Employees' access to bills, POs, and PQs is limited to the ones created by them. Their view access is expanded if they are added as the approver or mentioned by another user in the timeline.
Peakflo prefills a lot of the data automatically, and the employees can fill out any other essential data as needed. Employees can submit bills for company reimbursements right in Peakflo.
This guide is divided into below sections (recommended to go through it in this flow):
- How do approvals work?
- How to configure the types of approval emails notifications?
- How can employees manage "My approvals"?
- How to fill out custom fields?
- How to check/create vendors?
- What are budgets?
- How to create PRs?
- How to create POs?
- How to create bills?
- How to check credit notes?
- How to view receipt notes?
- What is AP Dashboard?
How do approvals work?
The approval workflow are created and customized according to the company's approval policies by the admins. Employees can be tagged as approvers in the approval policies. That's why it's important to understand how approval policies in Peakflo work.
Here's a sample of the approval policy where an employee is tagged as an approver by the policy creator or admin. This policy can be applied to the workflow for PR, PQ, PO, bills, and transactions.

Employees gets notified about the approvals for the approval workflows they are a part of.
To know more about creating approval policies, please refer to:
Configure the types of approval emails notifications
To avoid spam and facilitate clearer communications, you can set the types of emails that you'd like Peakflo to send.
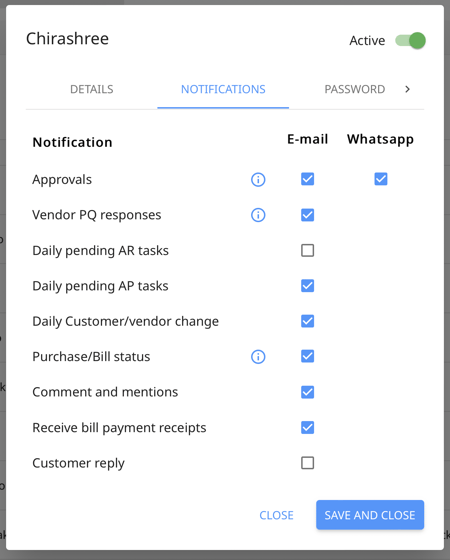
As usual, go to ⚙️ Settings and go to Users and click on your user name.
Click the Notifications tab in the user pop-up, and tick any of the boxes regarding which type of approval emails or WhatsApp notifications - or even other kinds of notifications - for the users to receive.
When a bill/PQ/PO/transaction is pending on someone’s queue, they get 2 types of notification:
- Immediately when the bill/PR/PQ/PO/transaction enters their queue
.png?width=450&height=525&name=pasted%20image%200%20(3).png)
- Start of the day as part of their daily briefing email
.png?width=450&height=545&name=pasted%20image%200%20(2).png)
How can employees manage "My Approvals"
This is the section where all bills/PRs/POs/transactions pending with the approvers are shown. When approval items come to the user’s queue, they can receive notifications by Whatsapp or email. Users can approve, decline, or change the status to draft.
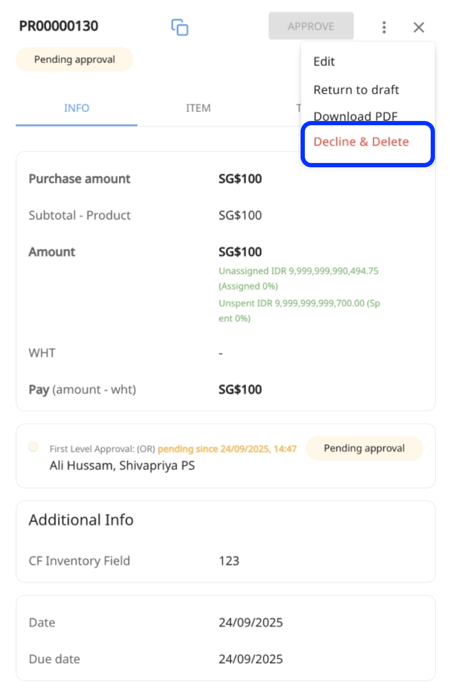
To approve, select the bills/PRs/POs/transactions and hit "Approve".

From the 3-dot option you can edit the details by clicking the "Edit" button, decline by clicking the "Decline" button, or send it back to the draft stage by clicking the "Return to Draft" button.
With these approvals, users can add comments and also mention other users to highlight changes or for audit purposes. Mentioning a user will enable view permissions of the bill/PO to that user.
.png?width=450&height=300&name=pasted%20image%200%20(16).png)
Important Note
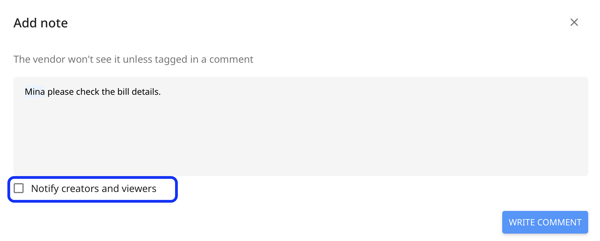
When adding "@mentions" in the comments, if you want to send the notification to bill creator and bill viewer along with the mentioned user then check the box "Notify creators and Viewers".
- Bill creator is the user who created the bill.
- Bill viewers are:
- All bill approvers are added as bill viewers
- Default viewers from vendors are added as bill viewers
- Anyone mentioned in the bill is added as a bill viewers
- Rules can add bill viewers
- If the user is a budget admin, then the user is a bill viewer
If you don't want bill viewers and creators to get notified and only want the person whom you have mentioned to get the comment, you need to untick the box "Notify creators and Viewers" before clicking on "Write Comment".
This page is mobile optimized so users can view attachments and approve bills/POs right from their fingertips.
-gif.gif?width=450&height=351&name=WHATS-NEW-DEC-22_access-all-approvals-from-the-tip-of-the-palm%20(1)-gif.gif)
Custom Fields
Custom fields can be used to add any details about the bill or the PQ, such as brand information or the requesting department.
We have various kinds of input types for the custom fields. The procurement team can see the custom fields mapped to bills, PRs, PQs, POs, and receipt notes in the table view.
.gif?width=600&height=233&name=WHAT-SEPT_custom-fields_BRAND%20(1).gif)
The fields are visible and editable in their edit forms too.

Learn more about custom fields here: What are custom fields and how to add them?
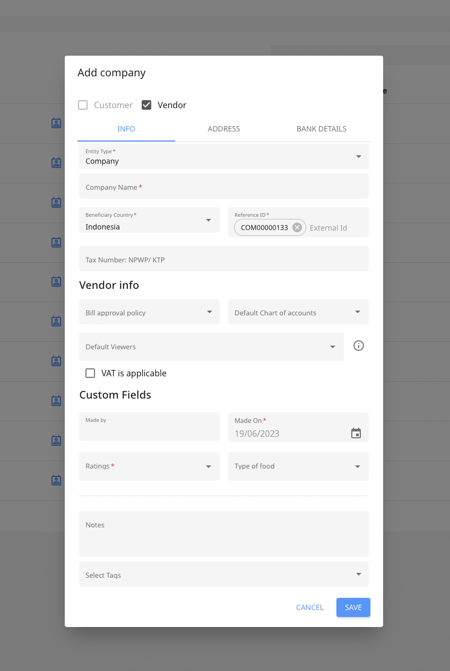
Vendor
Before raising any bills/POs, we need to create vendors.
The employees has access to view and crate all vendor details such as addresses, bank details, and contacts.
Vendor details have a 2-way sync between Peakflo and your accounting system. All vendors created in your accounting system will be present in your Peakflo account and vice versa. The synchronization happens every 5 mins.
The vendor timeline highlights all actions carried out, including the status of the corresponding bills. To access a certain vendor timeline, click on any vendor name.
.png?width=600&height=267&name=pasted%20image%200%20(4).png)
Recommended Reads:
Budgets
Employees are restricted to access budget creation, budget editing, or budget approval. They have access to view the budgets of which they're members.
Employees can select the budget category while creating PR/PQ/PO/Bill.

Purchase Requests
Employees has access to view and create PRs.
From the left sidebar, click on "Purchase Requests" under the "Payables" tab then click on "Add New" to create a new PR.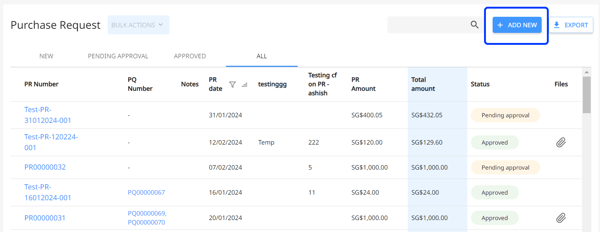
A new window will appear. Fill in all the details to create a PR.
Learn more about how to create PRs: How to create a purchase request and send it for approval?
After the PR is created, click on the newly created purchase request and click on the "Send for Approval" button to submit the PR for approval. 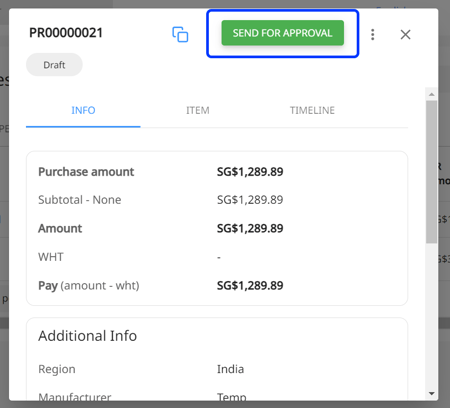
In the timeline you can see when the PR has been approved and when it matched with the PQ.

Purchase Order
Employees has access to view, create, and edit POs.
When the PQ is fully approved, the same document transforms into PO automatically. By clicking on the "Create PO" button from the PQ tab you can generate a purchase order.

Additionally, POs can be mass uploaded to Peakflo. Check out this article for more details: How to mass upload purchase orders?
If your Peakflo account is integrated with an accounting system, we sync all your POs created in Peakflo into your accounting system. Learn more about how the data flow works on the Integrations page.
Once a PO gets full approval, it will show up in the Purchase Orders section, under the Approved-open column.

When the PO amount matches with 1 or multiple bills, the PO goes to the Approved-closed state AKA completely billed.
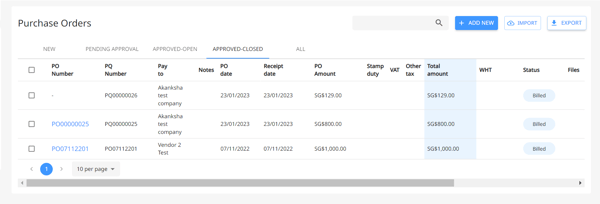
Peakflo also tracks any changes to PO and captures them in the timeline. Simply go to Purchase Orders and click on any PO you'd like to see. Bill maker/checker can view the entire history of the PO with the PO timeline.

Bills
Employees have access to all bills and modify all fields. They can view, create, edit, and delete bills while the it is in the Draft state.
You can also mass upload bills to Peakflo (in case you're not connected to accounting software).
To know more about mass upload or manual creation of bills (in case not connected to accounting software), please visit our help portal on how to create and upload bills.
Bills can also be automatically scanned using our OCR system. Vendors or Peakflo users can directly send the bill copy to our OCR mailbox. Peakflo automatically scans bill details with a high-level accuracy and saves them without any manual data entry. Sample mailbox details are mentioned below:
-gif.gif?width=600&height=284&name=users-can-access-the-email-to-send-bills%20(1)-gif.gif)
📘 Learn: How does OCR work?
If your Peakflo account is integrated with the accounting system, we will sync all the bills created in Peakflo to your accounting system. The synchronization happens in twice:
- When the bill is fully approved
- When a bill is paid and the corresponding transaction is fully approved
To create a bill from scratch, go to the "Bills" tab under the "Accounts Payable" section and click on "Add New".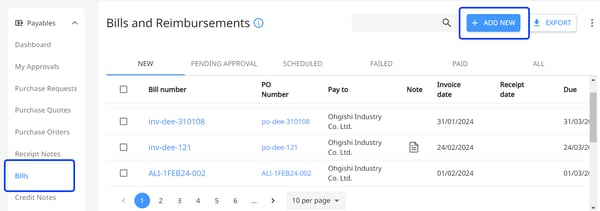
Add the information in the bill edit form and don't forget to match the bill with a PO by clicking on the "Match PO" button.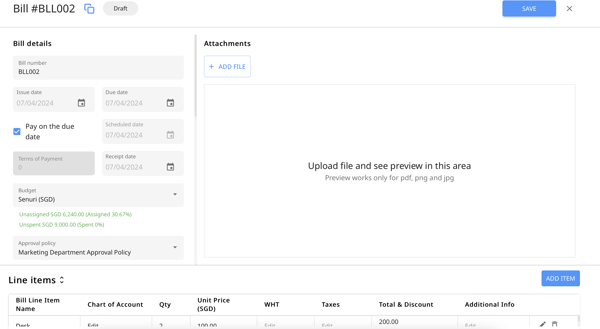
Bills can be matched to POs directly from the UI itself. This will automatically populate the PO line items and vendor details, avoiding any interim human error and skipping the time-consuming task of manual data entry.
📘 Read:
Employees can also add and edit bill line item details and tax details.
Recommended Reads:
Peakflo also captures bill history in its timeline. Go to the Bills section and click on the bill you'd like to see the details.

We can even automate payments if you've enabled Peakflo wallet. Once the bill receives full approval, it goes to the scheduled state. On the bill's due date, payment will automatically be paid with the Peakflo wallet.
We keep bill creator, updated with the details of the payment which can be found in the following email notifications:
- When a payment is successful:
.png?width=450&height=497&name=pasted%20image%200%20(8).png)
2. When a payment is failed:
.png?width=450&height=507&name=pasted%20image%200%20(9).png)
3. When the wallet is low on funds:
.png?width=450&height=499&name=pasted%20image%200%20(10).png)
So you don't have to worry about vendor payments, Peakflo's got your back! 💙
Employees can manually mark a bill as paid too. To manually mark a bill as paid, choose the bill you want to mark as paid. Click on the three dots on the top left of the bill and choose "Mark as paid".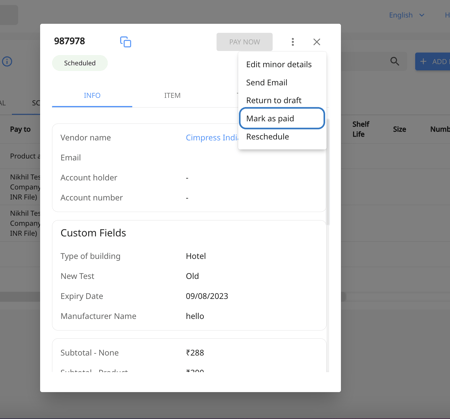
Learn more here: How to manually mark bills as paid in Peakflo?
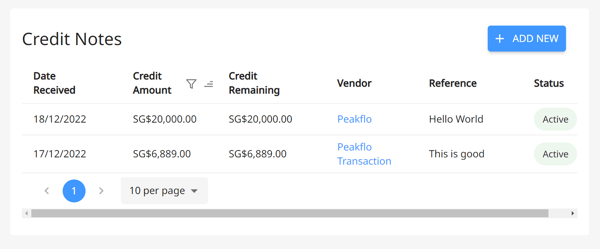
Credit Notes
Employees have access to view credit notes tagged to bills.

Receipt Notes
Employees have access to view all receipt notes in the table view and receipt note line item details along with the timeline by clicking on any receipt note.

Dashboard
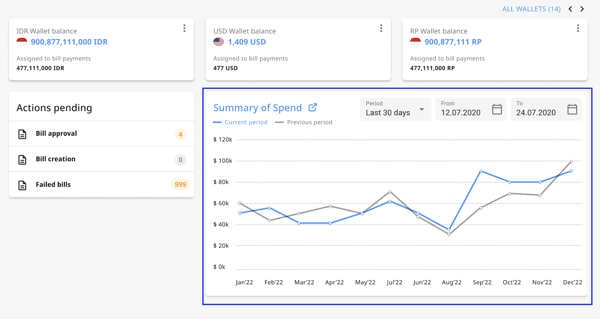
The dashboard shows the following 3 items:
- AP pending actions in the Peakflo account
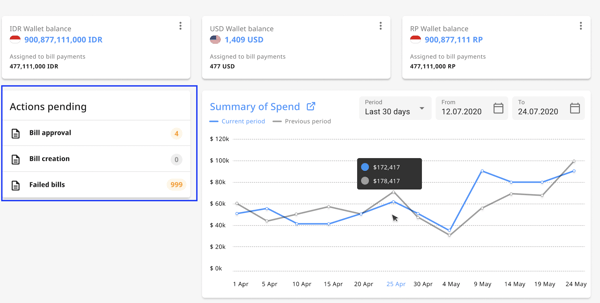
- List of AP Wallets with currency and current balance. Admins have access to top-up these wallets.
.png?width=600&height=203&name=pasted%20image%200%20(21).png)
- Summary of spend in the selected period, which also shows the trend of payables in the past.