1. Go to the "Bills" tab under the "Accounts Payable" section.
2. Click on "Add New" from the top right side.
3. Add the information in the bill edit form. 
- Bill Number: Input the bill number.
- Subsidiary Company: Select the subsidiary company associated with this bill from the dropdown menu.
- Issue date: Set the date when you issue the bill. This field will be automatically pre-filled by Peakflo, but you can also edit it.
- Due date: Set the date when the bill is due.
- Pay on the due date: Tick this box if you’d like to automatically pay the bill when it’s due.
- Scheduled date: Set the scheduled date for the bill to be paid.
- Terms of payment in matched PO: This section automatically populates based on the payment terms associated with the matched purchase order (PO). To learn more about Terms of Payment, please check out this article.
- Receipt date: Set the receipt date when the bill is filed. This field will be automatically pre-filled by Peakflo; only the admin can edit it.
- Budget: Set the budget that you’d like to assign to the bill. To learn more about budget management, please check out this article.
A list of open budgets assigned to you will be available, helping you choose the appropriate budget for your bill. Please note that employees do not have access to view budgets for which they are not members.
- Approval Policy: Set the type of approval policy that will be applied to this bill. This field will be automatically pre-filled by Peakflo based on the budget, but you can also edit it. To learn more about approval policies, please check out this article.
- Match PO: If there's a PO for your bill in Peakflo, the purchase order will automatically match the number or the name of the vendor to the bill.
- PO Requestor: This field will auto-populate with the individual who has requested the purchase order associated with the bill.
4. In the Vendor section, fill out the vendor information along with the vendor contact information. Check out the article "How to match the existing vendor or add a new vendor to the bill?" to learn more.
When you select a vendor, Peakflo will automatically pre-fill the relevant custom field in the bill form using the custom field value from the selected vendor’s profile.
You can define any required custom fields for the bills. To do so, please check out this link.
5. For adding line items, click on the "Line Items" expand view.

Note: The line item expand view will display a loading status until all the bill line items have been successfully loaded.

- Line items: Add an item or select one from the item catalog in the dropdown. In case you want to add a new line item, fill in the fields such as unit cost and description in the pop-up. Apply taxes and discounts, if any.
When creating or editing a bill line item tax, you have the option to apply the tax from one line item to all line items by selecting the checkbox labeled "Apply to all line items." This action will override any existing taxes on other line items.

Similarly, bill line item WHT can be applied to all line items.

6. Here's a breakdown for the Money section.
- Bill amount: The amount of the bill. This field will automatically be pre-filled based on the line items you've added.
- Currency: Select the currency of the bill. This field will automatically be pre-filled based on the line items you've added.
- Payment Method: Select which payment method you’d like to use for the bill.
- Subtotal: This field will automatically be pre-filled by Peakflo based on the bill amount.
- Discount: This field will automatically be pre-filled by Peakflo based on the discount amount.
- Tax WHT: Input the amount of withholding tax.
- Amount to pay: Check the box if you’d like to pay the full amount, or uncheck to input a specific amount in the box beside it.
- Note: Add any notes that you’d like to leave.
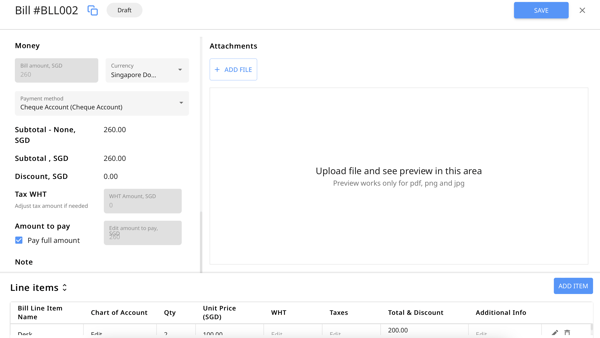
7. Click on the Add File button under "Attachments" if you’d like to include an attachment. If you hover over the article, you will be able to see the file type and file name.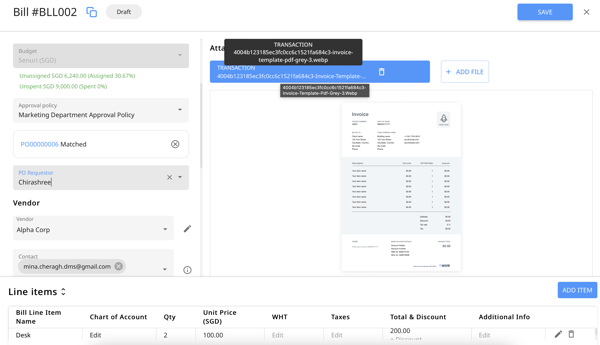
Please be aware that the file attachment size should not exceed 10 MB.
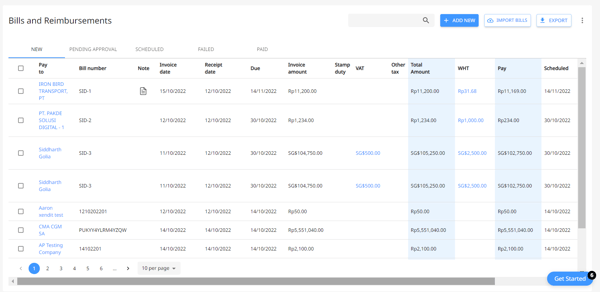
8. Once done, hit Save. The Bill will then appear under the “New” column in the Bills and Reimbursements tab.
FAQ
How to edit a bill?
In the Bills view, locate the bill you want to update and hover your cursor over it. A pencil icon, which represents the edit function, will appear. Click this icon to open the bill editing window, where you can review and modify the bill details as needed before saving your changes.
Can the due date be set before the issue date?
No, Peakflo prevents users from setting a due date earlier than the issue date. When creating or editing bills, the system will disable all dates before the issue/date you select. This ensures clarity for both the person submitting the document and the person approving it, avoiding any confusion.
Can I view dates in a different format?
Yes, you can view dates in the MM/DD/YYYY format (commonly used in the US and other regions). This makes it easier for you to work with dates in the format you’re most comfortable with. To configure date settings, contact support@peakflo.co
Recommended Reads: