How to set up approval policies for Accounts Payable?
Approval policies help companies streamline the approval processes for PRs, PQs, POs, bills, RNs, vendors, and transactions. Follow the steps to set up a payment approval process for your team.
Before setting up an Approval policy, ensure that you've added the relevant team members who will be a part of the workflow. Watch this video to learn how to add team members to your account.
Recommended Read: How to invite users and assign roles in Accounts Payable?
After you've added the team members, follow the below steps.
1. In your dashboard, click 'Settings' from the left navigation menu and go to 'Approval policies'. 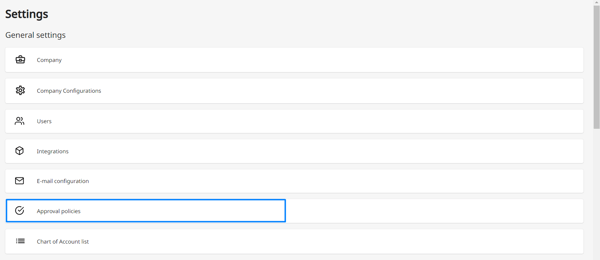
2. Click on the Add New button.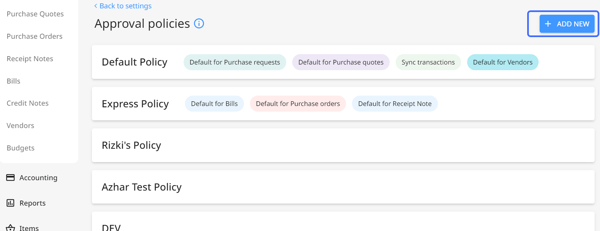
3. The approval policy box will appear. Add the name of the policy and simply tick any of the boxes to configure whether you want to apply the policy for Purchase Requests, Purchase Quotes, Purchase Orders, bills, transactions, receipt notes, vendors, or all of them!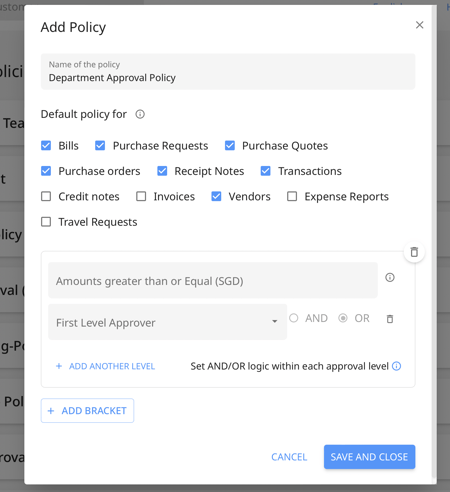
4. Then, you can set the amounts, assign multi-level approvers in your organization, or add more brackets to extend your policy.
What are approval levels?
Approval levels are where you can add multiple layers of approval for the bill payment. For example, you can add team member 'A' as the first-level approver. Once approved by team member 'A', it will pass on to the second level approver, team member 'B'. This helps refine the review process of all the bills before pushing them for payments. To cater to the most complex requirements. Peakflo can support up to 10-level approvals
What are approval brackets?
Approval brackets allow you to add more approval layers when more money is involved. For example. You can set an approval bracket of value between $0- $100 for auto-approval, $100-$1000 to a manager, and anything above $1000 to the director. This helps in bringing in the right stakeholders to review and approve high-value bills.
If a bill is created in a currency different from the base currency used in the approval bracket, Peakflo will first convert the bill amount into the base currency using the applicable FX rate. After conversion, Peakflo will determine which approval bracket the bill falls into and route it to the appropriate approver. This ensures consistent and accurate approval routing, regardless of the bill’s original currency.
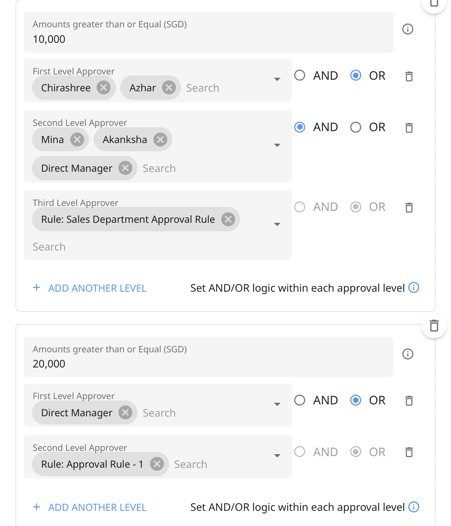
In the approval levels, you can add users, the Direct Managers, and also add approval rules.
If you want to accommodate approvals for different departments and business units, take advantage of rules for easier management.
By adding multiple rules to an approval level, the approval policy will automatically branch off to route to the right approval rules.
You can add multiple levels of approvals and multiple approvers in each level too.
You can set AND/OR logic within each approval level:
- AND: All approvers within the level must give their approval. This means that for a request to proceed to the next level of approval, every approver assigned to that specific level must provide their approval.
- OR: Any one of the approvers within the level can approve the request. This means that as soon as one approver gives their approval, the request can move forward to the next level without waiting for all approvers to respond.
5. Once you've filled in all the details and added the team members in different approval levels, click Save and Close to set your approval process live.
Configure the types of approval emails users will receive
To avoid spam and facilitate clearer communications, you can set the types of emails that you'd like Peakflo to send to the internal teams.
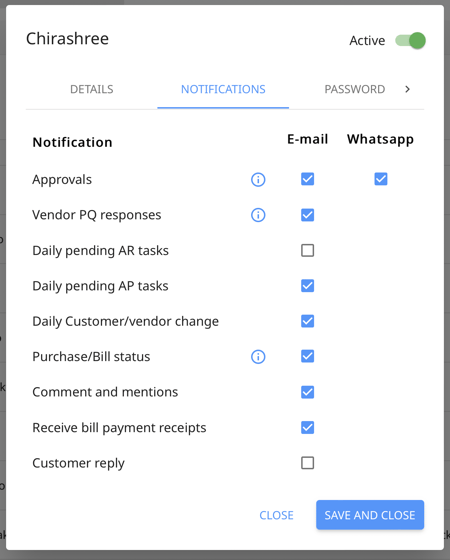
As usual, go to ⚙️ Settings and go to Users. Click on the user whose notification settings you'd like to edit.
Click the Notifications page in the user pop-up, and tick any of the boxes regarding which type of approval emails or WhatsApp notifications - or even other kinds of notifications - for the users to receive.
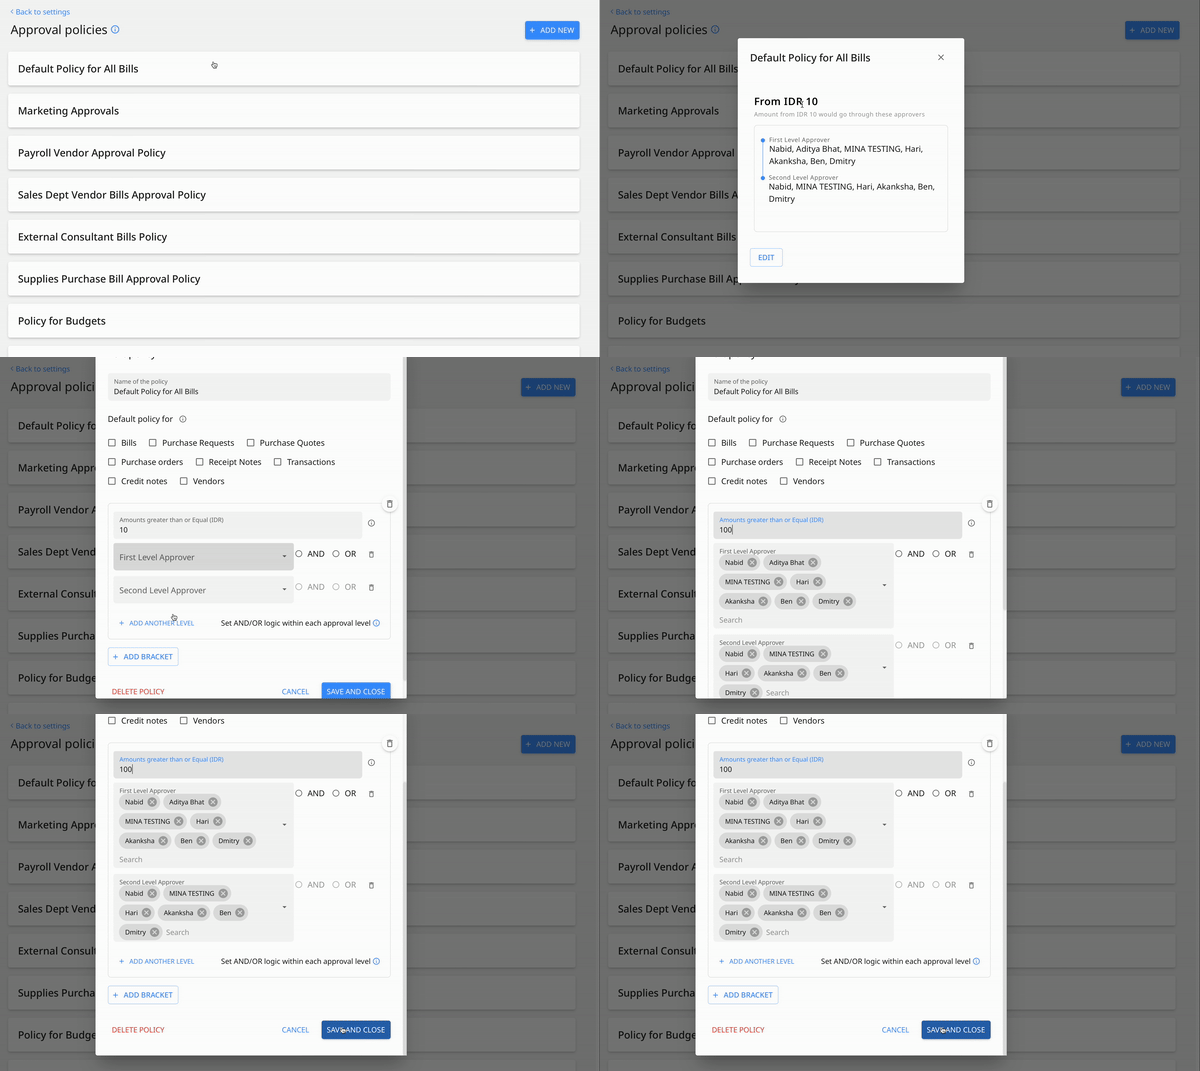
How to Edit Approval Policies?
To edit approval policies, click on the approval policy, then click on the “Edit” button add the changes then click on “Save”.
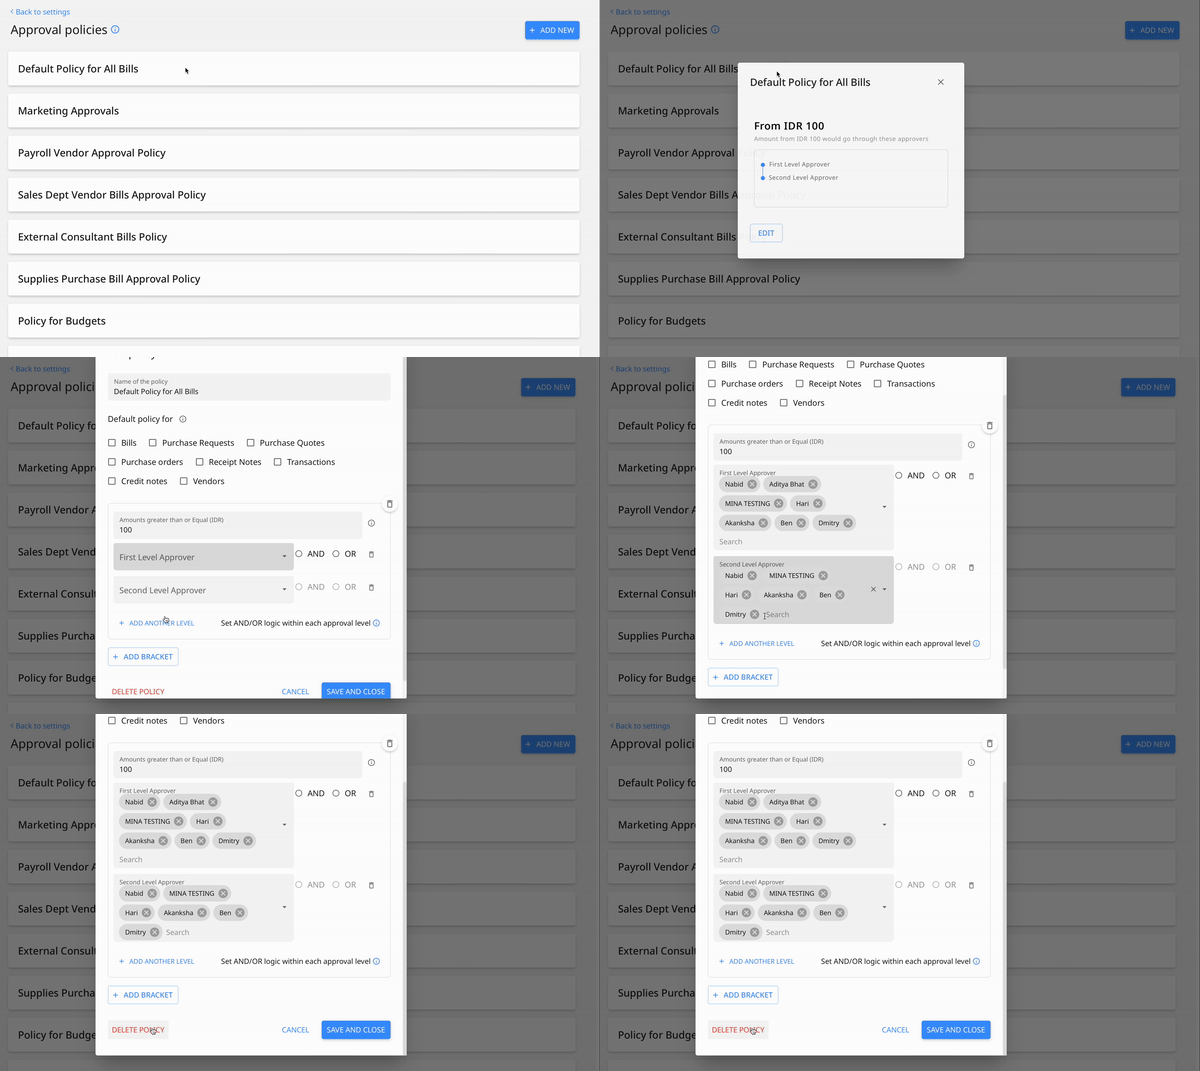
How to Delete Approval Policy?
To delete an approval policy, click on the approval policy, click on edit, and from the bottom of the approval window click on “Delete Policy”.
Recommended Read: How to add and edit rules to approvals?
FAQ
What if I approve a bill that is in a different currency from the currency in the assigned approval policy?
Not a problem! You'll still be able to approve the bill regardless of the currency difference. Peakflo will automatically convert the currency for you and check if it goes within the budget. If there's an error with processing approvals, it might mean the budget limit might be exceeded.