How to mass upload bills?
Get more things done by mass-uploading bills!
Table of Contents
Mass Upload Bills
Once you've downloaded the template, start filling all the columns with the bill details that you want to be uploaded.

Here are some important things to keep in mind when entering the details into the template.
- Vendor Type - Choose only between individual and company.
- Bank Country and SWIFT codes - Must be in alpha-2 code. You can find country codes along with the SWIFT codes in the alpha-2 code here.
- SourceCurrency & TargetCurrency - Must be in 3 letters. You can find country currency codes here.
Note:
- When bills are uploaded, if the vendor referenced in the bill already has a default Purpose of Transfer assigned, this default will automatically be applied to the bill.
- When bills are uploaded, if the beneficiary account currency, base tenant currency, wallet currency, and bill currency are matched, the system will automatically designate the Payment Channel as “LOCAL”.
Once your mass upload bill sheet is ready, go to "Settings" and under the "Import" section, click on "Mass upload bills"
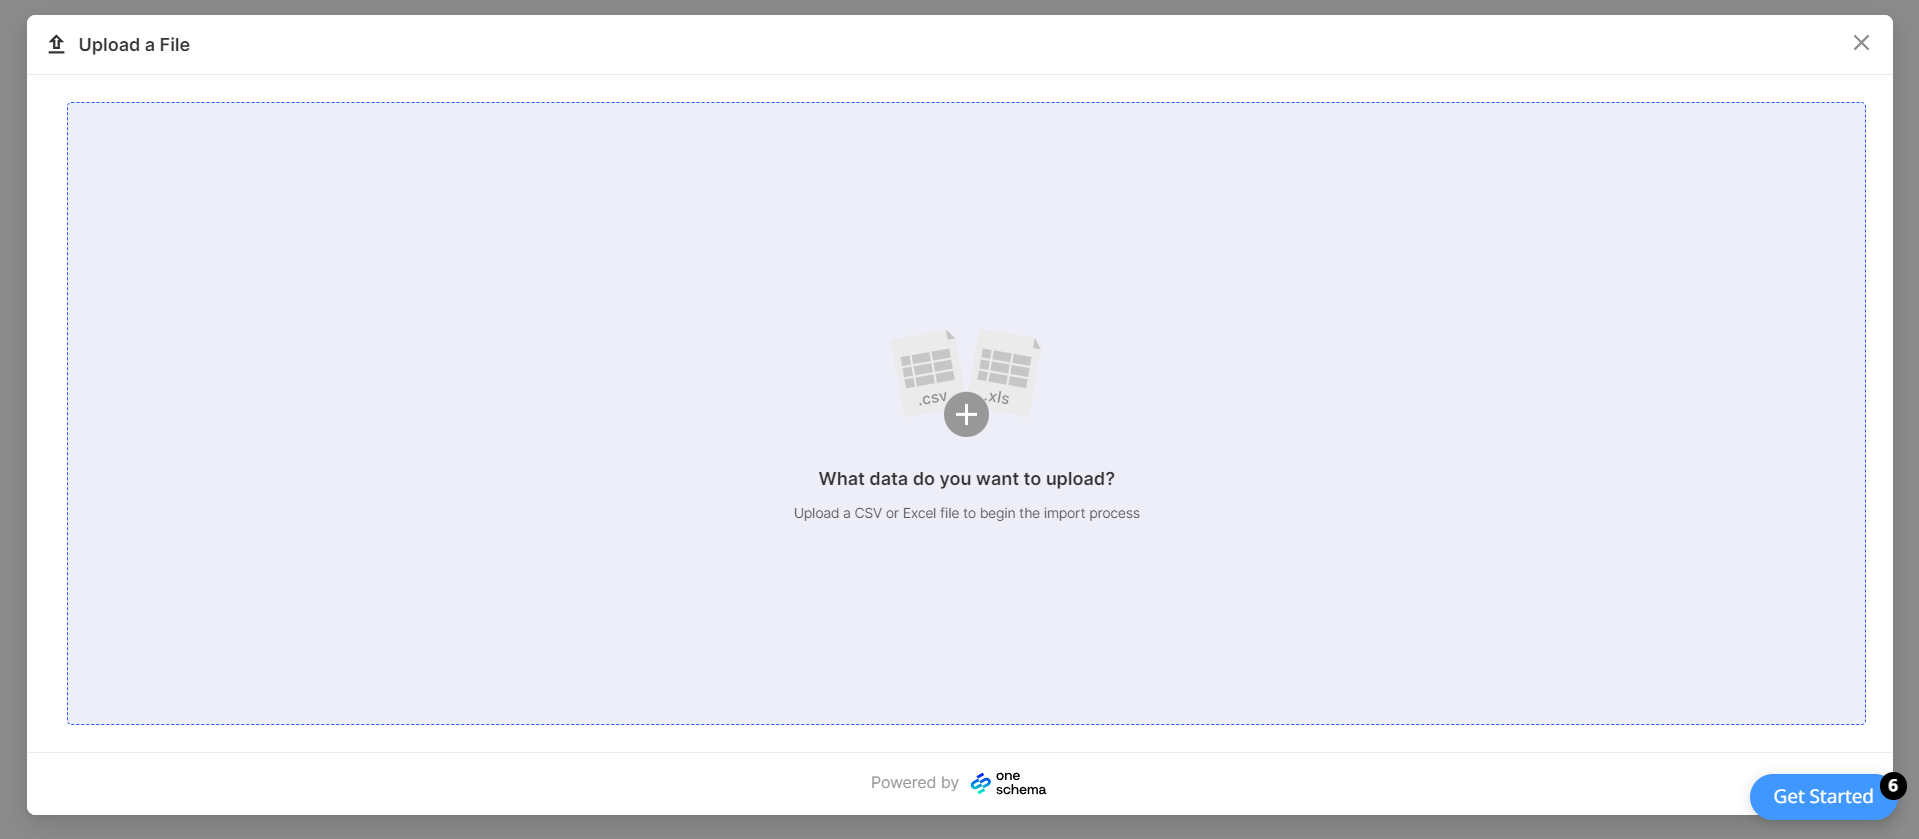
Now you will be redirected to the 'Upload a file' page. Here drag and drop the Excel file that contains all the bill details to be uploaded.

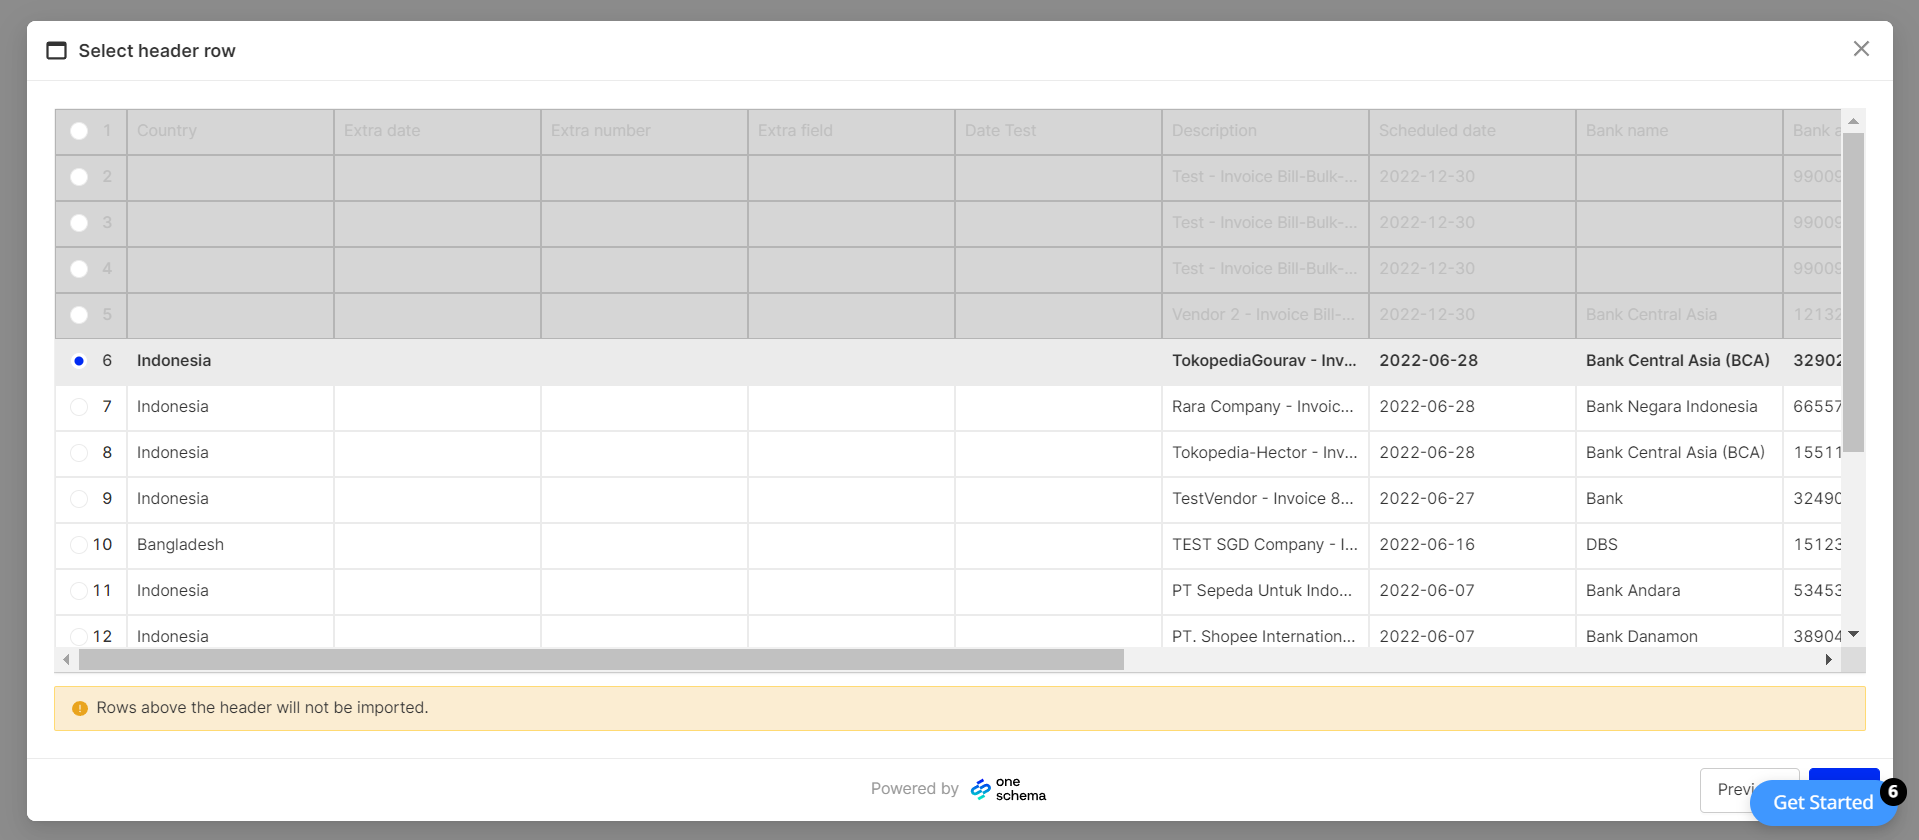
In the next section, select the header row of your sheet to ensure the data is accurately represented and click 'next'.

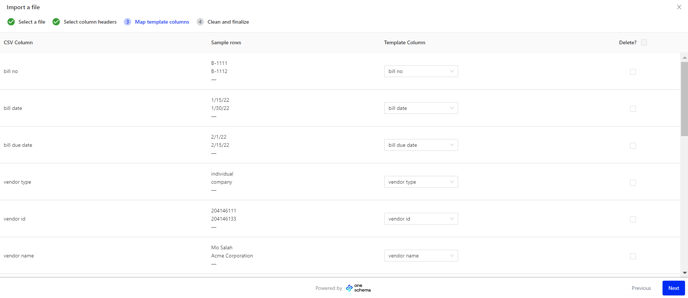
In the Map template columns section, ensure the CSV column and template column are the same. If not, you can change it by selecting from the dropdown list. You can also delete particular columns by selecting the checkbox under delete. Once you've verified all the templates, click 'next' to proceed to the last section.

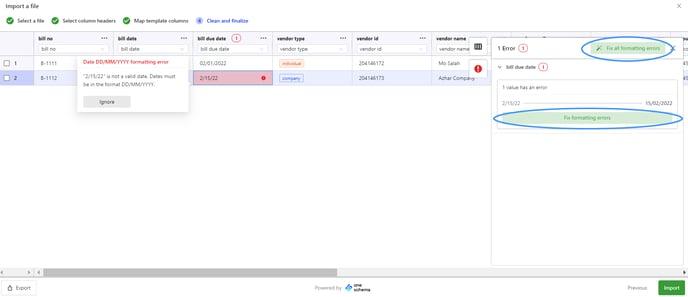
'Clean and Finalize' is the last section where you'll have to check all the details before reviewing. If any formatting errors are shown, click 'Fix all formatting errors' or 'Fix formatting errors' to clear any errors found.

Once there are no errors, click 'Import'.
.png?width=688&name=Mass%20Upload%20Bills_Clean%20and%20Finalize(2).png)
After clicking 'Import', you will see notifications on your screen that the bills were successfully imported.
If you go back to the 'Bills' section, you will find the recently imported bills.
Mass Upload Bill Line Items
Once you've downloaded the template, start filling all the columns with the bill and bill line item details that you want to be uploaded.

If your Excel file includes multiple rows with the same Bill Number and Bill Issue Date, the system will consolidate this information into a single bill, which will encompass multiple line items associated with that Bill Number.
Once your mass upload bill sheet is ready, go to "Settings" and under the "Import" section, click on "Mass upload bills". Click on "Upload Bills".
Now you will pop-up page. Here drag and drop the Excel file that contains all the the bill and bill line item details to be uploaded.

In the next section, select the header row of your sheet to ensure the data is accurately represented and click 'Next'.

Map the Columns in your file with the Template Fields. Once done, click on "Next".

Then verify your data. The system-identified anomalies will be highlighted in red.

Recheck and edit the data, then click "Submit". Peakflo will process and upload the payment details in a few minutes.

If the upload was successful, the status will show as Completed. Else, it will show Failed.

If an upload fails, please click on the upload to review the reason for the failure. After addressing the identified issue, you can follow the same steps to re-upload the file.
