So you're an Account Manager? Congrats! In this tutorial, we'll show how to navigate the Peakflo platform. Let's walk through the following sections:
Customers
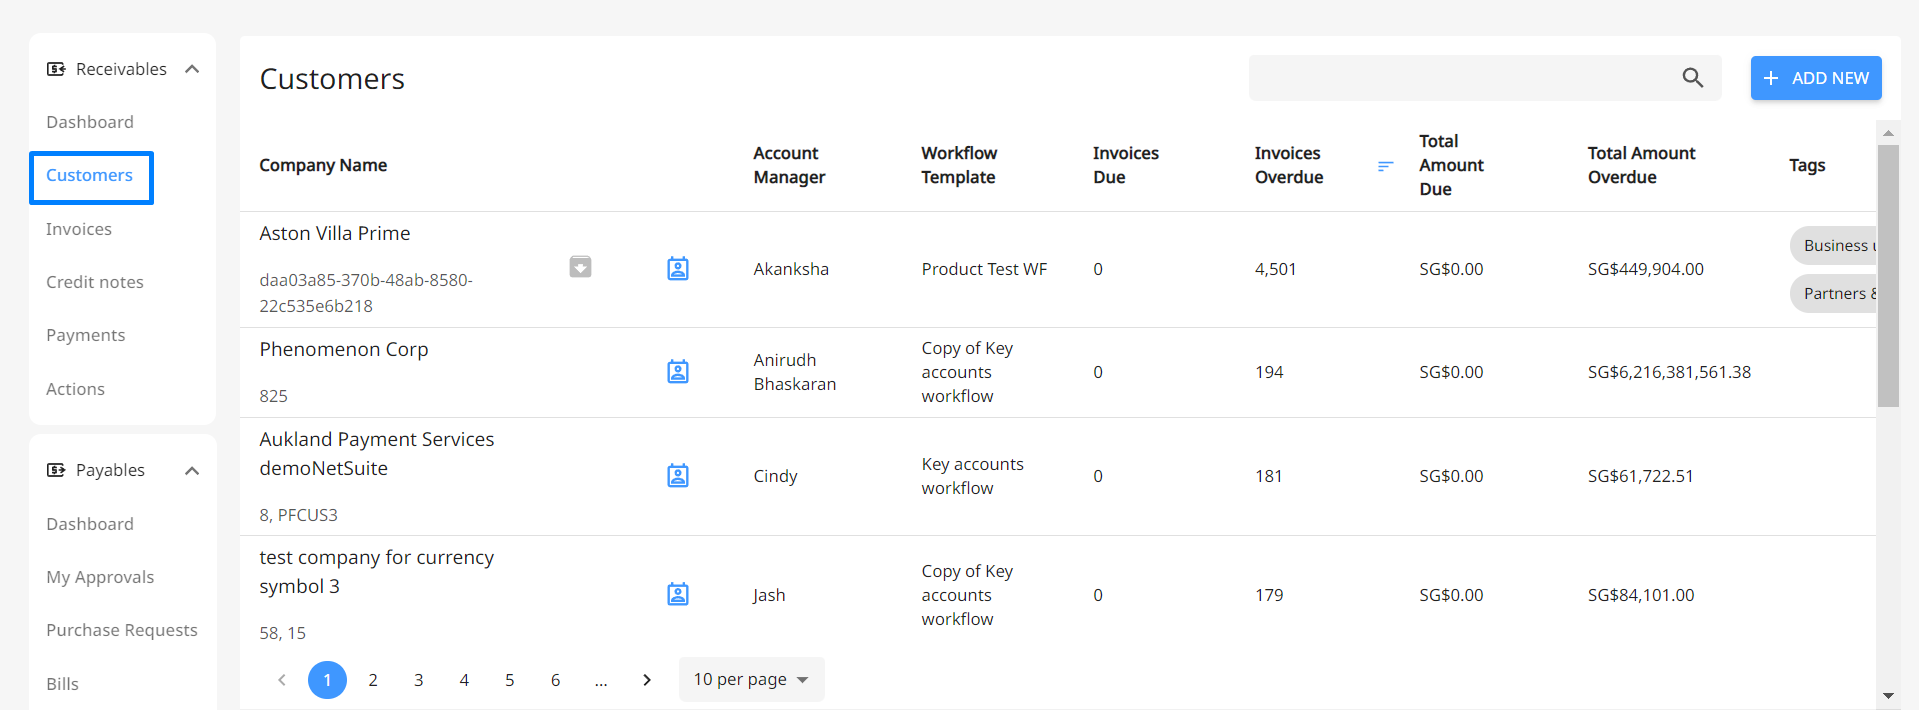
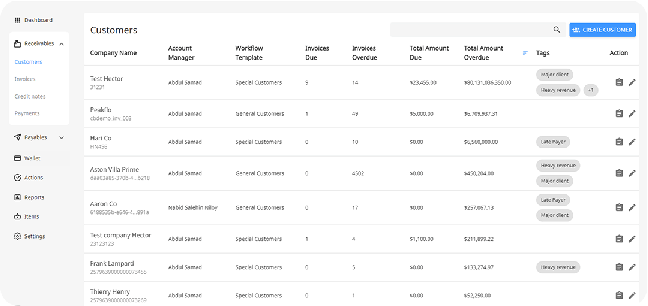
Under Accounts Receivable, you'll find the Customers section.
Customer details have a 2-way sync between Peakflo and your accounting system. All customers created in your accounting system will be present in your Peakflo account and vice versa. The synchronization happens every 5 mins.
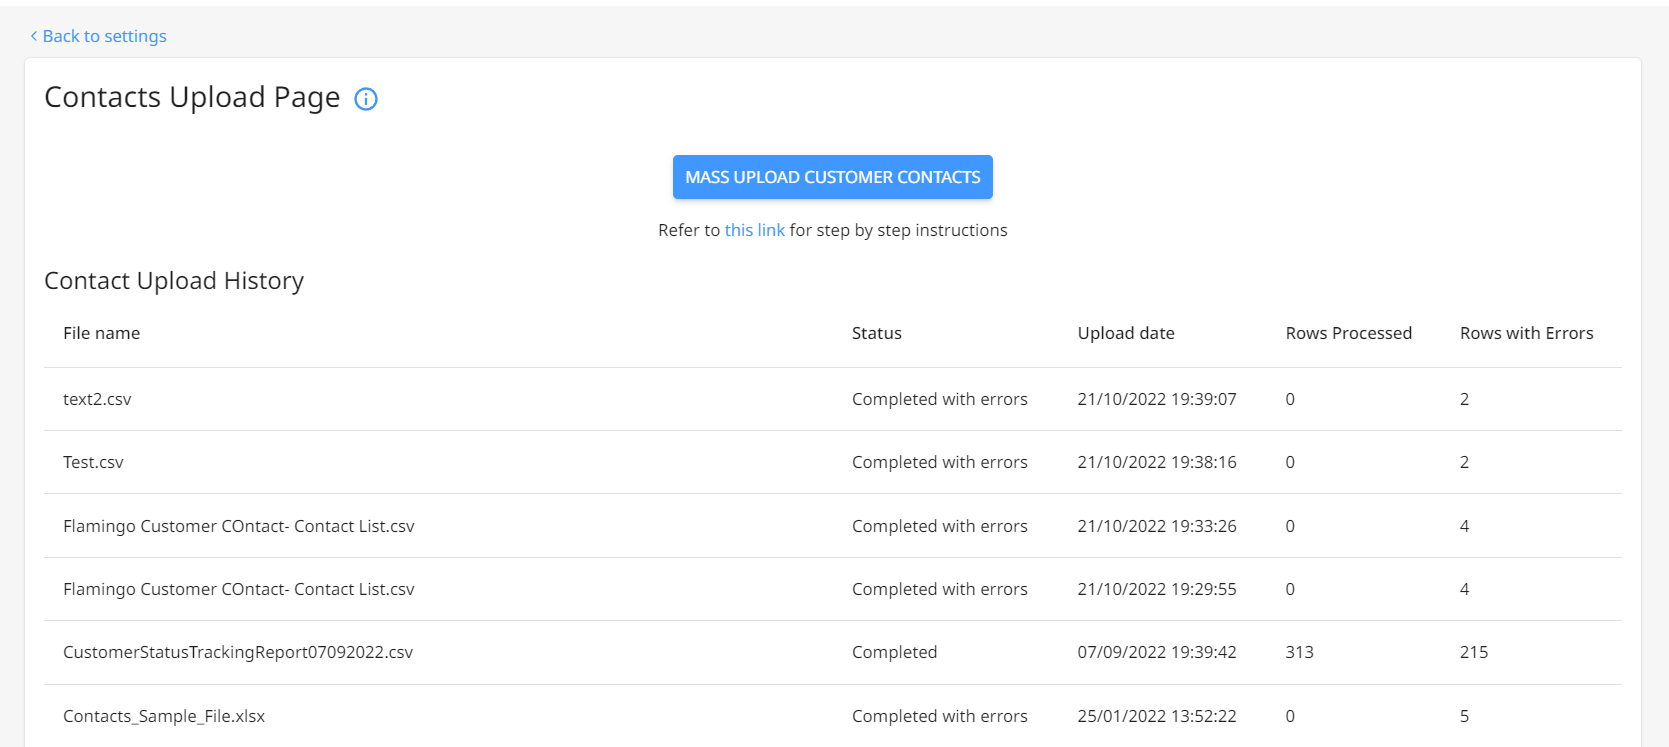
Customers can also be mass uploaded into Peakflo. Read how to bulk upload customer contacts.
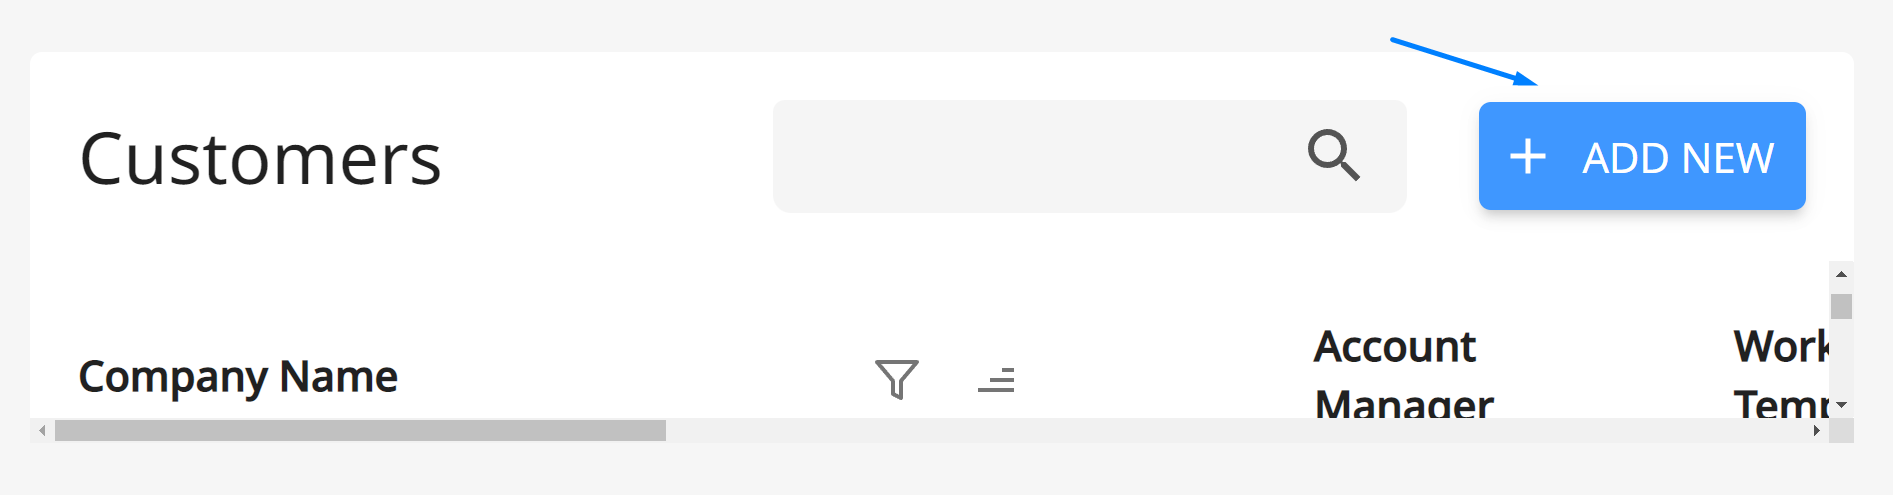
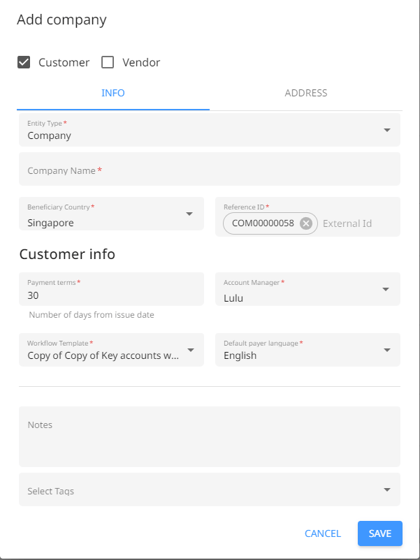
Customers can also be entered one by one from the Peakflo UI by clicking on the Add New button at the top right of the screen.
Read more to know how to assign an account manager to customers.
Why can't I see any customers in the Customer tab?
If you can't see a list of customers, it means that no customers have been assigned to you and you don't have the right access or role. If you want to see all the customers, please contact your admin and change your role to AR Admin or Collections.
Invoices
By creating invoices in Peakflo, you can send payment reminders to customers and get paid faster. Peakflo allows you to input invoices in 3 ways-
- Can manually create an invoice with professional branding (if the accounting system is not integrated)

- Can mass upload invoices by using excel docs in 1 go!
- Can directly sync from your accounting system. If integrated with Peakflo, no need to concern yourself with uploading invoices. Automatic 2-way sync to Peakflo from your accounting software will happen within minutes! Read more about this on our Integrations page.
Workflows
With Peakflo’s smart workflows, you can set up automated reminders for WhatsApp, email, SMS, or any other messaging channels.
How to create a new workflow?
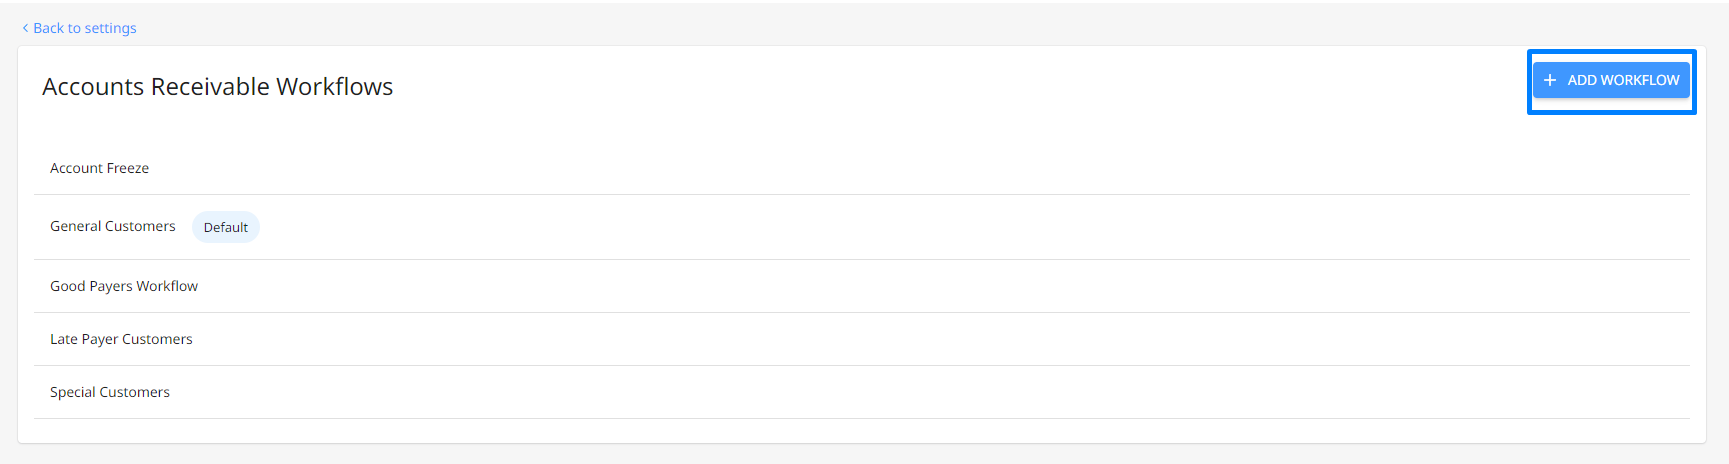
By default, Peakflo has assigned a workflow to all of your customers. Check this out:
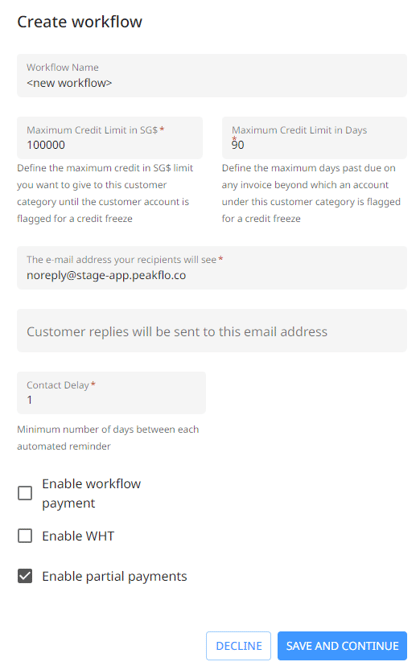
But let's say you want to create more workflows with your own customizations. Here are the steps to do that:
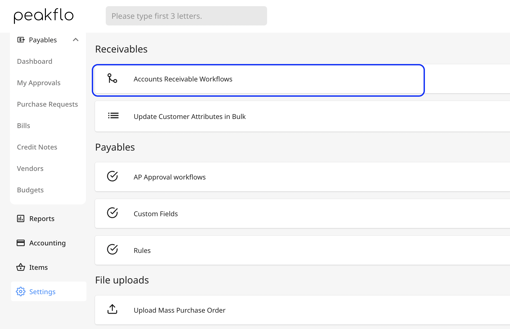
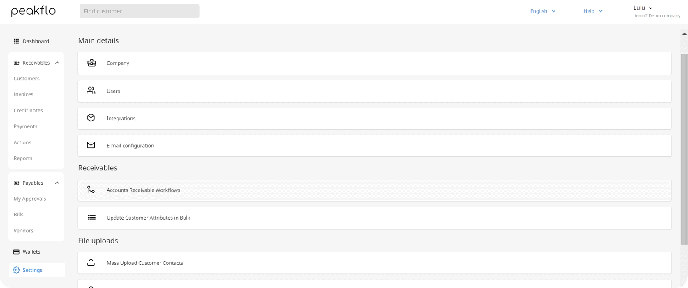
Go to ⚙️ Settings then head to Accounts Receivable Workflow.
At the top right of the dashboard, you’ll see the blue Add Workflow button. Click on it.
A new window will pop up. Here, you'll need to configure the workflow.
`
📖Read our guide for more information on how to create and edit a workflow.
-
How do I pause or resume workflows for multiple customers at the same time?
-
How to subscribe to LINE Messenger App payment reminders? (available in THAI only, contact us at ops@peakflo.co to enable this in your region)
-
How to setup Whatsapp for business on Peakflo? (available in MALAY, INDONESIA, PHILIPPINES, and SINGAPORE, contact us at ops@peakflo.co to enable this in your region)
Actions
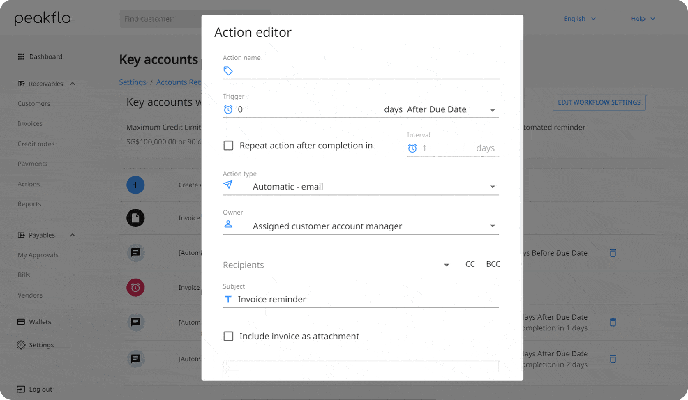
Adding more actions to the workflow will enable you to trigger personalized, multi-channel reminders to your customers using an escalation matrix.
In the workflow section, click on the Create action button.
Customize the action editor as per your needs. Most importantly, choose the type of action between you and your customer. Peakflo supports twelve types of actions, both manual and automatic, from Email and WhatsApp to some manual actions.
For more info on manual actions such as customer call or office visit, check out the video below.
Keep track of actions
As an account manager, handling a lot of accounts might be a daunting task.
Thankfully, Peakflo's got your back.
For your day-to-day operations, you can always keep track of the actions and tasks you need to do.
Go to Actions
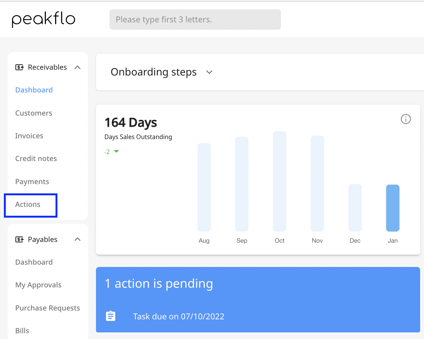
Here you'll see an overview of pending and future tasks that you need to do. You can also filter the Owner name to focus on your actions.
Click on the task, and you'll see more specifications about the action. The timeline of the customer will also open up so you can track the progress of communications in one go.

Dashboards: Get a bird's eye view
The dashboard allows you to see the overall health of all accounts. Learn about the metrics here.

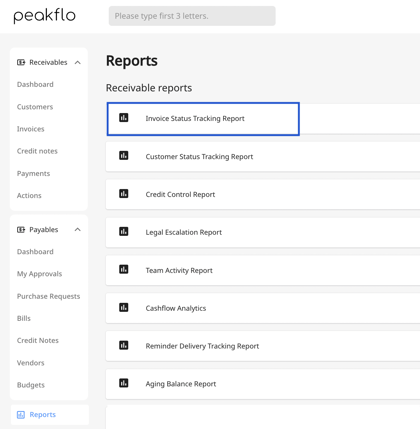
So, you don't necessarily want to see everyone's accounts, right? In Peakflo, you can filter out just the details you care about. To find out what's happening with the invoices, go to Reports and select the Invoice Status Tracking Report.
If you want to access the full timeline of all communications you've had with a certain company, click on the company name. Through the audit trail, you can track all the invoices issued, their statuses, changes to the details, and even view attachments.
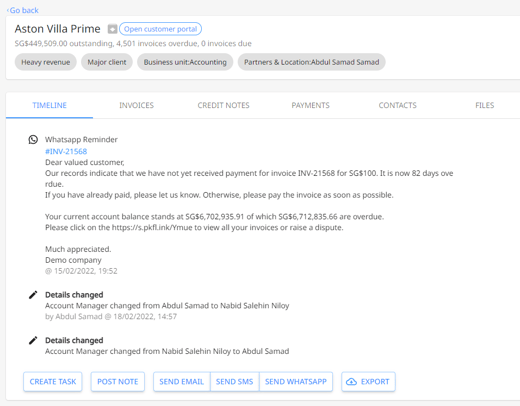
Here, you can also:
- Create tasks in case you want to save certain actions such as following up with a customer on the promise-to-pay date or the next step to be taken for the customer.
- Post a note in case you want to align internally on certain matters or keep track of any updates outside of the timeline.
- Send ad-hoc messages to customers in case you want to communicate with customers with a customizable text message or a pre-made template.
It functions like a centralized workspace to coordinate with your internal team and customers! How cool is that?
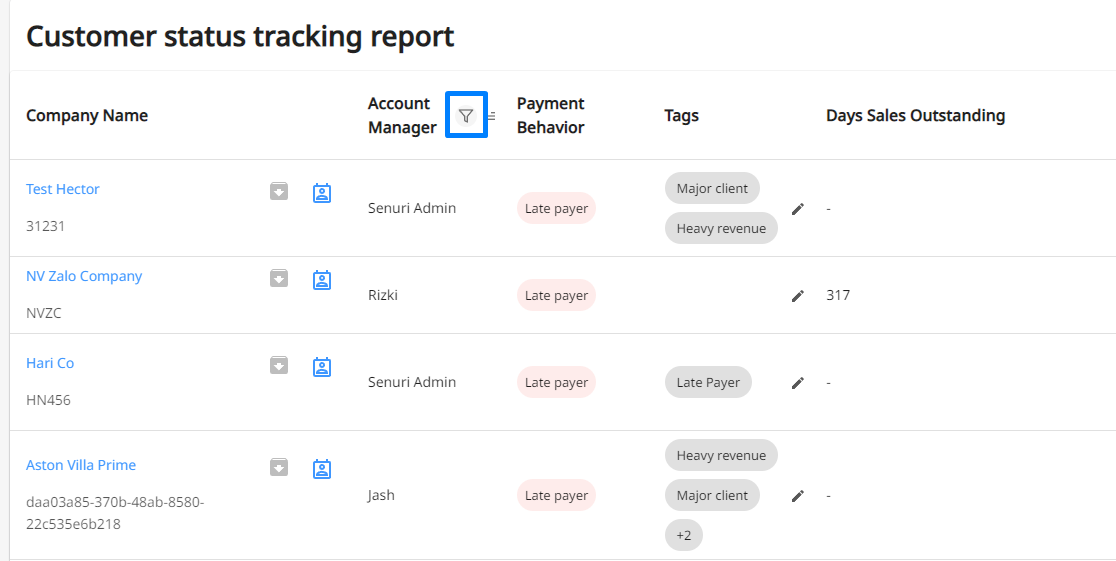
Customer Status Tracking Report
This report is another gem. It gives you a foolproof way to see what's happening with customers, highlighting who's paid early or late in plain language.
![]()
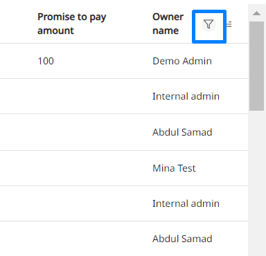
Likewise, you can click on the filter icon next to the account manager column if you want to focus on the status of your accounts.
In fact, almost every column is filterable! You can filter company name, payment behavior, customer-to-pay date, and such.
Here, you can also:
- Add tags to categorize customers for an optimal payment tracking process. Click on the pencil icon to edit.
- Add promise to pay amount and date.
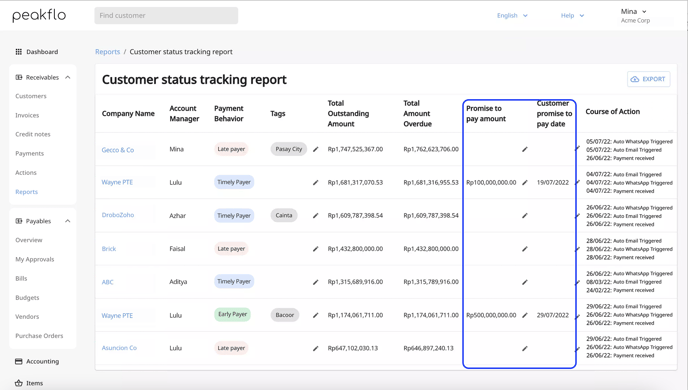
- Keep track of the course of action and the last input you've taken.
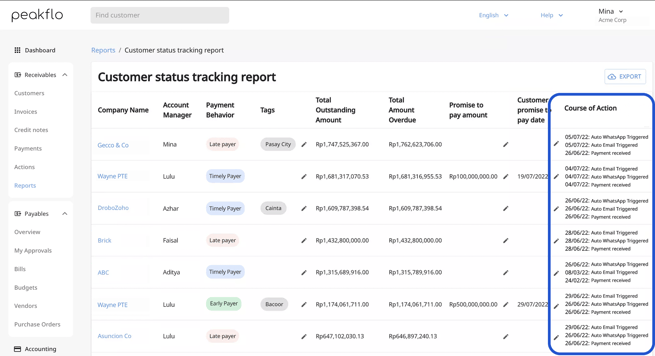
If you click on the Course of Action, you'll be directed to the customer timeline where you can see the history of communications and send a follow-up message. - Create a task for you. If you scroll until the end, you'll see the Action column and create a task by clicking on the icon. Assign an owner, add the promise to pay the amount and date, and any details as necessary.
.png?width=688&height=394&name=AR%20DEMO_Customer%20status%20tracking%20-%20Create%20task%20(2).png)
Customer Portal
The customer portal is the one-stop-shop for customers to:
-
Raise any dispute
-
View your credit notes
-
View outstanding balances and their aging

Every now and then, some miscommunications or mistakes will happen. In Peakflo, both customers and account managers can raise disputes. During the setup, you'll need to submit dispute reasons in advance.
Common dispute reasons include:
- Delivery not made
- Double charged
- Incorrect amount charged
- Product was damaged or lost
This section will cover:
- How you can raise a dispute
- How customers raise a dispute
- How to resolve costumers dispute
- How to modify dispute reasons
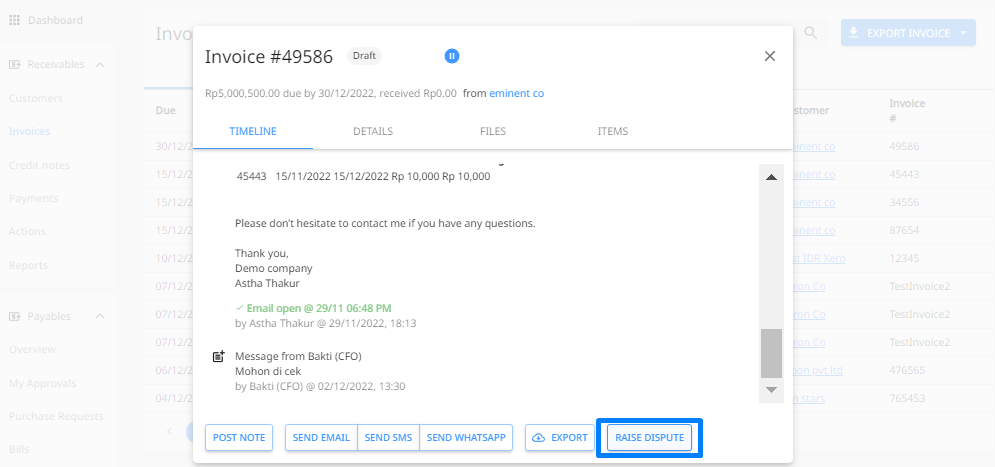
Step 1: Go to the disputed invoice
Step 2: Click 'Raise Dispute'
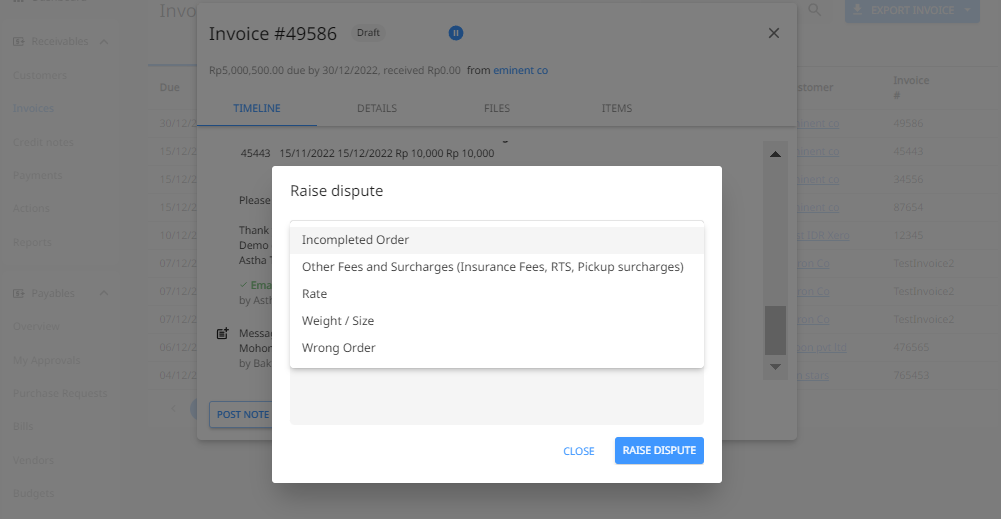
Step 3: Select the reason from the dropdown menu and click 'Raise Dispute'
During the setup phase, you will also need to decide on common dispute reasons for us to pre-load in your payer's portal.
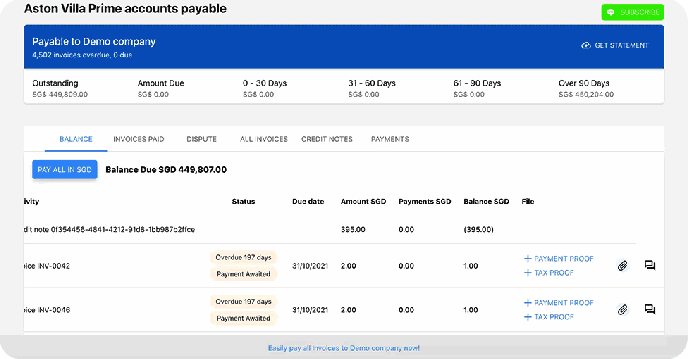
To raise a dispute, customers can go to the Payer's Portal and click the message icon.
Then select their dispute.
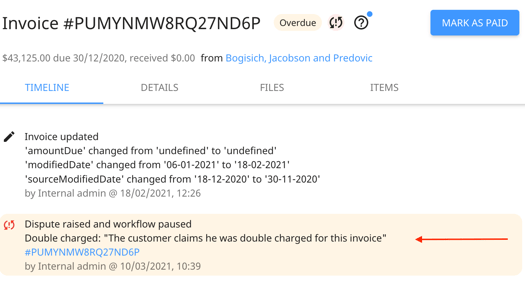
The workflow will pause and you, the account manager, will see a yellow alert that looks like this.
When a dispute is resolved, click 'resolve dispute'
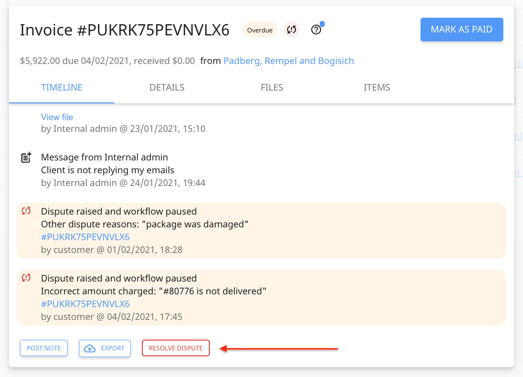
In the customer folder, you'll be able to see the invoice in question and problem-solve the dispute. Here you can:
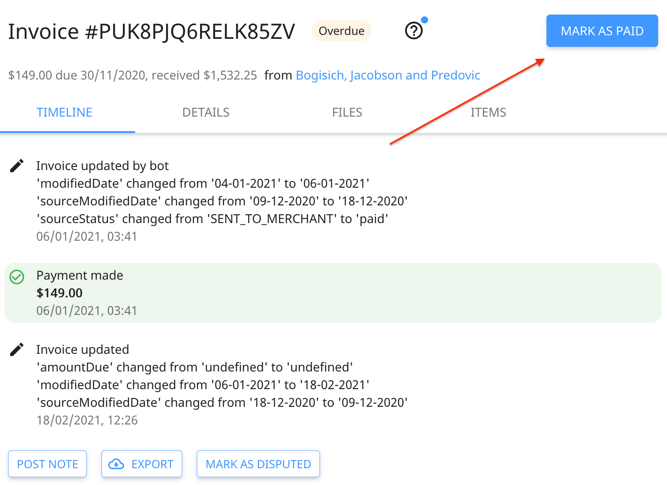
- Mark an invoice as paid
- Edit the invoice or attach an item in the details tab o (Note: If you're integrated into an external system, we cannot change invoice details.)
- Upload files in the files tab and attach screenshots of conversations managed in WhatsApp or other channels before marking the dispute resolved

- Track line items
How can you add more dispute reasons?
For now, if you want to modify dispute reasons, email us at support@peakflo.co
Payments
Payments are either added automatically or manually in Peakflo:
- Automatically, if the payment is made by the customer through the customer portal. Payment entry will automatically be added to the Payments tab.
- Manually, if the payment is made by the customer outside of Peakflo. Learn more how to add payments in Peakflo.
You can also export payments and import the file. You don't even have to reformat the sheet as we've formatted it so you can import the file straight to your accounting software!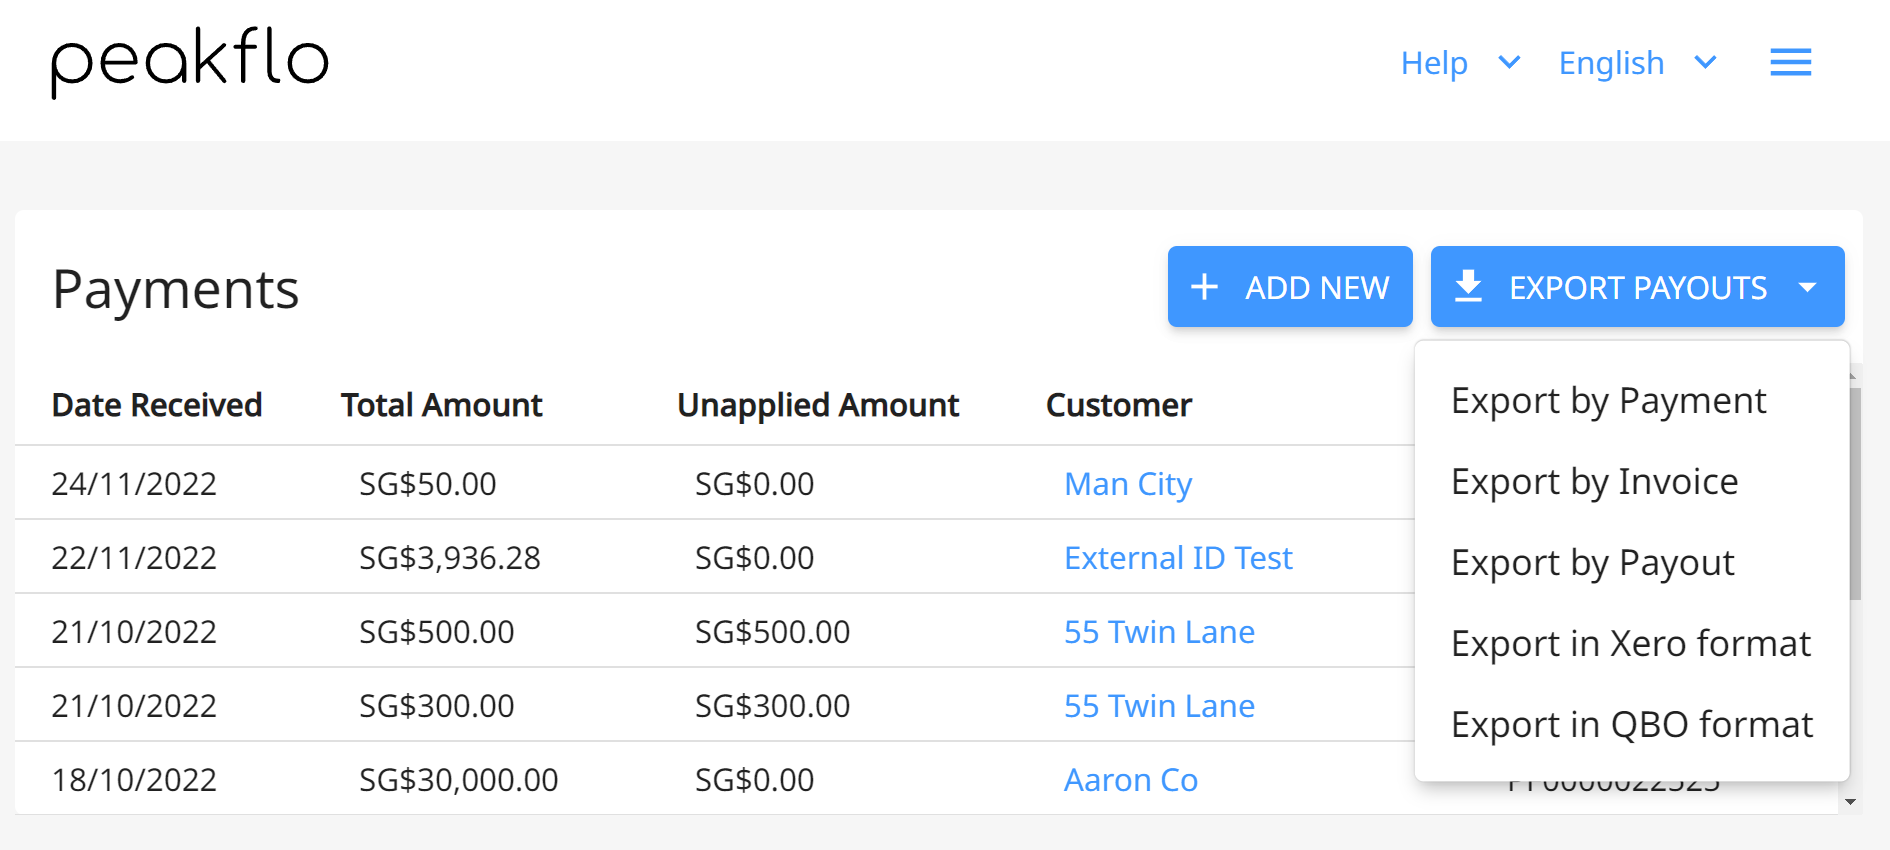
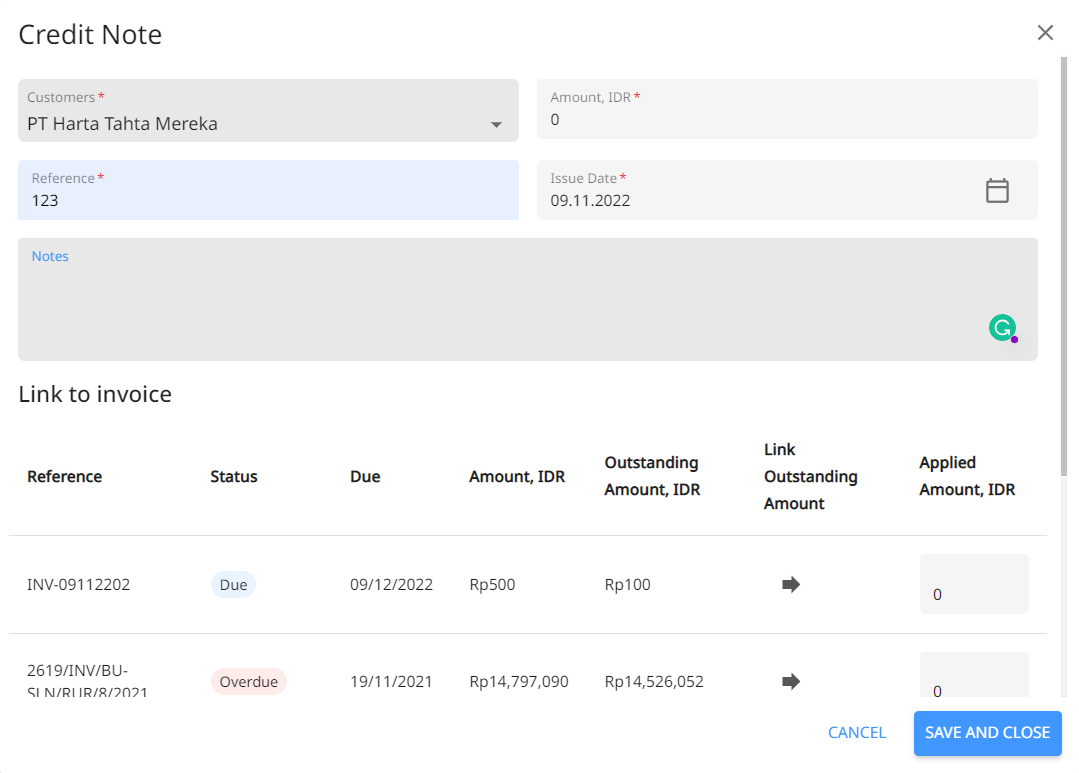
Credit Notes
With Peakflo, you can add a credit note and link it to an invoice. This way, document any changes to the invoice and have more control over who creates and approves the credit note!
Learn more how to create credit notes.