Mass uploading customer invoices eliminates the spreadsheet work and sets you up with detailed out-of-the-box reports, view customer timelines to stay up to date on all your accounts receivable, get full transparency on aging balance, set up financial KPIs and the course of action for each customer. Now let's get started.
If you are importing "invoices in draft status only" in Peakflo, please open, download, and import your invoice details according to this template.
Now let's start filling in the fields in the sheet to mass upload your invoice details and import line items at once.
Customer ID (mandatory): Copy and paste the same customer ID you used when uploading customer contact details/
* To find the customer ID, check out this link.
- On the Customers page, you will find the list of customers you have successfully uploaded to your Peakflo account. You can see the customer ID assigned to them below their name.
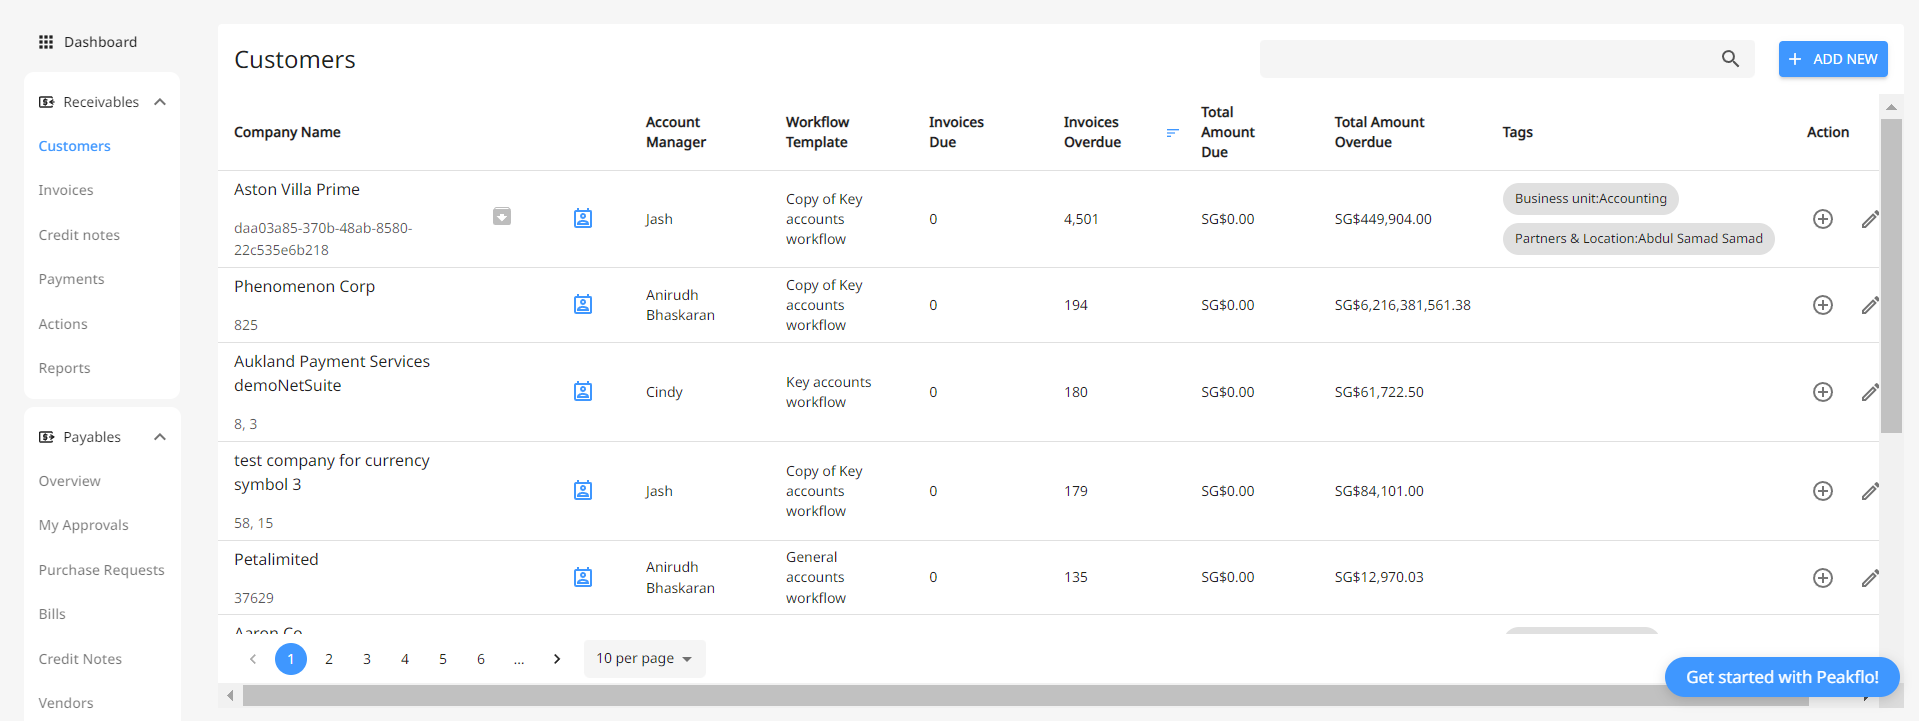
- Decide which company's contact details you'd like to upload and enter their customer ID in the spreadsheet.
In situations where the tax column is left empty and default taxes are configured for the company, the system will automatically apply the default taxes to the customer's invoice.
However, if default taxes have not been set up and the invoice mass upload file lacks tax information, the invoices will be uploaded without tax details. In such instances, adjustments to the default tax settings or the mass upload file are necessary.
To learn how to create custom fields for invoices and mass upload the details, read this article: How to create invoice custom field and mass upload invoice custom field details?
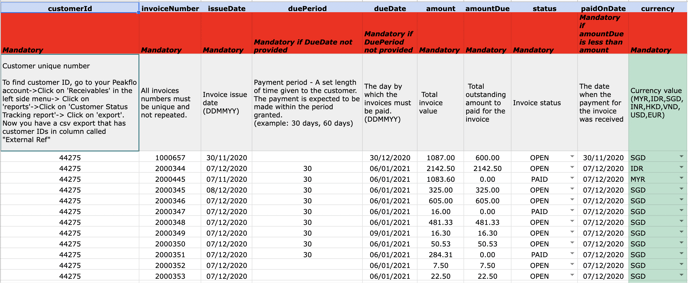
Before uploading the spreadsheet, don't forget to delete the 'mandatory' and the 'field description' columns. Your spreadsheet should look like this before it's ready to upload.

Peakflo can support invoice upload with 2000 lines items.
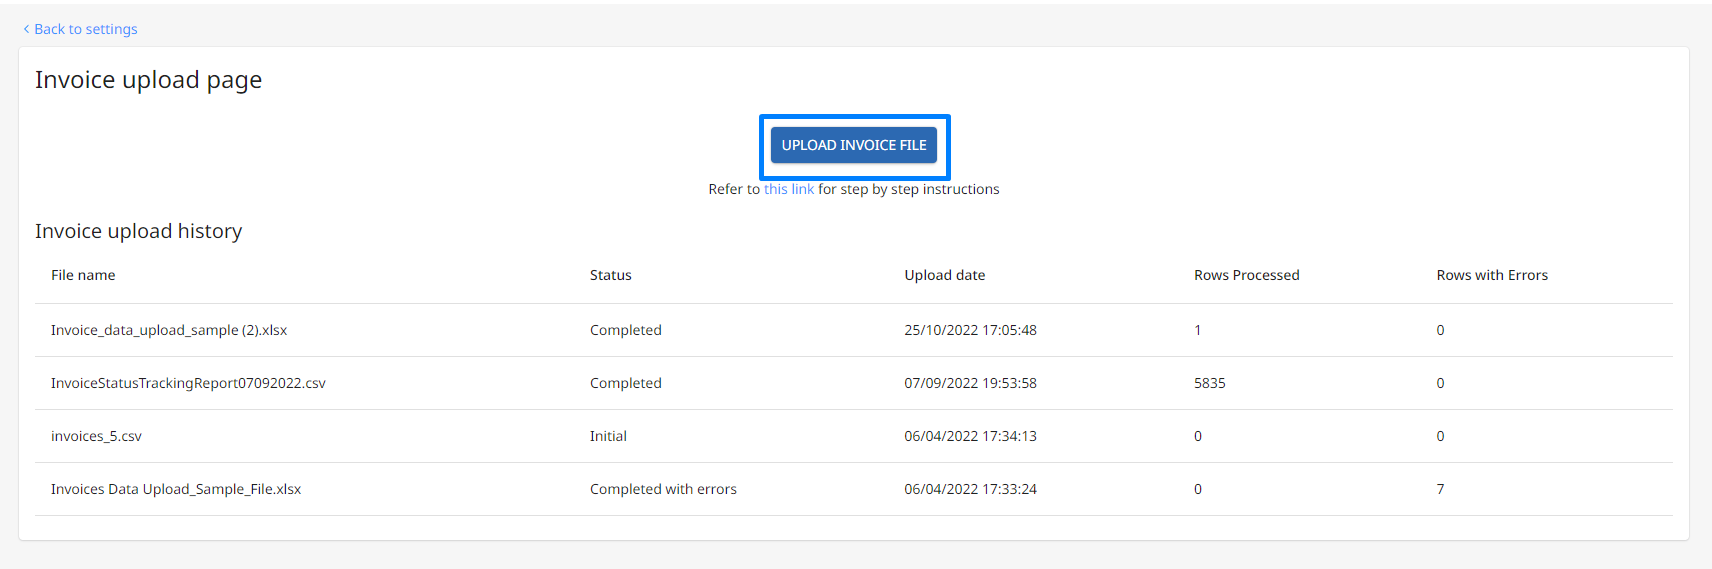
Next, go to Settings -> Mass Upload Invoices and click the 'Upload Invoices' button to upload your spreadsheet.
Upload your file in CSV, XLSX, or XLS format.

Select the Header Row and click on "Next".

Map the Columns in your file with the Template Fields. Once done, click on "Next".

Then verify your data. The system-identified anomalies will be marked in dark red.

Recheck and edit the data, then click "Submit".

Peakflo will process and upload the invoice details in a few minutes.
The invoices are successfully uploaded if the status is marked as 'Completed' if not then it will show 'Failed'.

If the status is ‘Failed’, click on the line item to view the list of errors. In the 'Upload details' box, you will find the list of errors and their line numbers to quickly identify them on the spreadsheet.

Once you've fixed the errors on the spreadsheet, re-name the spreadsheet and upload it again to complete this process.