How to add and manage items?
By importing line items, you can fast-track invoice and bill creation processes. Plus, your inventory management will be more seamless.
Find out how to:
How to Add an Item
Here's how you can add an item:
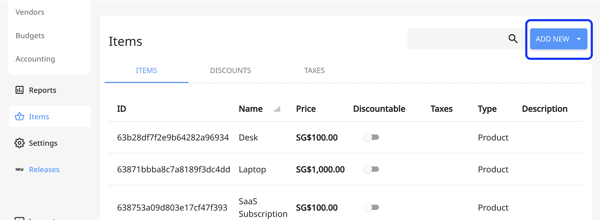
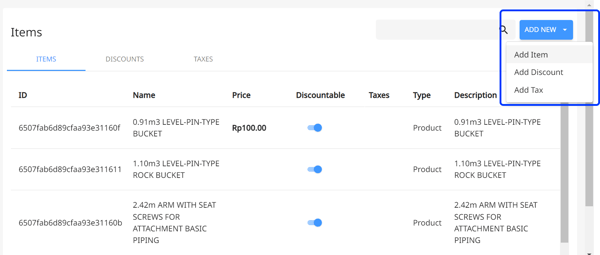
1. Go to the "Items" page and click on the "Add New" button on the top right section of the screen.
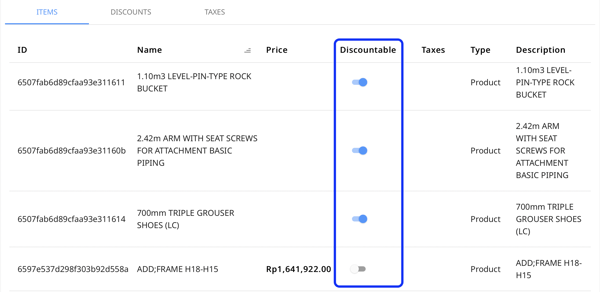
If the “Discountable” toggle is enabled it means discounts can be set for them.

2. Choose "Add Item" from the drop-down list.
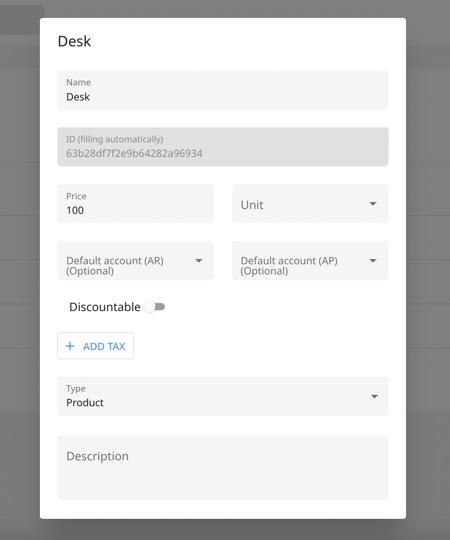
3. Then, fill out all the empty fields, such as:
-
- Name of the item
- ID (will be filled automatically)
- Price of the item
- Unit: Quantity of the item
- Default account (AR): Choose the default accounts receivable CoA of the item.
- Default account (AP): Choose the default accounts payable CoA of the item.
- Switch the toggle if it's Discountable
- Add Tax if necessary
- Select the Type
- Add Description if needed

4. Once done, hit "Save and Close".
How to Manage Items
On the same page, you can view all the items you've added along with the details.
You can always edit an item by clicking on any of the rows or switching the toggle to make it discountable.
The flow for editing an item is more or less the same as adding a new one.
How to Delete an Item
To do this, it's fairly simple.
You've probably seen the little button in the bottom left corner of the page.
All you have to do is click on "Delete Item", and the item will be deleted.