Overview
We at Peakflo specialize in helping you get paid faster and settle your bills easier. We aim to ensure that we save you time and effort in your financial operations. Before delving into managing your receivables and payables, you need to set up your Peakflo account, which needs to be done by your administrator.
Table of Content
Peakflo setup is divided into below steps:
- Invite users and assign roles
- Configure email
- Integrate with your accounting system (this can be skipped if integration is not required)
- Add inventory items
Invite users and assign roles
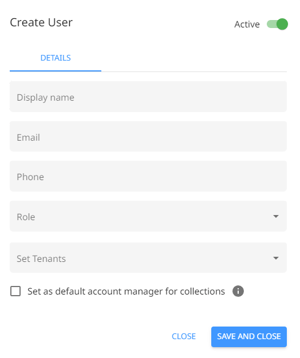
As the admin for your company, you can invite any of your colleagues or stakeholders into the Peakflo platform.
Along with the user's name, email address, and Peakflo accounts (tenants), they need to be assigned a specific role, depending on the level of access you wish to grant them. The permissions are mentioned once the role is selected.
If you wish to deactivate this user later, simply toggle the button at the top right.
If you'd like to assign a team member as an account manager, read this tutorial.
Configure the email
You can set up Peakflo such that reminders to your customers go through your company’s registered domain and email ID. This setup task should be prioritized so that your AR journey can begin.
For more information on how to set up email configuration, click here.
Integrate with your accounting system
You can integrate your Peakflo account with any of the below-mentioned accounting software. We pull in data from this software and enable faster collections and payments.
The synchronization of data between Peakflo and accounting systems is explained in detail in the links provided below:
Configure account mapping (accounting software customers only)
To ensure correct mapping is done for all the financial accounts in the general ledger of your company, we also require sync to the correct Chart of Account in your accounting software.
Please go to Settings and click on Integrations to follow the steps below.
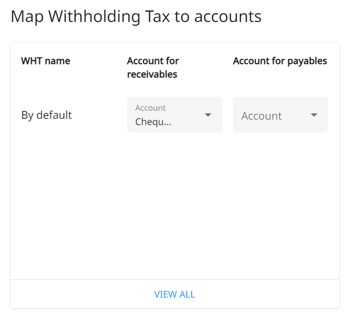
- Withholding Tax:
- To ensure Withholding Tax entries for every invoice and bill sync into the correct Chart of Account (CoA), select the CoA under the “Account for receivables” & “Account for payables” drop-downs.
We have shortlisted the most common WHT and GST codes during account setup but can definitely add them to the list if required by you.
Contact us at support@peakflo.co for any assistance. - Other taxes: All other taxes can be pulled in when creating invoices and bills.
- To ensure Withholding Tax entries for every invoice and bill sync into the correct Chart of Account (CoA), select the CoA under the “Account for receivables” & “Account for payables” drop-downs.
- Payment processing fees:
All the AR payments you receive have processing fees that your payment partner charges you. This ideally should be synced into the correct CoA in your accounting software. Map Payment Processing Fees to the correct CoA in the accounts tab. - Bill item default
While you can pick the correct account for each item while adding them to a Bill, there ideally should be a default account for items you do not pick the account for. This is again configured in Bill item Default mapping on the accounting page.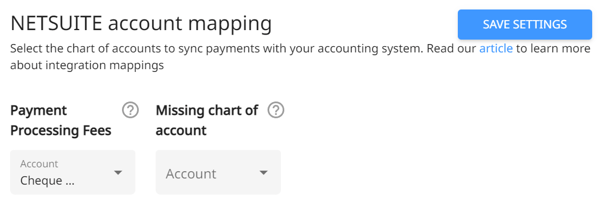
- Map currencies to bank account:
Set the relevant currency for the chart of accounts linked to cash inflows & outflows.- Click on View All to see more options for the currencies.
- Receivables account: Select the bank account to sync customer collections.
- Funding account: Select the bank account to fund the Peakflo wallet.
- Payables bank account: Select the Peakflo wallet created in your accounting software

Other than your taxes, you have Default Accounts that are line item level. The list of CoA and their respective GL codes is pulled in from your Accounting Software.
Chart of Account configuration for non-accounting software customers only
If you are a non-accounting software user of Peakflo but still want to have your GL Codes linked to the items, for future syncing - you get the option to do it by getting in touch with us and sharing the GL Codes + List of Chart of Accounts.
Please contact us at support@peakflo.co.
Setup the Peakflo wallet
Peakflo has enabled payments on both the receivables and payables side. Depending on what market you have your operations in, we will enable payments (payouts or collections, depending on payment partner coverage). You will need to do the following:
- Share your estimated Total Payments Value for 12 months with your customer success manager (please base it on the actuals for the last 3 months)
- Post this, we will share our KYB documentation checklist and request you to fill it out and provide the supporting documentation
On the AR side, enabling your payments will allow you to accept payments against your invoices from your customers directly through the Peakflo customer portal.
On the Payables side, enabling payments will allow automatic disbursement of funds to your vendors or beneficiaries on the due date of the approved bill as long as the AP Wallet has sufficient fund balance. Read more about the Peakflo wallet top-up.
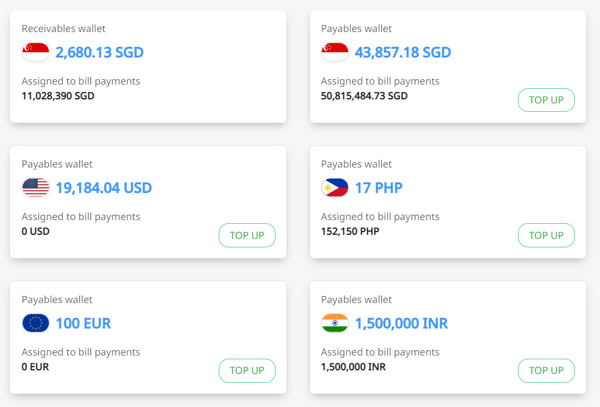
In case your wallet is running low on funds, you will receive a low-balance reminder email to ensure none of your payouts are affected.
.webp?width=450&height=498&name=pasted%20image%200%20(10).webp)
Add inventory items
To create Invoices, POs/PQs, or Bills in Peakflo, it is useful to add inventory items. If your account is integrated with an accounting system, the items will automatically be synced into Peakflo through manual creation sync.
If not integrated with any accounting system, Peakflo has an items module. Under “Items” select “Add New” in the top right corner, then select Add Item from the dropdown.
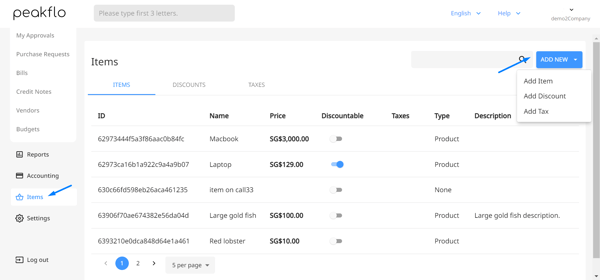
In the modal that shows up, enter the item details and click on save. That’s it, your item is created. Now you can start using these for your Invoices, POs/PQs, or Bills.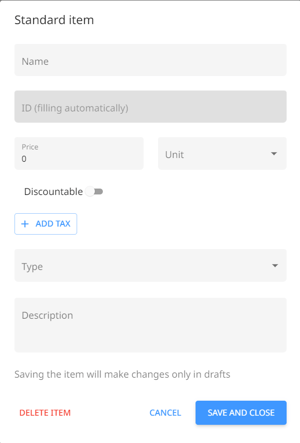
Discount
Similar drill, go to Items → Add New (in the top right corner) → Add Discount, and then fill in the details you see below.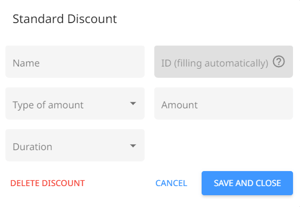
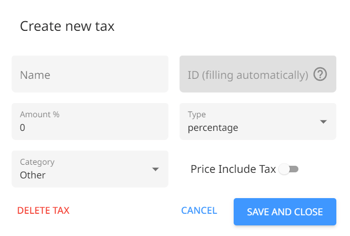
Tax
Similar drill, go to Items → Add New (in the top right corner) → Add Tax and then fill in the details you see below.