For creating and approving Goods Receipt Note and Service Receipt Note in Peakflo, ask support@peakflo.co to enable the feature first.
Once the feature is enabled in your Peakflo account, all you need to do is follow the steps below to create and approve GRN and SRN.
How to Create GRN and SRN?
1. Go to "Receipt Notes" under the "Payables" section.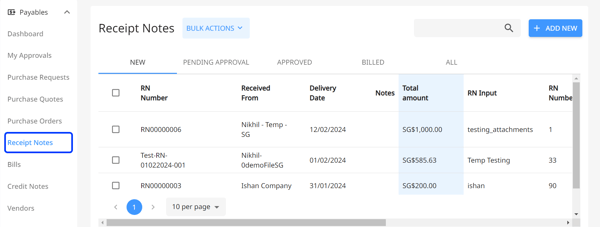
2. Click on "Add New" from the right side of the screen.
.png?width=600&height=227&name=Group%20337%20(1).png)
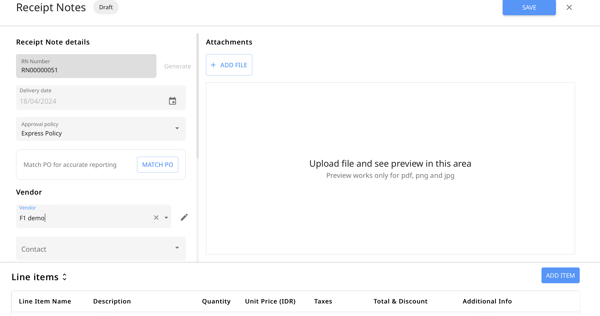
3. Fill out the information in the RN form and assign an approval policy for the RN.
For setting up approval policies, please check out this article.
* If needed, you can auto-generate the RN number or add a specific RN number
* Delivery date should be equal to or greater than the date on the purchase order.
4. In case there's an available purchase order for the RN, please click on "Match PO."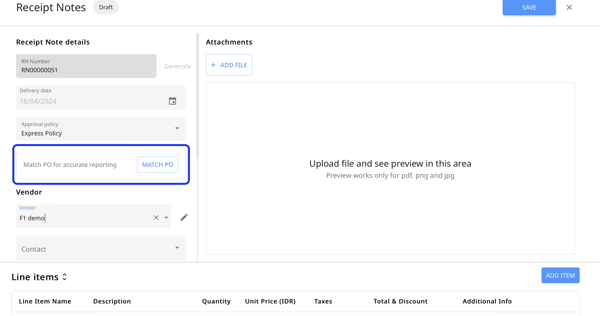
Recommended Read: How to validate three-way matching in Peakflo?
5. Choose the PO for the RN, then click on it. Then click the "Proceed" button..png?width=450&height=350&name=Group%20338%20(2).png)
6. Enter the Vendor information and Additional Information. In case you want to add a new vendor, please check out this link. 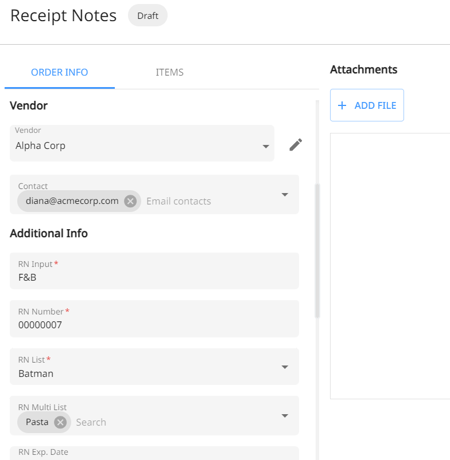
7. The RN amount and all related information will be auto-filled. You can add your comments in the Notes section.
Tick the highlighted box on the RN form in case you wish to send the RN via WhatsApp or email to the vendor after full approval.
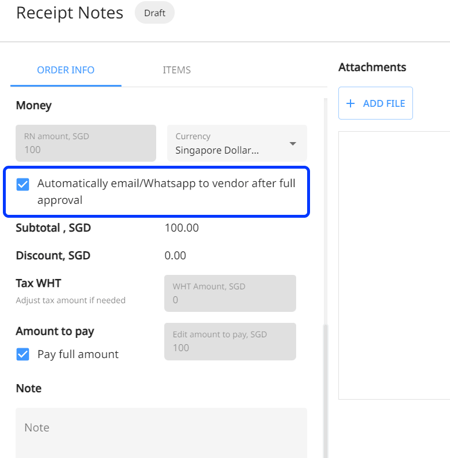
8. You can check, add, edit, or delete line items by clicking the expand button on the "Items" section. You can also add Tax and Discount.
9. Click on the "+Add File button under "Attachments" if you’d like to include an attachment. I
Please be aware that the file attachment size should not exceed 10 MB.
10. Then click "Save" from the top right side of the RN form to save your changes.
11. In case there are any "Inconsistent Matching" in the RN, Peakflo will flag them before saving, like the example below:
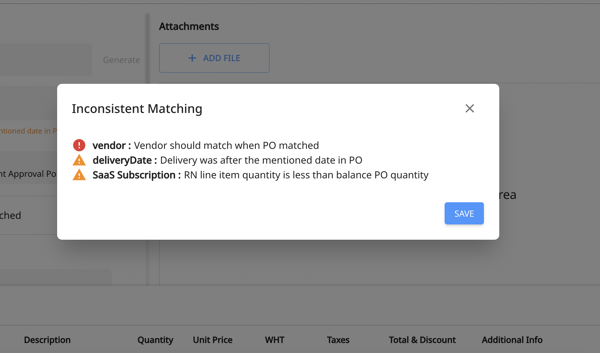
12. To resolve the errors, click on the X button to go back to the form and edit the changes.
Suppose you need to collaborate with teammates to resolve the issue. In that case, you can click on "Save", then choose the "Receipt Note" with inconsistent matching from the receipt note list, go to the timeline, click on "Leave comment", tag your teammate, and leave a comment for the stakeholders to resolve the issue.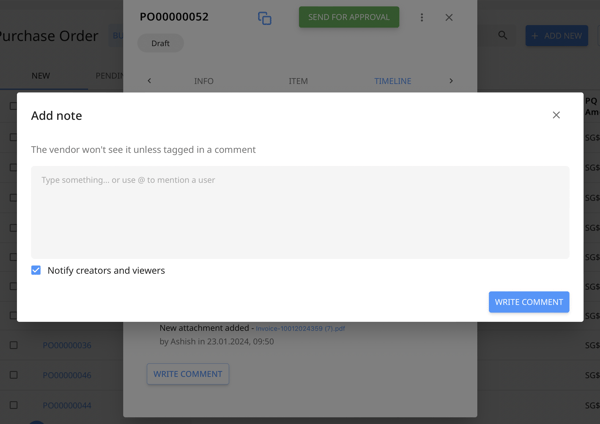
Please pay attention to the "Notify creators and viewers" check box. For an understanding of its functionality and guidance on when to select it, refer to this article: Link.
13. You can also perform "Bulk Actions" on Receipt Notes. All you need to do is select and tick specific RNs and click on "Bulk Actions".
From the "NEW" tab, you can choose to "Send for approvals" or "Delete" the chosen RNs in one go. 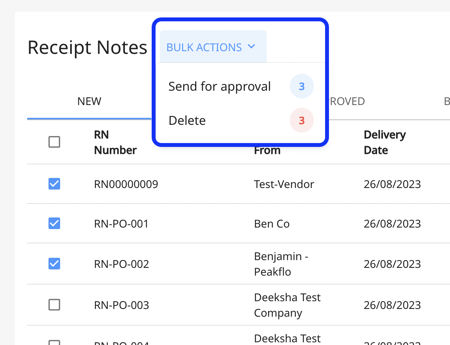
How to approve GRN and SRN?
You can also approve GRN and SRN by simply logging into Peakflo and going to the "Approvals" section from the sidebar. Then click on the box for "Receipt Notes".

To learn the complete process, check: How can I perform Approvals in Peakflo?
After GRNs and SRNs are approved, they will appear under the "APPROVED" tab.
You can perform bulk actions from here. You can choose to "Create Bill" or "Return to Draft" the chosen RNs in one go.

- If multiple vendors are selected, the option to create a bill will not be available.

- If fully billed Receipt Notes are selected, the option to create a bill will not be available to prevent duplication when generating bills.

FAQ
How can I know which Bill is linked to which Receipt Note (RN)?
When you create a Bill from an unbilled RN in Peakflo, both the Bill and the RN will show a timeline entry. The Bill will display the RN it was created from, and each RN will show the linked Bill, both with clickable links and timestamps, so you can easily track the connection.
