In Peakflo, you have a centralized dashboard for all the approvals assigned to you. This intuitive dashboard serves as a single point of access, allowing you to easily view and manage all pending approvals in one place. You can check PRs, PQs, POs, Bills, receipt notes, invoices, credit notes, travel requests, expense reports, and more, so nothing slips through the cracks.

Additionally, if you’re an approver and have pending approvals, you’ll receive a daily email reminder (like in the image below) to review your all your pending approvals and act on them. Click on "View" to check them.
You can quickly take action on approvals with just a few clicks, streamlining your workflows and improving overall productivity. Let's take a look at how to navigate "Approvals" in Peakflo.
1. To check the approval go to the "Approvals" option at the top of the sidebar.
Here you can see all the approvals assigned to you.

If there are currently no approvals assigned to you, the screen will display a message indicating that your approval queue is empty, as shown in the image below.

2. Select the specific type of approval you wish to review.
For example, you want to check purchase orders. Then click on the box named "Purchase Orders".

3. You will be able to see a list of approvals that are pending review.

4. Select a row to view detailed information, including info, item, and the timeline.

5. For resolving issues and communicating with the rest of the team, you can easily leave comments from the "Timeline". All you need to do is click on "Write comment".
Use @ to "mention" a teammate in the comment.

Important Note
When adding "@mentions" in the comments, if you want to send the notification to bill creator and bill viewer along with the mentioned user then check the box "Notify creators and Viewers".
- Creator is the user who created the object.
- Viewers are:
- All approvers are added as viewers
- Default viewers from vendors are added as viewers
- Anyone mentioned in the comment is added as a viewers
- Rules can add viewers
- If the user is a budget admin, then the user is a viewer
If you don't want viewers and creators to get notified and only want the person whom you have mentioned to get the comment, you need to untick the box "Notify creators and Viewers" before clicking on "Write Comment".

After the comment is posted, you will be able to view it in the "Timeline".

Anyone who is mentioned in the comment will also get notified immediately via email and will be able to check the details of the comment in no time. 
6. After you have reviewed the details, to approve click on the "Approve" button.

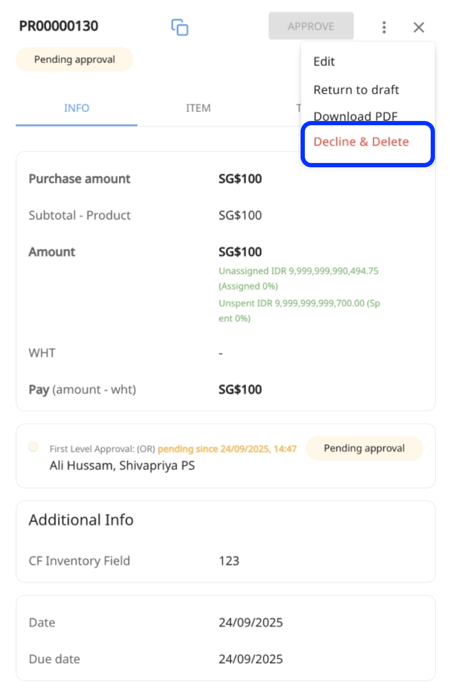
To decline, click on the three-dot icon on the top right and select "Decline"
Approvers and admins can see the actual approvers in the approval chain so that they know exactly who is responsible for each approval step.
-png-1.png?width=450&height=433&name=image%20(1)-png-1.png)
7. To execute bulk actions on approvals, simply select multiple rows. Next, click on the "Bulk Action" button. You will see two options: choose "Approve" to approve the selected items, or "Decline" to reject them.
