Table of Content
- Add General Expense
- Add Per Diem Expense
- Add Mileage Expense
- Add Expenses via OCR
- View Saved/ Submitted Expense
- Edit/ Delete an Expense
- FAQ
Add General Expense
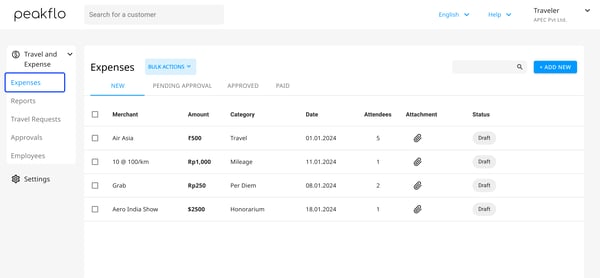
1. Log in as an employee/submitter and go to the Expenses tab under Travel and Expense in the navigation menu.
There are two tabs:
- New: The expenses that are created by you.
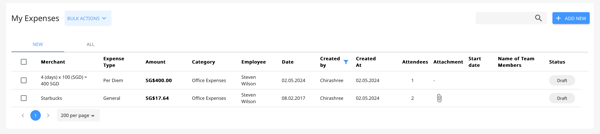
- All: The expenses that are created by any and all employees at your company.

- Sort and Filter: By default, the most recently created expense records will appear at the top. You can verify the date of creation in the "Created At" column.
You can sort your expenses by date, status, creator, or any other relevant parameter to quickly locate the information you need. Additionally, you can apply filters to narrow down your search results and focus on specific sets of data.
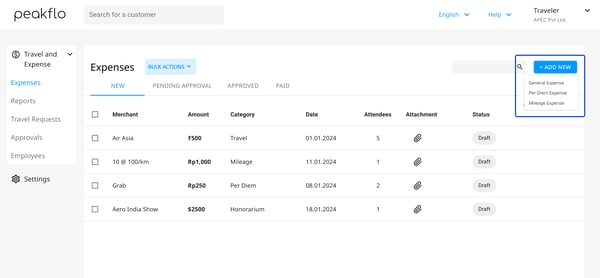
2. Click on the Add New button, and you will see three options. Click on the General Expense option.
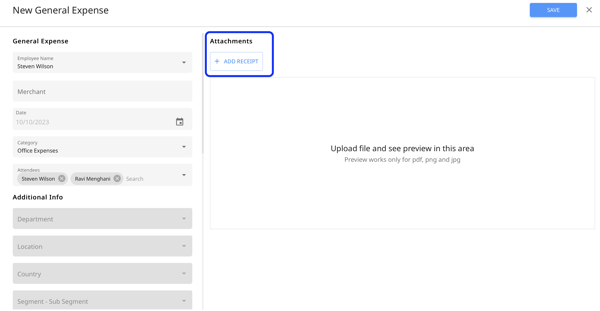
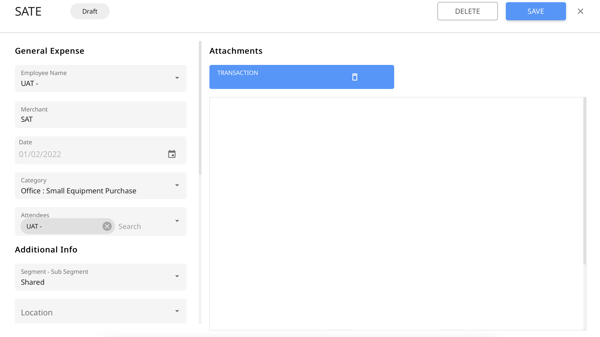
3. Start by filling out the required fields, here is the breakdown:
- Employee Name: Select your name
- Expense Report:
Expense Report: This setting controls what happens to your expense after you save it. Select “Auto create new expense report" if you want Peakflo to automatically create an expense report against the expense. Select “Do not auto assign to expense report” if you prefer to keep this expense as a standalone record for now and decide later which expense report it should be added to.
- Merchant: Enter the name of the merchant from whom the expense was incurred.
- Date: Enter the date on which the expense was incurred.
- Attendees: Add the names of any individuals who were present or involved in the incurring of the expense.
- Additional Information: Fill out the fields under additional information as per your company guidelines.
The Additional Info fields are custom fields that could be added as per your organization's requirement. To add custom fields check out:
How can admins add custom fields for travel requests, expenses, and expense reports?
If the Additional field information is filled out in the Employee level, then while creating the expenses the Additional fields will auto-populate as per employee records.

For assistance contact support@peakflo.co
Then add your receipt by clicking on the "+Add Receipt" button.
Please be aware that the file attachment size should not exceed 10 MB.
Peakflo supports multiple attachments, making it convenient to add individual expense receipts without the need to combine them into one file.
4. As soon as you upload your receipt the OCR will start scanning and extracting the data.
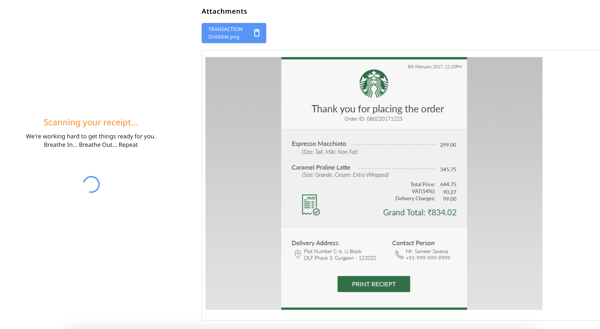
If there are mismatches between the data you entered and the scanned data, you will see a dialogue box. You can either overwrite the existing input by clicking on the Overwrite button or re-submit a new attachment by clicking on the Remove Receipt button.
.png?width=600&height=396&name=image%20(14).png)
5. Once the scan is complete you will be able to see the values automatically entered into the fields within the Money section. Double-check that all required information are added and accurate then hit the Save button.
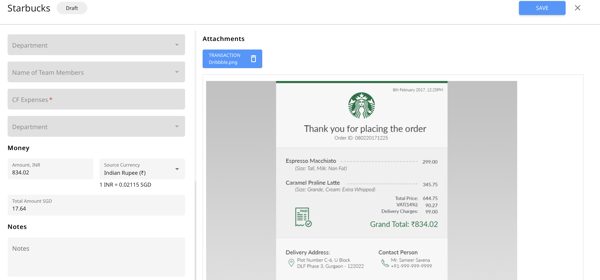 Your general expense is now added!
If the scanning fails then you will see an error message. In such cases, you can enter the details manually.
Add Per Diem Expense
1. Log in as an employee/submitter and go to the Expenses tab under Travel and Expense in the navigation menu.
2. Click on the Add New button, and you will see three options. Click on the Per Diem Expense option.
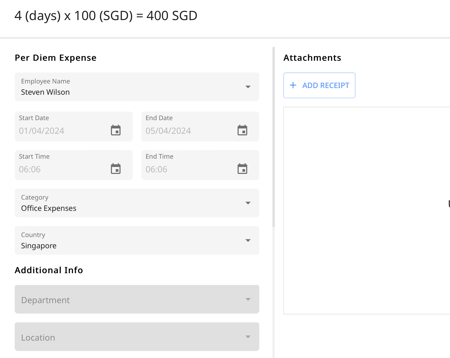
3. Start by filling out the required fields. Here is the breakdown:
- Employee Name: Select your name
- Expense Report:
Expense Report: This setting controls what happens to your expense after you save it. Select “Auto create new expense report" if you want Peakflo to automatically create an expense report against the expense. Select “Do not auto assign to expense report” if you prefer to keep this expense as a standalone record for now and decide later which expense report it should be added to. - Start Date: Select the start date of your travel
- End Date: Select the end date of your travel
- Start Time: Select the start time of your travel
- End Time: Select the end time of your travel
- Category: Select the appropriate category that best describes the type of expense based on the nature of the cost incurred. In this case, it will be per diem.
- Travel Country: Enter the name of the country where your travel expense was incurred.
- Additional Information: Fill out the fields under additional information as per your company guidelines.
The Additional Info fields are custom fields that could be added as per your organization's requirements. To add custom fields, check out:
How can admins add custom fields for travel requests, expenses, and expense reports?
If the Additional field information is filled out in the Employee level, then while creating the expenses, the Additional fields will auto-populate as per employee records.
For assistance, contact support@peakflo.co
- Upload Receipt: Attach your receipt by clicking "+Add Receipt." Peakflo supports multiple attachments, making it simple to upload and organize receipts for accurate expense tracking.
4. Once all the details are filled out, the total amount will auto-generate under the Money section as per the per diem travel and expense policy set by your admin. You can also see the calculation in the Money section.
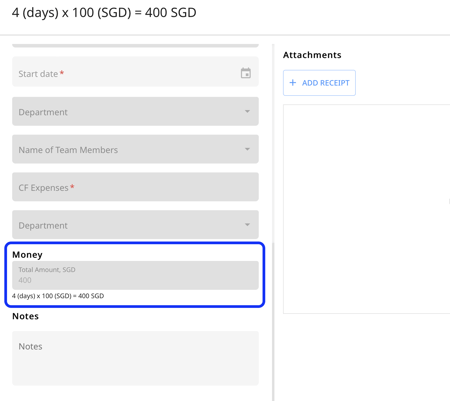
5. Hit the Save button on the top right to complete the process.
Add Mileage Expense
1. Log in as an employee/submitter and go to the Expenses tab under Travel and Expense in the navigation menu.
2. Click on the Add New button, and you will see three options. Click on the Mileage Expense option.
3. Start by filling out the required fields. Here is the breakdown:
- Employee Name: Select your name.
- Expense Report:
Expense Report: This setting controls what happens to your expense after you save it. Select “Auto create new expense report" if you want Peakflo to automatically create an expense report against the expense. Select “Do not auto assign to expense report” if you prefer to keep this expense as a standalone record for now and decide later which expense report it should be added to. - Mileage Type: Select the type of mileage.
- Distance: Enter the distance covered during your travel.
- Date: Select the date on which you incurred the expense.
- Category: Select the appropriate category that best describes the type of expense based on the nature of the cost incurred.
- Additional Information: Fill out the fields under additional information as per your company guidelines.
The Additional Info fields are custom fields that could be added as per your organization's requirements. To add custom fields, check out:
How can admins add custom fields for travel requests, expenses, and expense reports?
If the Additional field information is filled out in the Employee level, then while creating the expenses, the Additional fields will auto-populate as per employee records.
For assistance, contact support@peakflo.co
- Upload Receipt: Attach your receipt by clicking "+Add Receipt." Peakflo supports multiple attachments, making it simple to upload and organize receipts for accurate expense tracking.

4. Once all the details are filled out, the total amount will auto-generate under the Money section as per the mileage travel and expense policy set by your admin. Hit the Save button on the top right to complete the process.
Next Step: How can employees create expense reports?
Add Expenses via OCR
To enable the expense receipt capture feature via OCR, please reach out to support@peakflo.co to activate this functionality within your system.
1. Employees can send their expense receipts to the OCR email address, which can be found by clicking the "ADD NEW" at the top right of the "My Expenses" tab under "Expenses".

2. Copy the email address and send the receipt file to through the email ID. Employees will receive a confirmation email, like in the image below.

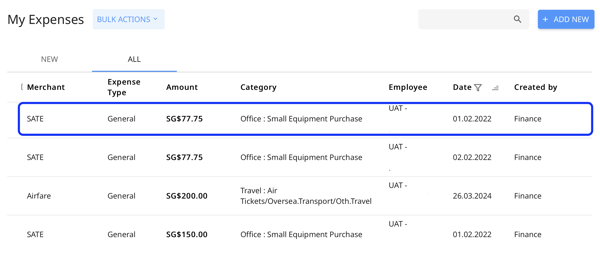
3. A new "General Expense" will be added under "My Expenses".
The details that will get captured via OCR are:
- Merchant: The name of the merchant from whom the expense was incurred.
- Date: The date on which the expense was incurred.
- Amount: The amount on the receipt.
- Source Currency: The currency in which the receipt was issued.
- Total Amount: The total amount in your currency.

4. Employees can fill out the other information as mentioned in the "Add General Expense" section and hit "Save".
5. Employees will receive an email confirming the Expense has been added.

For more information on how OCR works, check out: How does OCR work?
View Saved and Submitted Expenses
Once you click on "Save" the expense will appear in the "New" section of the "My Expenses".

Now once you have submitted the expense to an expense report, you will find the expense in the "All" section of the "My Expenses".

Edit or Delete an Expense
1. Go to Expenses under Travel and Expense in the navigation menu.
2. Click on the expense you want to edit or delete.
3. The expense window will open.
To Edit: Make the modifications and click on Save
To Delete: Click on the Delete button.
Once the expense is reported, you can not delete the expense but can still edit it.
FAQ
Why do I see the "Switch Tenant" option while creating an expense?
When you are in a different tenant than your assigned one and try to create an expense by clicking "Add New" in My Expense, then Peakflo will show a message asking you to switch to your assigned tenant.

Click on the "Switch Tenant" option, and you will be redirected to your assigned tenant where you can create a new expense.
Why can't I save the expense and see the error "An expense with the same details already exists"?
Peakflo runs duplicate validation checks before saving the expenses. The system checks for duplicate expenses based on:
- Employee Name
- Merchant
- Date
- Amount
- Category
If all the details match an existing expense then you will see the error and will not be able to save the expense. In such cases, make sure that you haven't already added the expense previously. Make sure to also check the details entered in the newly created expenses are accurate.