How do employees get auto-reimbursed for Expense Reports from Peakflo?
Employees get auto-reimbursed for expense reports directly into their designated bank account. In this article, well talk about how this works in Peakflo.
Overview
Auto-reimbursements from Peakflo happen when employees have submitted the expense report and it is approved by the approver. This process facilitates automated disbursements from the Peakflo AP wallet to the employee's bank account.
Table of Content
Recommended Reads:
Steps required before auto-reimbursement
Before we discuss how auto-reimbursement will happen in Peakflo, make sure the below two criterias are fulfilled:
1. Added Employee Bank Details:
Employees must have their bank details filled out in their employee record. This information can be synced from your accounting software/ ERP or manually added.
To check if employees bank details are added, follow the steps below:
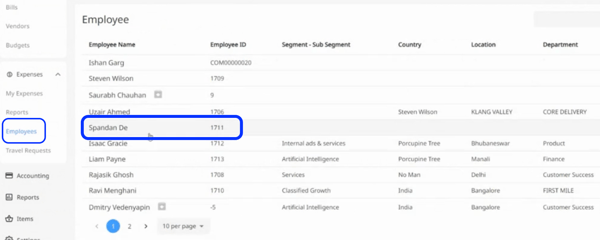
- Go to "Employees" under "Travel and Expense" and click on the employee for whom you want to check the bank details.
- A pop-up will appear, go to the "Bank Details" tab. Here you will see the emplyee's bank details.
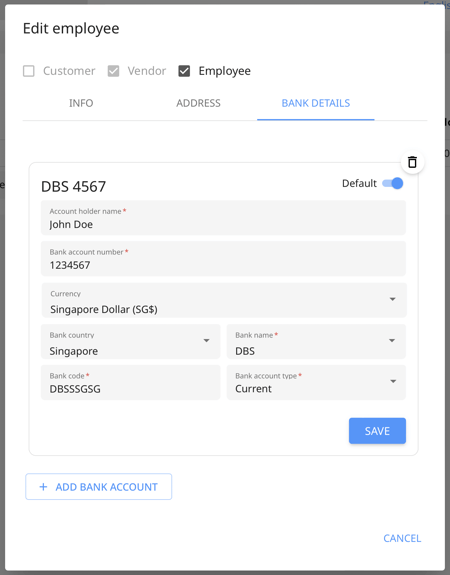
If any information is missing or incorrect, you can enter the correct information and click on the "Save" button.
Check out How to add employees to Peakflo?
2. Enable AP Wallet
To utilize the auto-reimbursement feature, make sure that the AP wallet in Peakflo is created and has sufficient funds for reimbursements.
To enable your Peakflo AP Wallet reach out to Peakflo's support team at support@peakflo.co
Check out How to top-up your AP wallet?
How auto-reimbursement works?
1. Go to the "Approved" section under "Expense Reports" to view all the approved expenses.
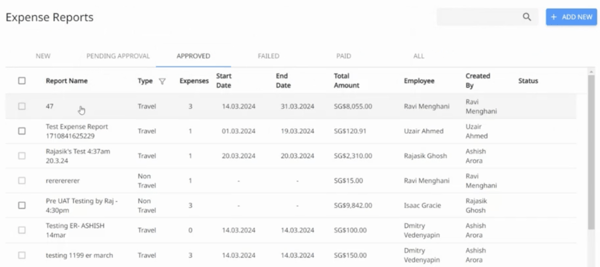
2. Select the expense report for which you would like to initiate the payment.
3. A pop-up will appear, click on the three-dot icon at the top right corner.
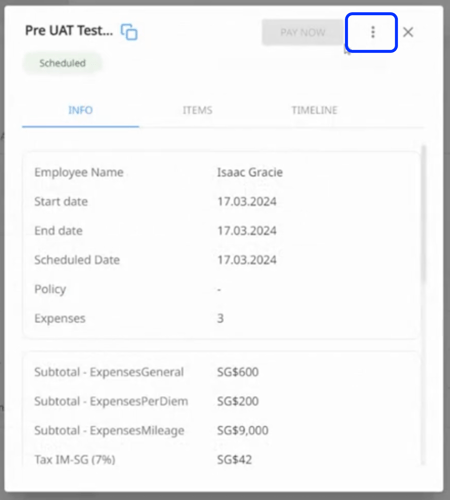
4. From the options select the "Mark as Paid" option. This action initiates the disbursement process and moves the expense report to the "Paid" status.
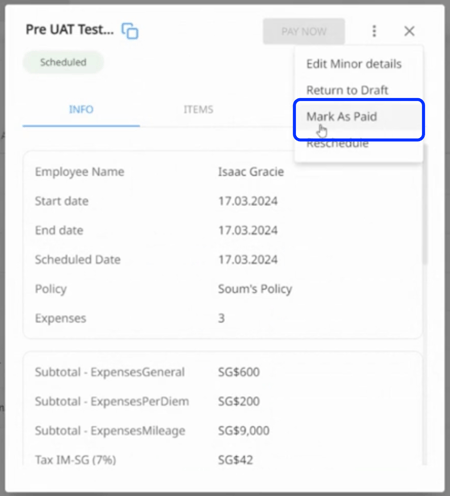
This step triggers the automatic debit from the AP wallet and credit to the employee's bank account.
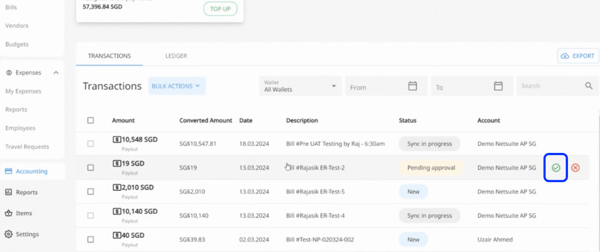
5. To record this transaction in your accounting software/ERP, go to the "Transactions" section under "Accounting". Here you will see a new transaction is created against the reimbursement. It will have the status "Pending Approval".
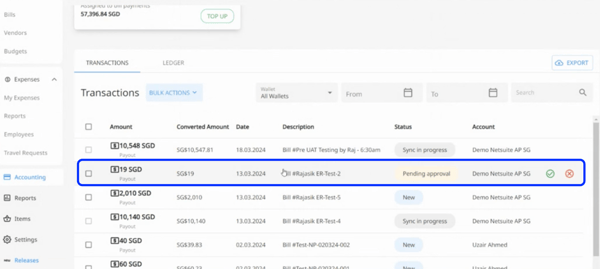
6. Click on the 'green tick mark' to approve the sync. This syncs the payment information back to the accounting software/ERP.
