How can employees add, edit, or delete travel requests?
Employees can easily manage travel requests in Peakflo by following the steps below.
Table of Contents:
How to add Travel Request?
1. The employees can go to the "Travel Request" tab from the left navigation bar.
There are 4 tabs:
- New: The travel requests are in the draft stage.
- Pending Approval: The travel requests that are submitted for approval.
- Approved: The travel requests that are approved.
- All: View all the travel requests irrespective of their status.
- Sort and Filter: By default, the most recently created travel requests will appear at the top. You can verify the date of creation in the "Created At" column.

You can sort your reports by date, status, creator, or any other relevant parameter to quickly locate the information you need. Additionally, you can apply filters to narrow down your search results and focus on specific sets of data.
2. To add a new travel request, click on "Add New". -1.png?width=600&height=227&name=image%20(35)-1.png)
2. Based on the description below, employees can fill out the Travel request information:/
Travel Request Number: Your employees can add a travel request number or click on "Generate" so that Peakflo can auto-generate the number.
Employee Name: The employee name will be added automatically, it is also possible to change the employee name from the drop-down list.
Start date: The start date of the travel request
End date: The end date of the travel request
Policy: The approval policy for the travel request. The policy can be assigned to the travel request both manually and automatically.
The employees cannot edit the Money section, it will be auto-filled after the items details are added.
Here is what the Money section contains:
- Currency: The currency of the travel request
- Amount: The total amount of the travel request
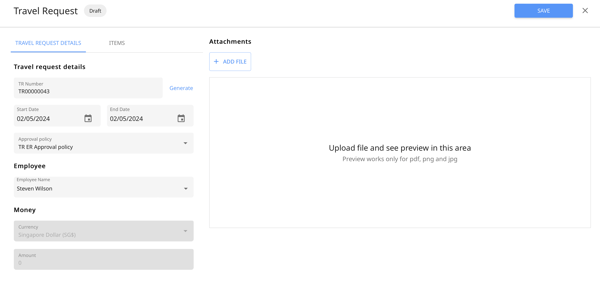
3. Once the travel request info is added, employees can click on "Items" to add the details of the travel request.
Fill out the details of the travel request items based on the description below:
Expense Type: Add the type of travel request, e.g. flight or hotel.
Source City: Add the departure city
Destination City: Add the destination city
Start Date: The date that the travel starts
End Date: The date that the travel ends
Amount: The total amount of the travel expense e.g. airfare, hotel cost
Upload Receipt: Attach the travel request receipt in pdf or image format.
Please be aware that the file attachment size should not exceed 10 MB.
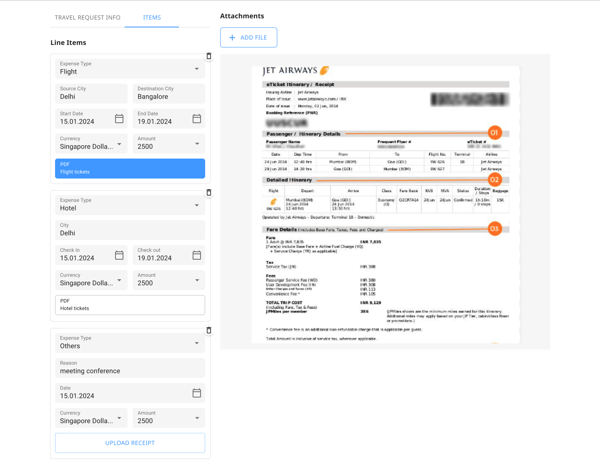
4. Once done, employees can save the travel request by clicking the "Save" button.
5. Now, employees can see the travel request under the New tab. To send the travel request for approval, employees can click on the travel request and the click on Send for Approval from the pop-up.
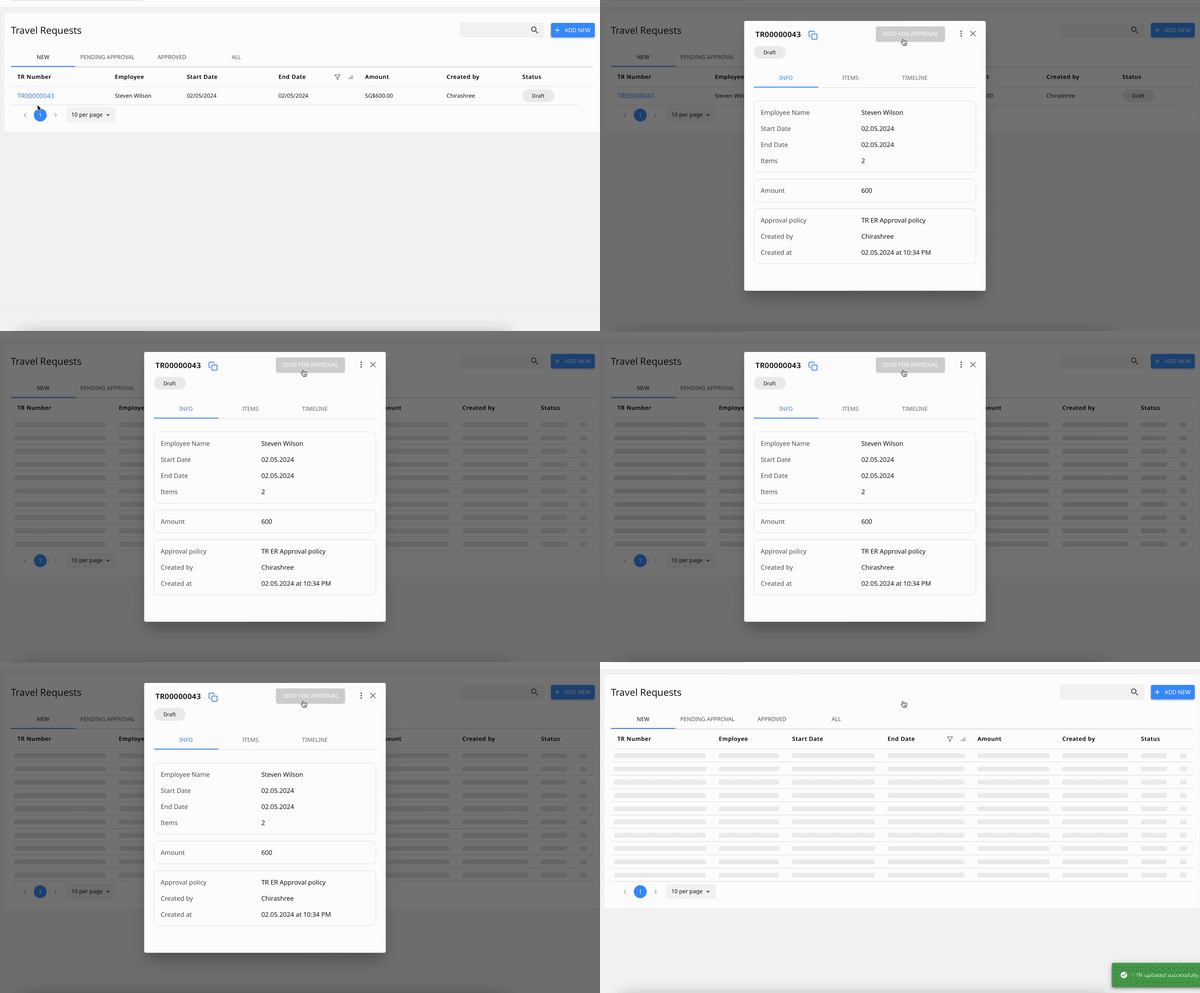
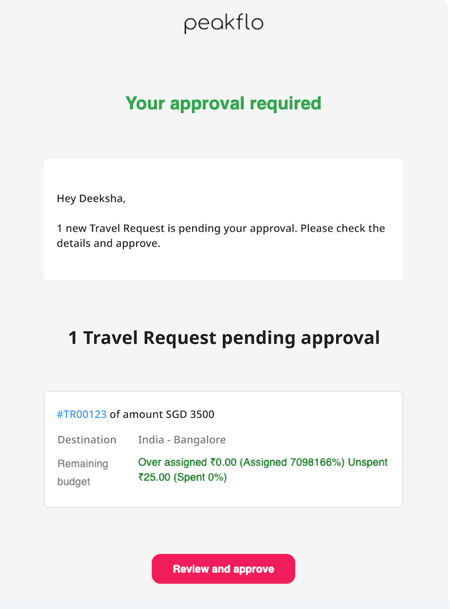
Based on the approval rules and approval workflow, the approval notification will be sent to the right approvers through Slack or email. The approvers can check the approvals through their preferred channels.
Example of Slack approval notification .png?width=450&height=180&name=image%20(38).png)
Example of Email approval notification:
An approved travel request does not follow with a reimbursement. Once you add the travel request to the expense report and it gets approved, you will be reimbursed.
Are you an approver? Click on this link to check and approve or reject travel requests seamlessly.
How to Edit Travel Requests?
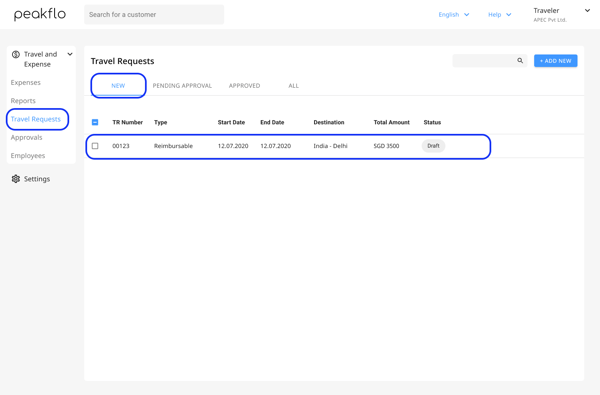
1. The employees can go to the "Travel Request" tab from the left navigation bar. In the New section, click on the travel request to edit it.
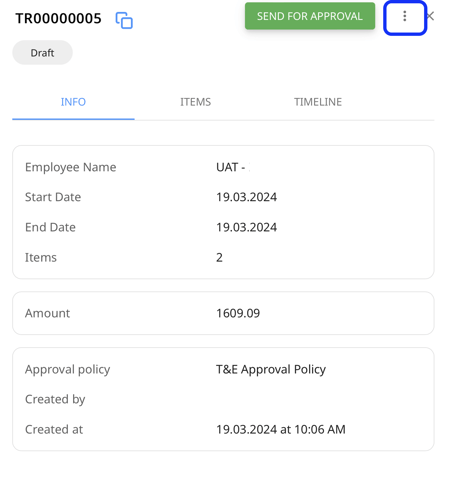
2. A pop-up will appear, click on the 3-dot button on the top right.
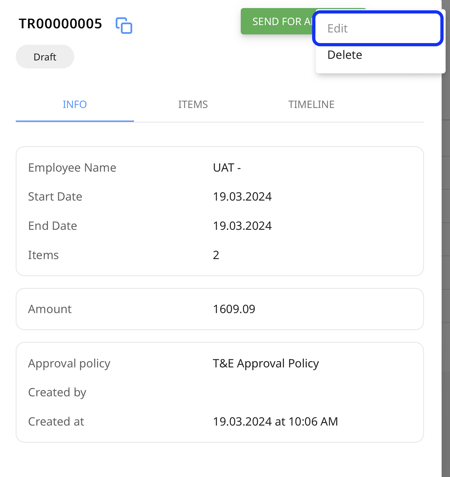
3. Now click on the Edit option.
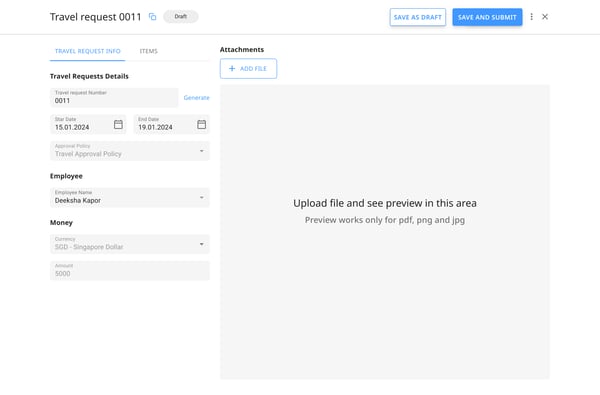
4. The edit window will open. Make the modifications and click on Save.
How to Delete Travel Request?
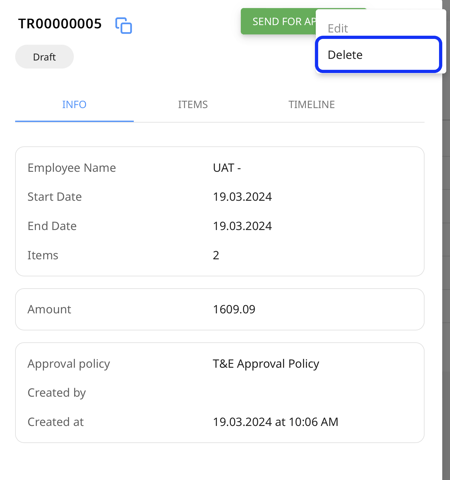
1. The employees can go to the "Travel Request" tab from the left navigation bar. In the New section, click on the travel request to open it.

2. A pop-up will appear, click on the 3-dot button on the top right.

3. Now click on the Delete option to remove the travel request.
FAQ
Can a employee select past dates when creating or editing a travel request?
Yes, an employee can select past dates as start date and end date when creating or editing the "Travel request Information" as well as line items under the "Items" tab.
Why do I see "Switch Tenant" option while creating a travel request?
When you are in a different tenant than your assigned one and try to create an travel request by clicking "Add New" in the Travel Request, then Peakflo will show a message asking you to switch to your assigned tenant.

Click on the "Switch Tenant" option, and you will be redirected to your assigned tenant where you can create a new travel request.