With Peakflo’s smart workflows, you can set up automated reminders for WhatsApp, email, SMS, or any other messaging channels.
Workflows can help reduce or even eliminate mundane tasks and streamline your accounts receivable processes, saving you a bunch of hours 🙌
Now, how do you create a workflow?
Create a new workflow
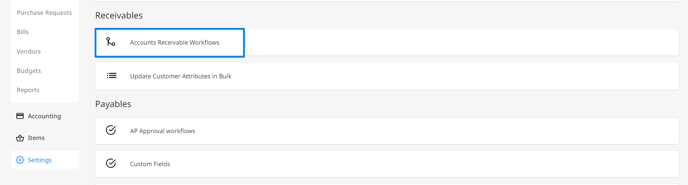
Go to ⚙️ Settings then head to Accounts Receivable Workflow.
At the top right of the dashboard, you’ll see the blue Add Workflow button. Click on it.

A window will then popup, in which you’ll need to fill in the following information:

- Workflow name: Give a name to your workflow.
- Maximum credit limit in (currency): Define the maximum credit limit (in your currency) you’d like to set to this customer category until the account is flagged for a credit freeze
- Maximum credit limit in days: Define the maximum number of days for an invoice past due before the account is flagged for a credit freeze
- The email address your recipients will see: Add the email address from which the email will be sent
- The email name your recipients will see: Add the email name from which the email will be sent
- Customer replies will be sent to this email address: Add the email address where the customer replies will get delivered
- Contact delay: Set the minimum number of days between each automated reminder
Afterward, you can tick any of the boxes below to allow customers to make certain types of payments.
- Send to parent company (if available): When the checkbox is selected, reminders will be sent to parent company contacts (if the customer has a parent company).
Note:
- The check box is selected by default. When the check box is selected, the customer portal link included in the reminder emails will point to the parent company’s portal. If the customer doesn’t have a parent company, the reminders will go to the contact against whom the invoice was issued.
- When the check box is not selected, reminder emails will be sent to the contact against whom the invoice was issued and the customer portal link will point to respective company portals.
- Enable workflow payments: Allow customers to make payments through the customer portal
- Enable WHT: Allow customers to add withholding taxes to their payments
- Partial payments: Allow customers to adjust the amount of their payments
Once you have filled out all the fields, click Save and Continue.
➡️ Next step: How to add actions to a workflow
Edit a workflow
Now, let’s go on to how to edit a workflow.
The process is the same as creating a workflow. All you have to do is click on any existing workflow that you’d like to edit, and at the top right you’ll see the Edit workflow settings button.
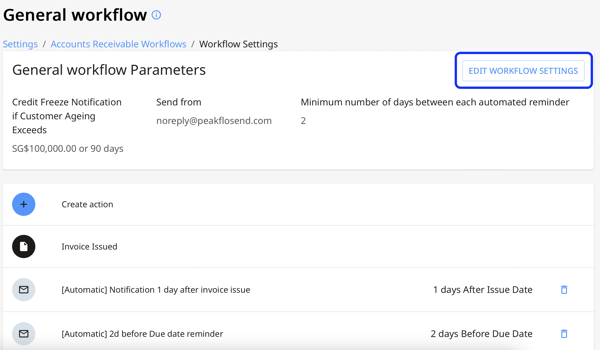
Once you’re in the Edit workflow settings window, the steps are the same as when you create a new workflow. Fill out all the information as required.
Congratulations, you’ve successfully created a workflow 🎉
For the next steps, visit our workflow management page for all the needed information on workflows.
FAQ
Why are your workflows not firing?
If your workflows are not firing, there are a lot of possible causes. To resolve them, see how to solve workflows not firing issues.
How can I remove a workflow?
To remove a workflow, click on the delete button that appears while hovering over a workflow. Please contact support@peakflo.co for assistance. 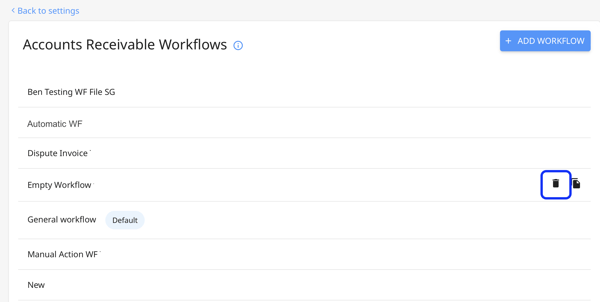
A dialogue box will appear, click on Yes to delete the workflow.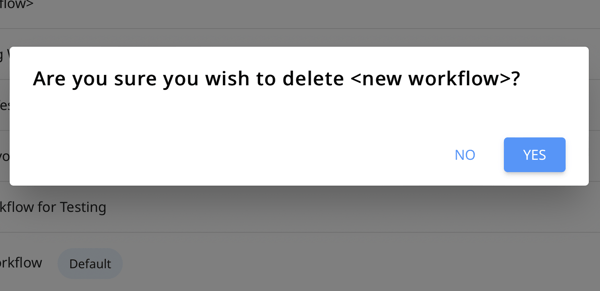
Can I set the minimum contact delay to zero or less?
Yes, you can set the minimum contact delay to zero or less. This means the minimum number of days between each automated reminder will be less than a day. If you'd like to set the contact delay to less than a day, contact us at support@peakflo.co!