How can I add a new action in the workflow?
Workflows are the ❤️ of Peakflo. Using workflows, you can trigger personalized, multi-channel reminders to your customers using an escalation matrix.
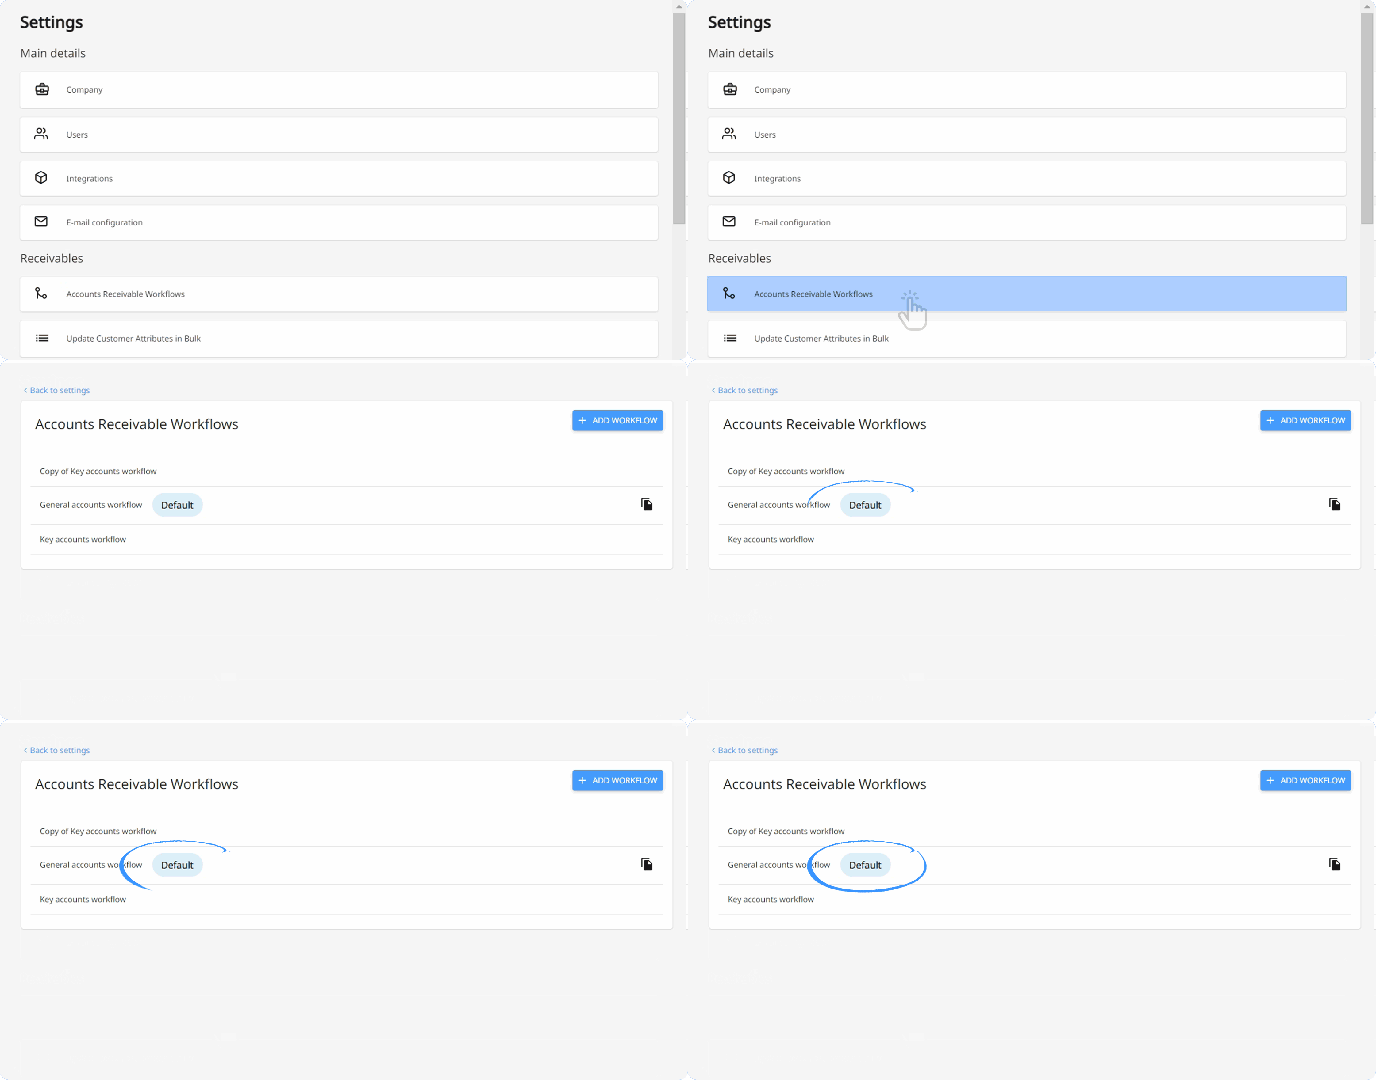
By default, Peakflo has assigned a workflow to all of your customers. Check this out:

Pretty cool, right? 😎
But you know what's cooler? Adding more actions to your workflow to follow up on pending invoices and get paid faster. 💸
Follow the step-by-step guide to create an action using the workflow.
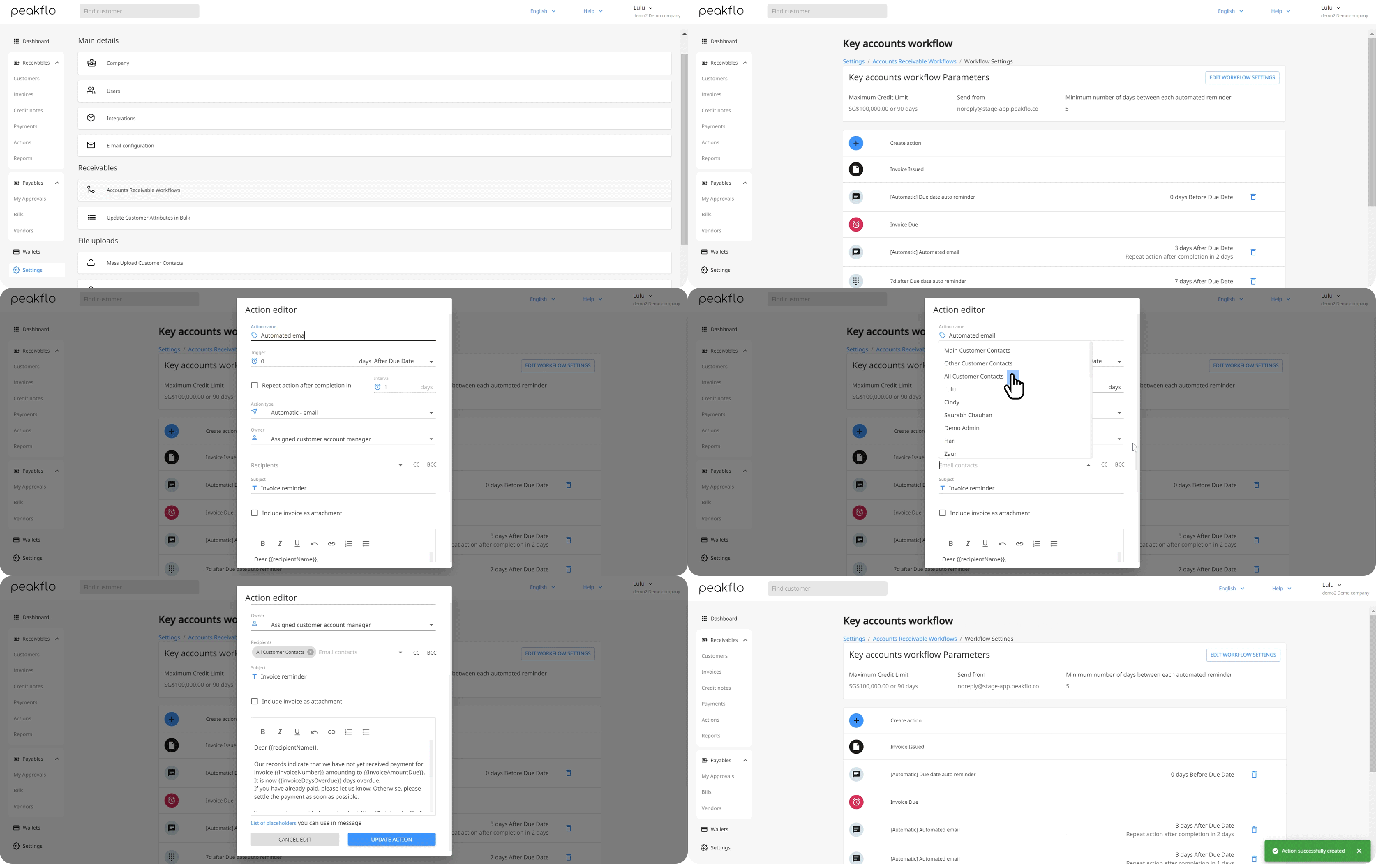
- Go to Settings and click on Accounts Receivable Workflows.
- Choose a workflow where you want to set up an action. Here you also can find a list of the actions you’ve already set up.
- Click on the Create action button.
- Once the action editor pops up, fill in the details as necessary. These include:
- Action name. The name of the action you’re going to create.
- Trigger. The number of days you want the action to be triggered. You can set it up based on the trigger type:
-
 After Issue Date: This trigger allows you to set up actions that will be initiated a specified number of days after an invoice has been issued. For example, set the trigger such as 7 days After Issue Date.
 -
Before Due Date: Use this trigger to send reminders to your customers before an invoice is due. For example, set the trigger such as 3 days Before Due Date.
-
After Due Date: This trigger activates actions a certain number of days after the due date has passed. For instance, set the trigger such as 5 days After Due Date.
-
Before Promise to Pay: This trigger allows you to send reminders a specified number of days before the promise to pay date (which is mentioned in the invoice). For example, set the trigger such as 10 days Before Promise to Pay.
-
After Promise to Pay: This option sends reminders a set number of days after the promise to pay date (which is mentioned in the invoice) has passed. For example, set the trigger such as 7 days After Promise to Pay.
-
Every Month: This trigger allows you to set up recurring reminders that will be sent out on a monthly basis. This reminder is triggered at the customer level. For example, if you want to send reminders on the 12th of each month then set the trigger as 12 Every Month.
-
- Repeat action after completion. The interval of days you want the action to be repeated.
- Action type. The type of action you want to set up. Learn more about different action types.
- Owner. The account manager responsible for managing the action and reminder.
- Recipients. The people who will receive the reminders or notifications related to the actions.
If it's an email reminder, please specify the CC and BCC as necessary.
You can also assign multiple users or customer categories:
- Internal users: assign your account managers or any members of the company
- Main contacts: the group of customers whom you've saved as the primary point of contact in the company.
- Other contacts: the other regular customers you've saved into your Customer base.
🔍 To differentiate the categorizations of contact, see how to upload customer contacts.
-
- Include invoice as attachment. Tick the box if you want the invoice to be attached in the mail.
- Fill in the text box with the email template you’ve created. Learn how to customize your action template to autofill any of the important information in the mail.
- Review one more time and once you’re done, hit “Update action”

Congratulations, you have successfully created an action.
FAQ
What if I want to remove users or customers from the accounts receivable managers?
If you think that the reminders to accounts receivable should not include specific users or customers, let's say the account managers:
Open up your Action Editor → remove the user or customer from the Recipient list → Save and Close.
.png?width=561&height=259&name=image%20(5).png)
To get the most out of our AP and AR tools, feel free to explore our help center. 🔍
FAQ
How to edit the timing of automatic reminders?
If you want to change the timing of automating emails, WhatsApp, or other reminders, kindly specify the timeframe and send a ticket to support@peakflo.co.