Only Admins can manage approval rules.
How to add approval rules?
1. Go to "Settings" and click on "Rules" under the "General" settings. 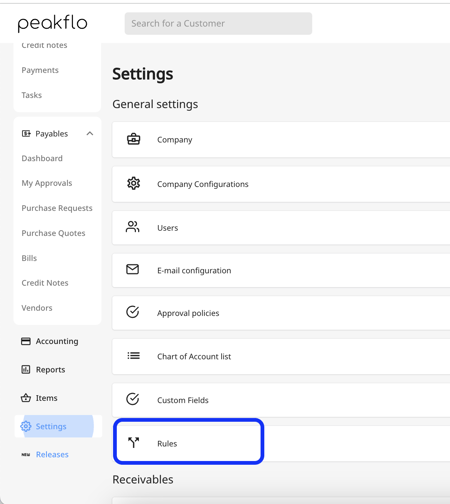
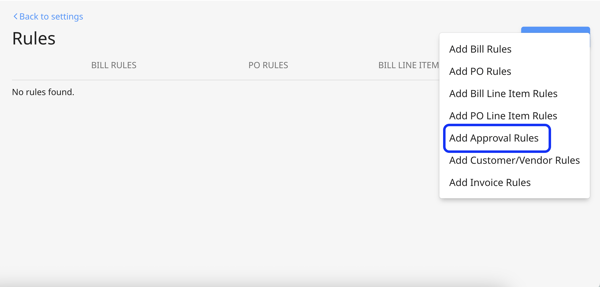
2. click on "Add New" and choose "Approval Rules" from the list of available rules.
3. In the approval rules tab, you can define rules based on default fields and also custom fields.
To learn more about custom fields, read this article.
Approval rule name
IF
Object Option: In the object option, you can choose a category, travel request, expense report, travel category limits, or any other custom fields.
Condition: Depending on the value defined in the Object option, this field may differ,
if it's a numerical field, you will have the option to choose "less than", "equal to" or "greater than".
If it's a fixed value such as "Employee name" then you will have the option to choose "Is" or "Is not"
Value: Depending on the Object Option, this field can have numbers or text.
THEN
Field: In this section, you can choose "Approvers"
Value: You can add the name(s) of your approvers.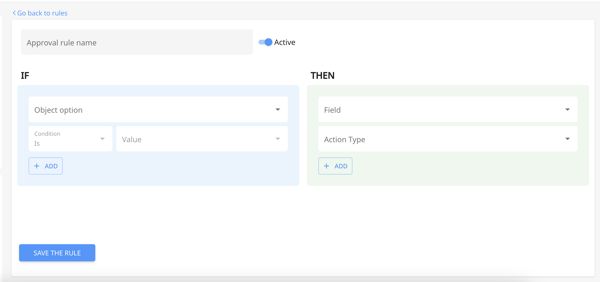
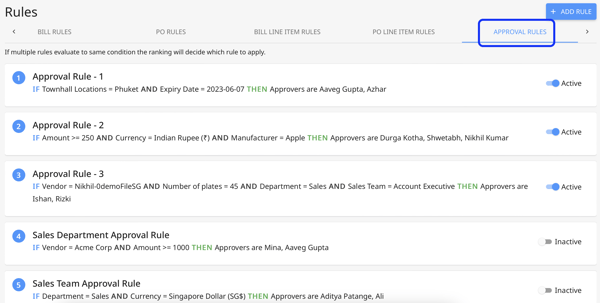
The approval rules work with a simple if x, then y logic.
For example, many companies would like to route the approvals to the right approvers based on department name and an amount bracket.
Simply put, IF the "Department Name" is "Finance" AND the "Amount" is greater than "50" THEN the "Approver" should be Chirashree, Aaveg, and Mina(Head of Finance).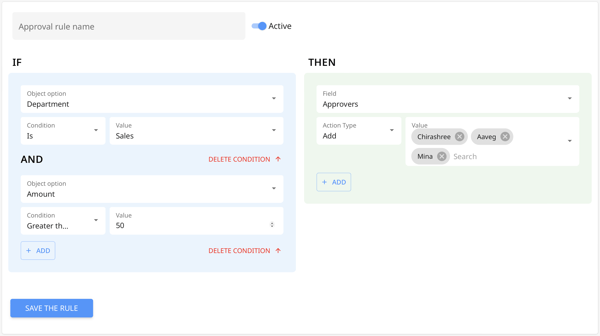
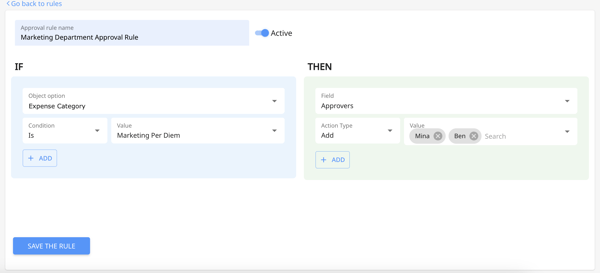
Another example is when you like to route the approvals to the right approvers based on expense categories.
Simply put, IF the "Expense Category" is "Marketing Per Diem" THEN the "Approvers" are Mina (Marketing Head) and Ben (Marketing Manager)
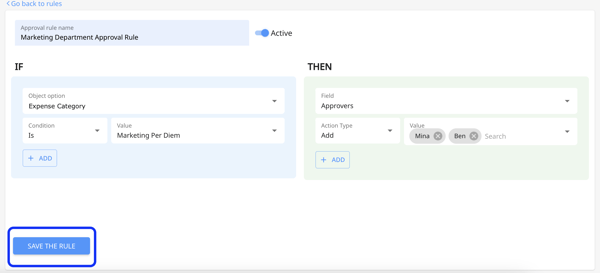
4. After you've defined the rule conditions, click on the "Save the rule" button.
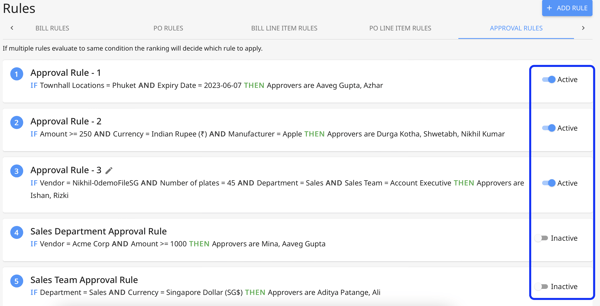
5. For deactivating an approval rule, all you need to do is click on the toggle on top of the screen. You can activate the approval rule at any time. 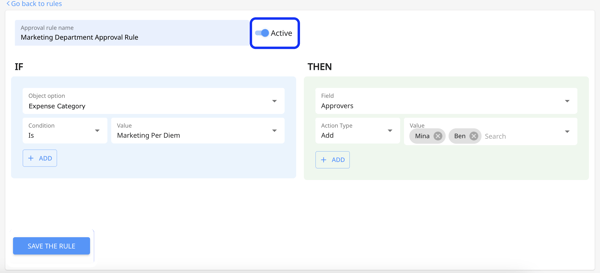
Activating/deactivating the approval rules is also possible from the "Approval Rule" View.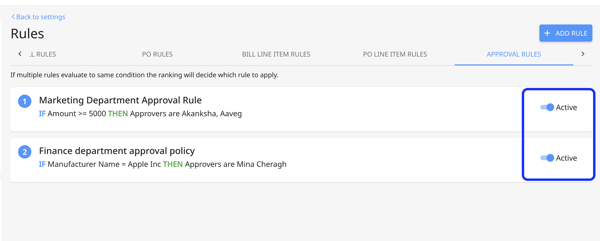
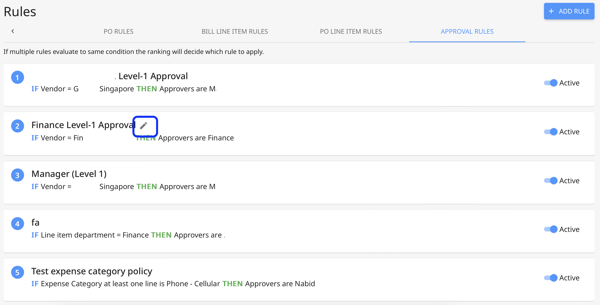
6. For editing an approval rule, hover over the rule and then a pencil icon will appear next to the rule's name. Click on the pencil and edit the rule. 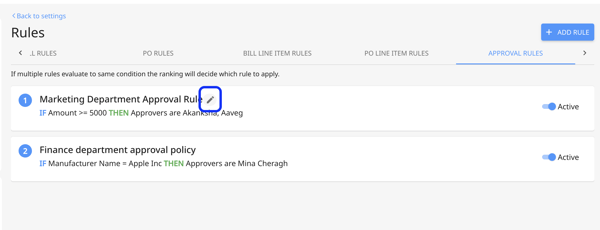
7. For adding an approval rule to an approval policy, check out the article: How to add travel and expense approval policies in Peakflo?
How to edit approval rules?
1. Go to "Settings" and click on "Rules" under the "General" settings.
2. Click on the Approval Rules tab.
3. Hover over an approval rule and you will see an edit icon. Click on the edit icon to modify the approval rule.
How to activate/ inactivate an approval rule?
1. Go to "Settings" and click on "Rules" under the "General" settings.
2. Click on the Approval Rules tab.
3. Click on the toggle to activate or inactivate an approval rule.