Only Admins can create and edit travel and expense approval policies.
How to set up approval policies?
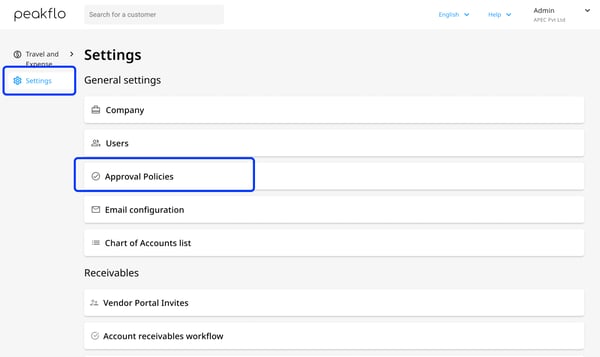
1. Log in as Admin and select Settings from the navigation bar. Then click on Approval Policies under General Settings.
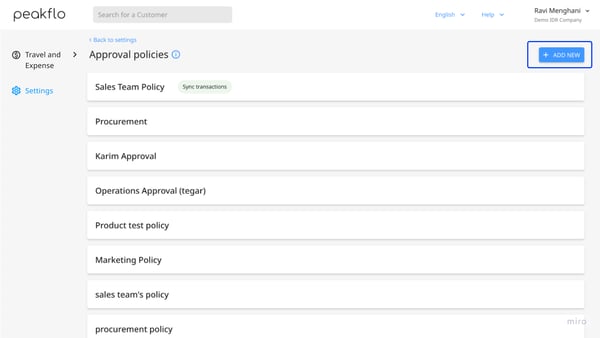
2. Click on the Add New button at the top right.
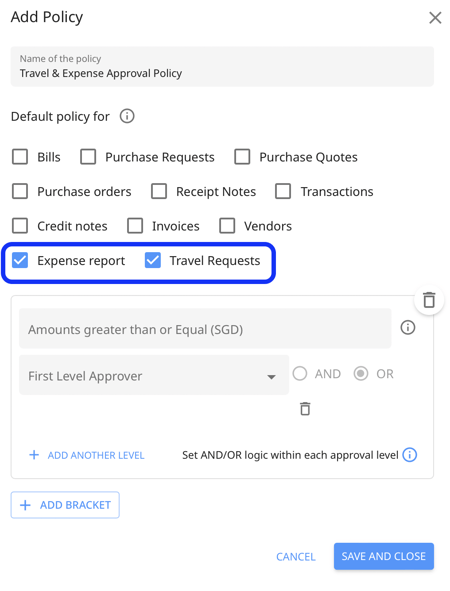
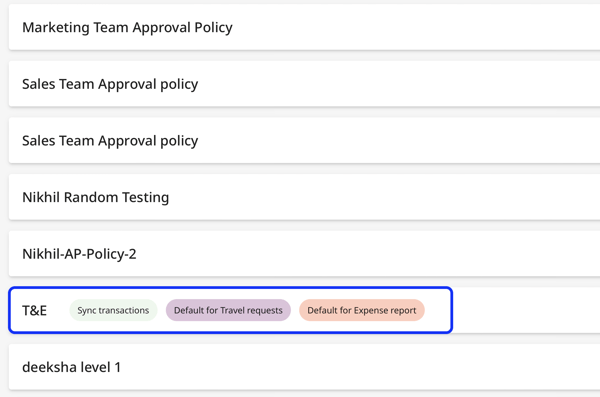
3. A pop-up will appear. Give a name to the policy.
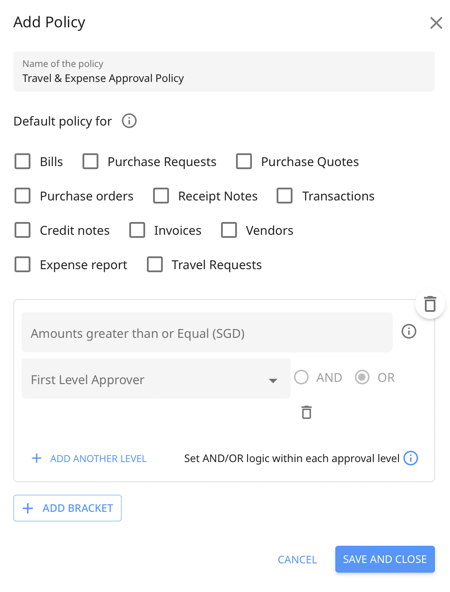
4. If you want the policy to be the default for Travel Request or Expense Report, check the adjacent box.
Making a policy default means that this specific policy will be automatically applied to all new travel requests or expense reports by default unless another policy is specifically selected.
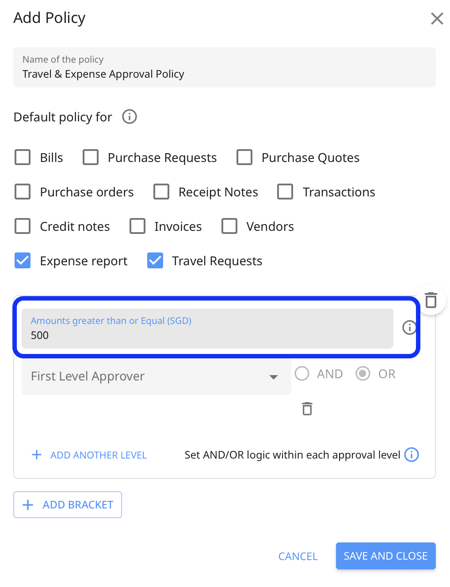
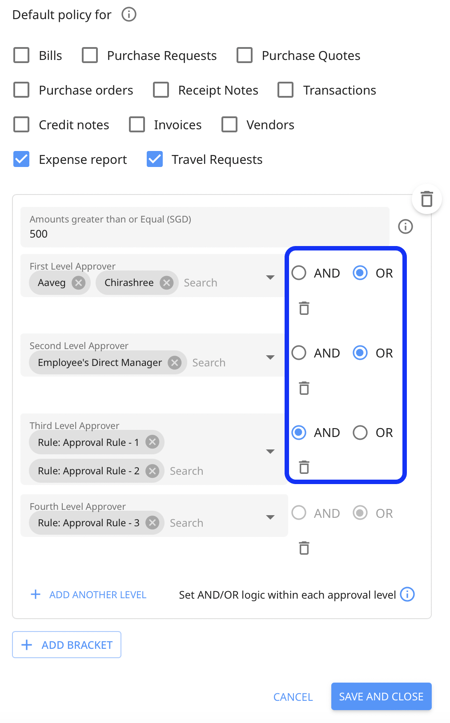
 5. Next, specify the Amount (greater than or equal to) that would go through the approval process. For example, you set a specific amount, such as $500, where any travel request or expense report exceeding this limit will require approval from the designated approvers.
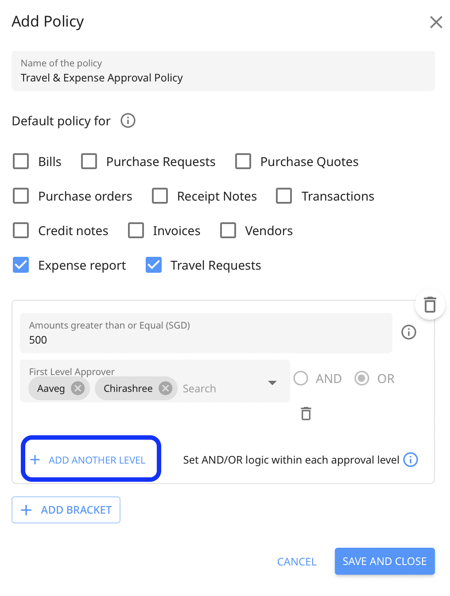
6. Next, you can add multiple levels of approvals and multiple approvers in each level too.
To add another approval level, click on the Add Another Level button.
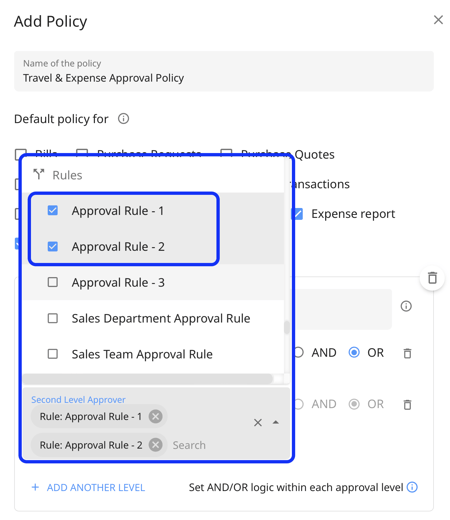
 7. The policy can be divided into multiple directions based on the approval matrix of your organization and attributes travel and expense objects. By adding multiple approval rules to an approval level, the approval policy will automatically branch off to route to the right approvers.
To add approval rules to the approval policy, search the rule name and click on it. You can add multiple rules to the level.
Tip:
To learn more about how to create approval rules check out the article: How to set up approval rules for travel and expense management in Peakflo?
8. You can set AND/OR logic within each approval level:
- AND: All approvers within the level must give their approval. This means that for a request to proceed to the next level of approval, every approver assigned to that specific level must provide their approval.
- OR: Any one of the approvers within the level can approve the request. This means that as soon as one approver gives their approval, the request can move forward to the next level without waiting for all approvers to respond.
TIP:
You can effortlessly add your manager as an approver by clicking on the approval level drop-down and selecting Employee's Direct Manager.
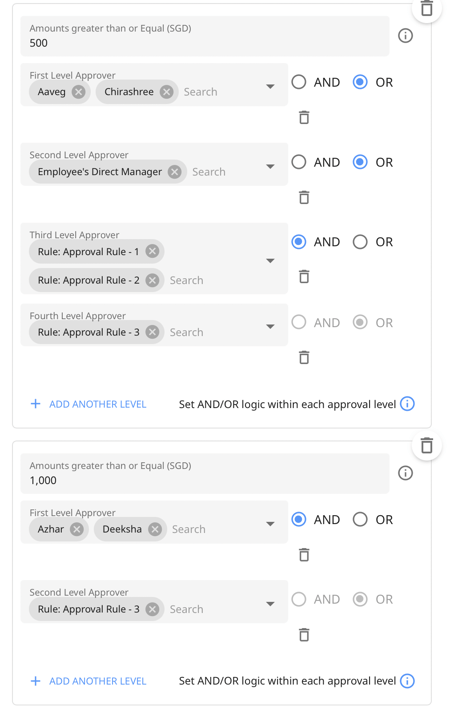
You can add unlimited Brackets and up to 10 levels of approver.
10. Click the Save and Close button to complete the process.
Related Artcle: How to set up travel and expense approval rules?
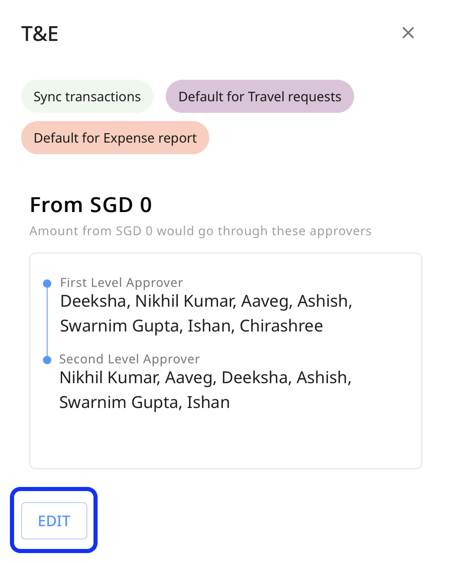
How to edit approval policies?
1. Log in as Admin and select Settings from the navigation bar. Then click on Approval Policies under General Settings.
2. Click on the approval policy you want to edit.
3. A pop-up will appear. Click on Edit to modify the approval policy.