- Invite Vendors to Sign Up in the Vendor Onboarding (Done by User)
- Sign Up and Submit Information in the Vendor Onboarding (Done by the Vendor)
Invite Vendors to Sign Up in the Vendor Onboarding
There are two ways to add or invite vendors to sign up in the Peakflo vendor onboarding:
1. Invite Vendors Manually
To invite vendors manually, follow these steps:
1. Go to the Vendors tab under the Payables section.
2. Select the vendors you want to send the invite.
3. Click on the Bulk Action button and then hit the Send Invite button..png?width=600&height=413&name=Vendors%20(2).png)
4. A pop-up will appear, asking you to confirm your action. Click on the Yes, Accept button to send the invite.
.png?width=600&height=413&name=Vendors%20(3).png)
If a vendor doesn't have at least one contact, you’ll see this error:
"The following vendors don't have contacts available. Please add at least one contact before sending the invitation."
Invitations will still be sent to vendors with at least one contact.
5. Your vendor will receive an email (like in the picture below) automatically informing them that they have been invited to the Vendor Onboarding. They will also receive another email with their login credentials.
2. Add a Sign-Up page
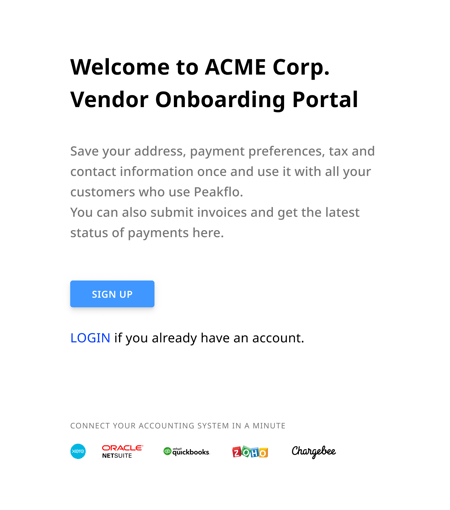
Alternatively, you can reach out to Peakflo's support team at support@peakflo.co and we will build a custom web page for Sign-Up (similar to the picture below) to streamline the vendor onboarding process and reduce the manual effort involved in onboarding vendors.
Sign Up in the Vendor Onboarding
Your vendors have to follow the steps mentioned below to sign up in vendor onboarding:
1. Your vendors will receive an email to sign up. They need to click on the Complete Onboarding button to proceed. 
Note:
Your vendors will receive a separate email with their login credentials.
2. Your vendors will be redirected to a login page, where they need to enter their login credentials to start the onboarding process.
3. Once logged in, your vendors will be redirected to the Vendor Onboarding Dashboard.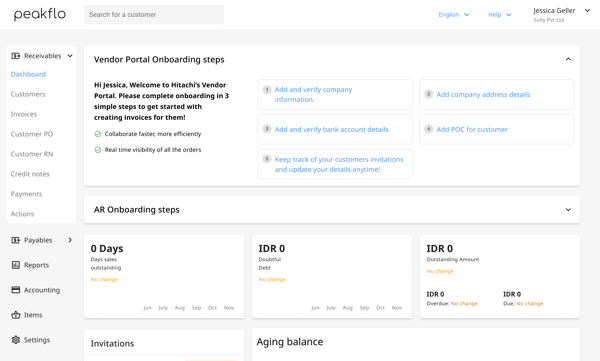
4. In the dashboard your vendors will see the Invitations section, with a tag Pending Verification. Your vendors need to click on the edit button to start the process of submitting their company and personal information..png?width=600&height=362&name=onboarding%20(1).png)
5. A pop-up window will appear with the first tab Info where your vendors can fill in their company information.
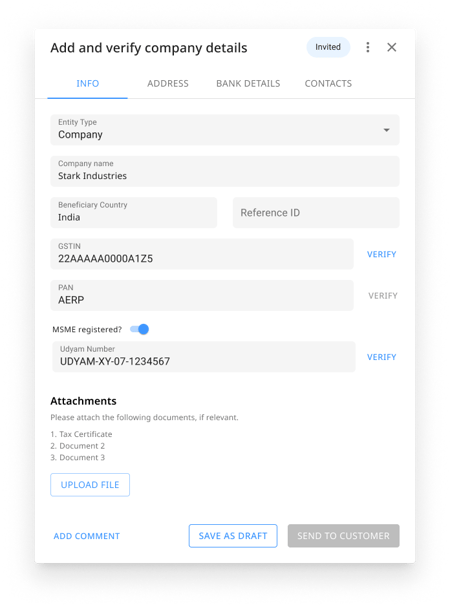 Here's a breakdown of the information your vendors will fill out in the Info tab:
Entity Type: Refers to the legal structure of the vendor's business, such as sole proprietorship, partnership, or corporation.
Company Name: The official name of the vendor's company or business.
Beneficiary Country: The country where the vendor is based or registered.
GSTIN: The vendor's Goods and Services Tax Identification Number.
The tax number field can be customized based on country.
For India: GSTIN
For Indonesia: NPWP
For Singapore: UEN
Reach out to support@peakflo.co to customize the field as per your requirement
PAN: The vendor's company PAN number.
MSME registered: If the vendor is registered under the MSME Act, they need to click the toggle button.
Udyam Number: The Udyam Registration Number that was issued to the vendor's company.
Attachments: Your vendor can upload supporting documents, such as business registration certificates, tax identification documents, and MSME registration certificates.
6. Once all the information is filled out, your vendors need to click on the Verify button to verify their GSTIN, PAN, and Udyam Number.
.png?width=450&height=605&name=info%20(1).png)
NOTE:
The GSTIN, PAN, and MSME validations are only available for entities in India.
Peakflo will start the verification process to check the validity of the information. If the data is accurate, a green tick will appear beside each field (like in the picture below). If the data is inaccurate, your vendor will have to re-enter the information and verify again.
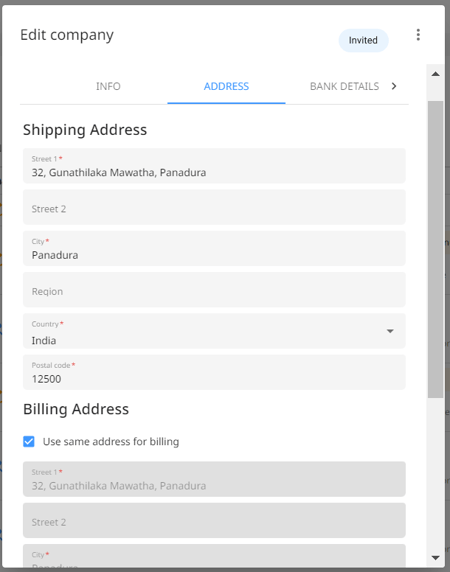
.png?width=450&height=605&name=info%20(2).png) 7. Now coming to the Address tab, your vendors can fill in their Shipping Address and Billing Address.
7. Now coming to the Address tab, your vendors can fill in their Shipping Address and Billing Address.
8. In the Bank Details tab, your vendors can fill out their bank information such as Account Number, Account Holder Name, Currency, Bank Country, Bank Name, Bank Code, and Bank Account Type.
Your vendors can add multiple bank accounts by clicking the Add Bank Account button. In such cases, your vendor will need to select a primary bank account by clicking the toggle button named Default.
.png?width=450&height=605&name=bank%20details%20(3).png) After entering all the details, your vendor needs to hit the Save button. Peakflo will validate the bank details using the penny drop process.
After entering all the details, your vendor needs to hit the Save button. Peakflo will validate the bank details using the penny drop process.
NOTE: The bank account validations are only available for entities in India.
9. In the Contacts tab, your vendors can fill out their personal information by clicking on the Add New button and edit their information by clicking the Edit button on the top right.
.png?width=450&height=605&name=filled%20contacts%20(3).png)
10. A window will appear for your vendors to fill in their personal details such as First name, Second name, E-mail, Mobile number, and Position.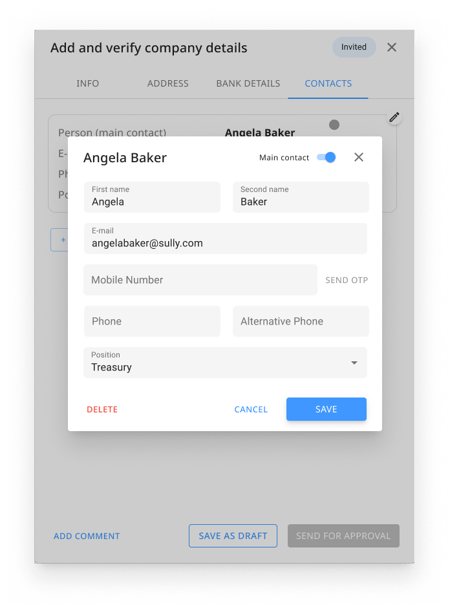
Note:
Multiple contacts can be added in the Contacts tab. In such cases, your vendor needs to mark one contact as the primary contact by clicking the Main Contact toggle on the upper right corner.
11. Once your vendors enter their mobile number and click on Send OTP, they will receive an OTP on the phone.
 12. Next, your vendors need to enter the OTP and click on the Verify button.
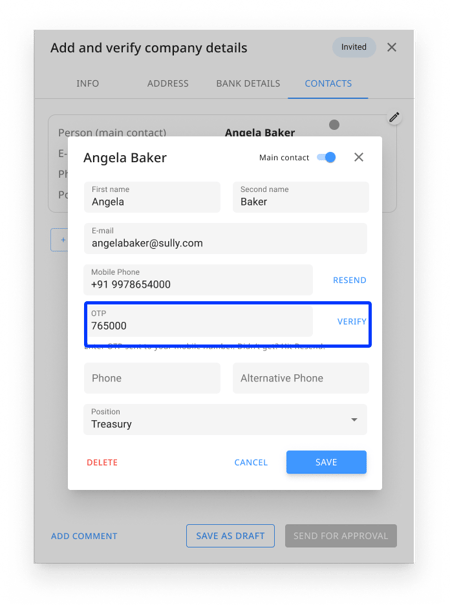
NOTE: The OTP verification is avaiable in all countries
13. Once your vendor's number is verified, a green tick will appear next to the mobile number field. Then they can hit the Save button to save their information.
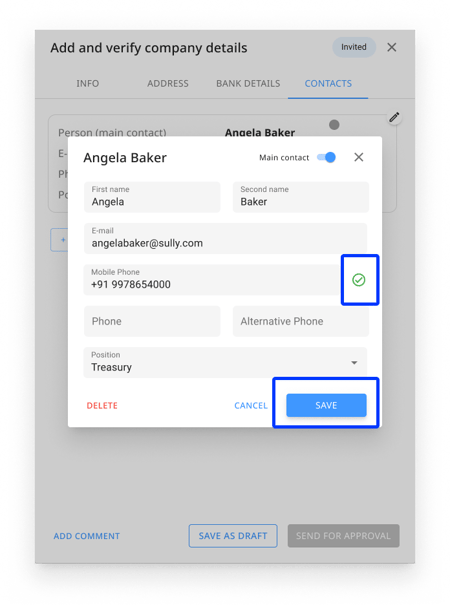 14. Once all the information is filled, your vendors can click on the Send to Customer button to submit their information and complete the sign-up process.
.png?width=450&height=605&name=filled%20contacts%20(4).png)
FAQ
Q: How can vendors add and verify their information?
A: When your vendors are filling out the information, the PAN, GSTIN, Bank details, and Udyum number are auto-verified. To verify their mobile number, the vendor needs to enter the OTP that was sent to their personal number and click on Verify in the interface.
Q: How will I know if my vendor submitted the correct bank details?
A: If the bank details provided by the vendor are verified and accurate, the pop-up window will look like the image below.
.png?width=450&height=605&name=bank%20details%20(2).png)
If the bank details provided by the vendor are inaccurate the text "Bank account verification failed" will appear. In such cases, the pop-up window will look like the image below.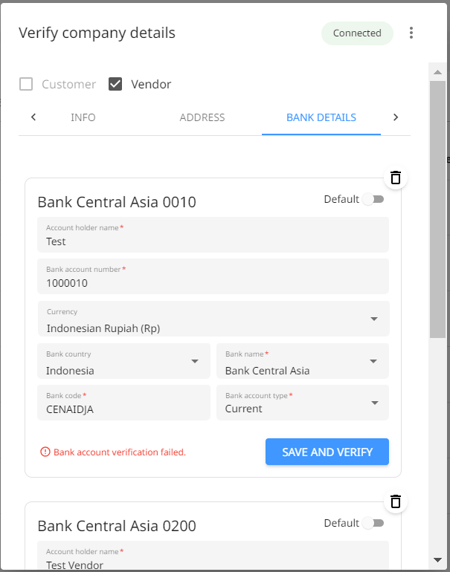
Ask the vendor to re-submit their bank details correctly and Peakflo will automatically verify the details. To get a detailed step-by-step process to verify vendor bank account details, check out this article: How to verify vendor bank account numbers?