
Uploading your customer contact details is the 2nd step for manually importing your customer data into Peakflo. This step assists in capturing essential information of your customers uploaded to your Peakflo account in the previous step. Now let's get started.
Now let's start filling the fields in the sheet.
Remember that we should only fill in the details of the customer names uploaded in the previous step.
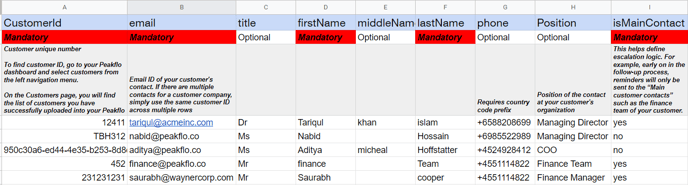
- Customer Id (mandatory): Copy and paste the same customer ID you used when uploading customer names.
* To find the "Customer ID", check out this link.
On the Customers page, you will find the list of customers you have successfully uploaded to your Peakflo account. You can see the customer ID assigned to them below their name.

- Decide which company's contact details you'd like to upload and enter their customer ID in the spreadsheet.
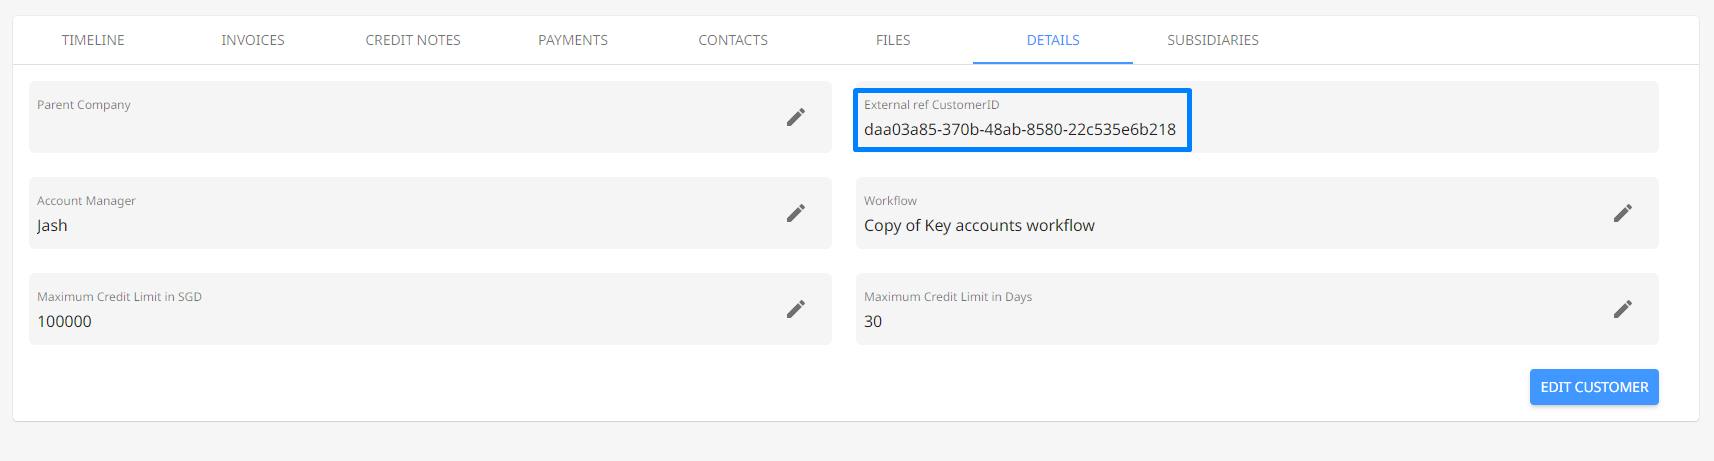
- Select the customer and go to the 'Details' tab to view the long customer IDs. Here you can find the customer ID in the 'External ref Customer ID field'.
- Email (Mandatory): Enter the email address of the customer contact.
- Title (Optional): Dr./Mr./Ms.
- First Name (Mandatory): First name of the customer contact.
- Middle Name (Optional): Middle name of the customer contact.
- Last Name (Mandatory): Last name of the customer contact.
- Phone (Optional): Phone numbers require a country code prefix. For example, if your country code is +1, add it before your phone number (+16175551212).
- Position (Optional): Position held by the contact at your customer's organization. If you wish to fill out this field, please keep in mind that you can only add the positions mentioned below:
[Unknown, Sales, Accounting, Management] - is Main Contact (Mandatory): This field helps define escalation logic. For example, early on in the follow-up process, reminders will only be sent to the “Main customer contacts” such as the finance team of your customer. However, later in the follow-up process, reminders can go to all customer contacts, i.e. senior members in your customer’s organization, eg: Managing Director, CEO, COO etc. If you want the customer contact to be a part of the early follow-up process, mark it as ‘yes’.If your customer has only 1 contact, then mark 'yes' for isMainContact
Here are some other field suggestions that you can add to the spreadsheet
- ContactId (optional): A unique contact reference that should be used if contact is imported again in the future. It should be unique number
- altPhone (Optional) or mobilePhone (optional) : Phone numbers require country code prefix. For example, if your country code is +1, add it before your phone number (+16175551212)
- description (Optional): Any other notes about the contact
Once you've captured all the details, this is how the spreadsheet will look like:
Before uploading the spreadsheet, don't forget to delete the 'mandatory' and the 'field description' columns.Your spreadsheet should look like this before it's ready to upload.

Next, go to Settings -> Mass Upload Customer Contacts and click 'Mass Upload Customer Contacts' button to upload your spreadsheet.
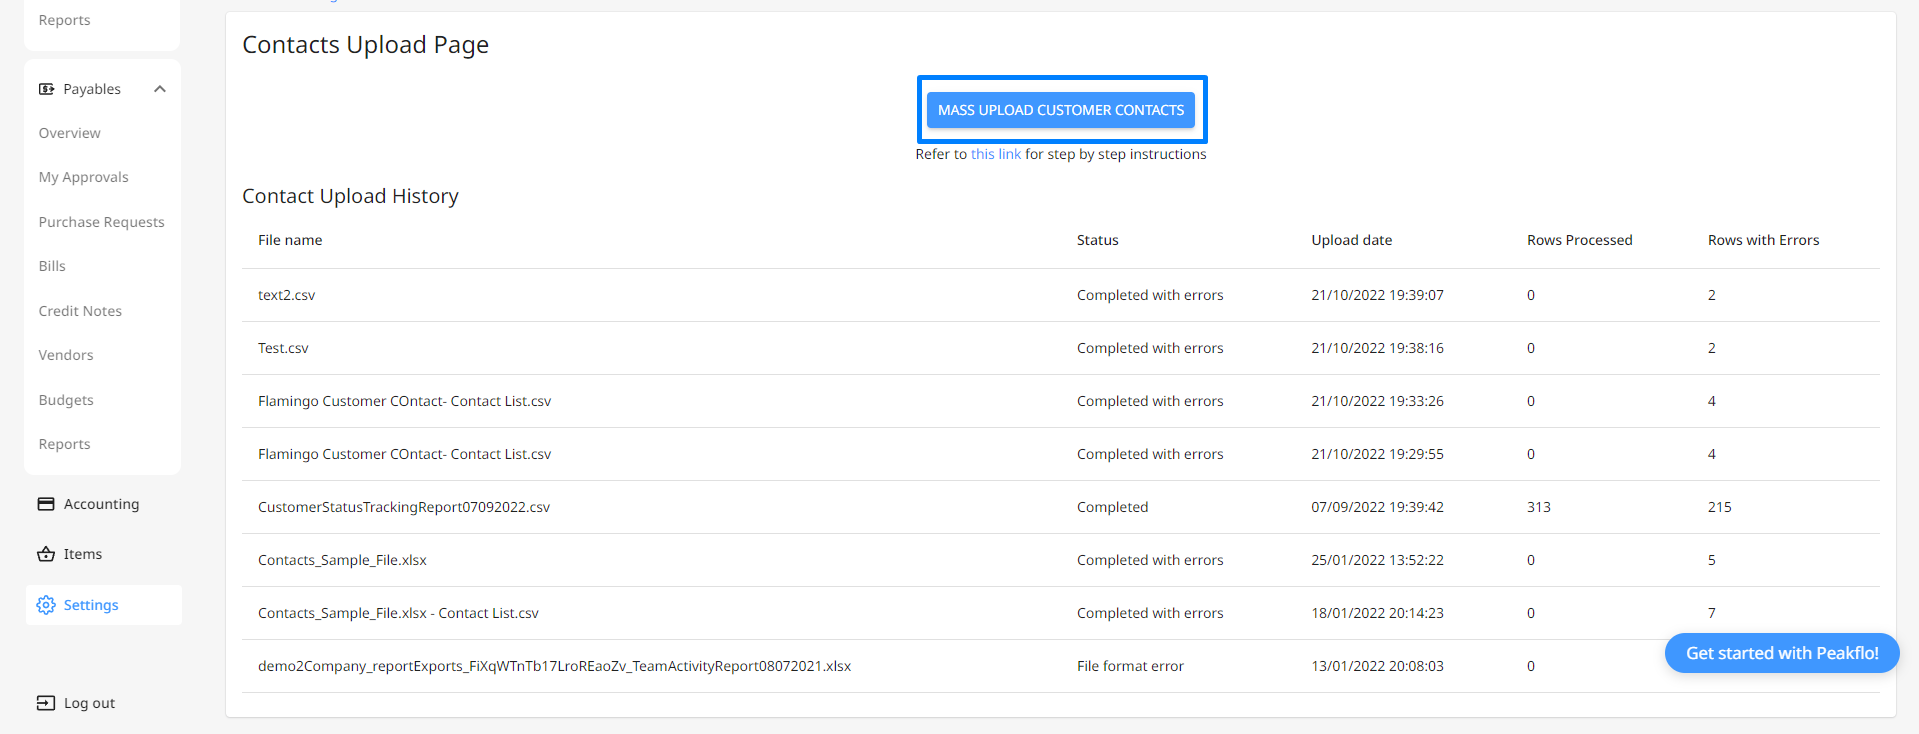
If the status is marked as 'Completed', the customer contact details are successfully uploaded.

If the status is displayed as ‘Completed with errors’, click on the line item to view the list of errors.
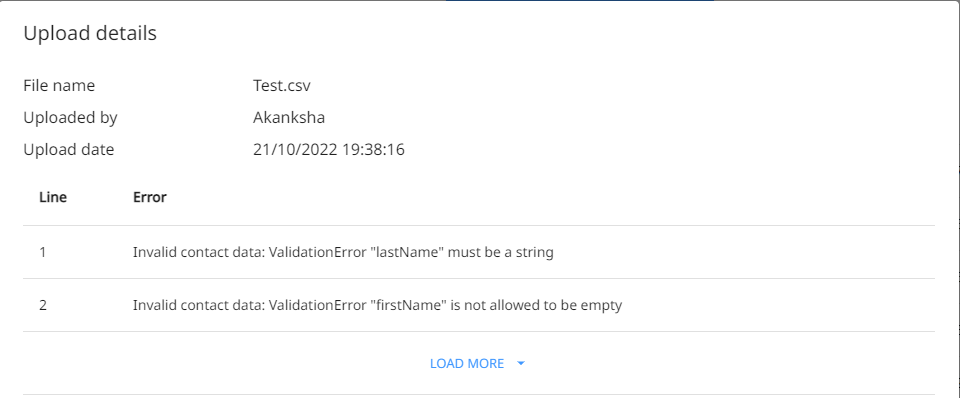
In the 'Upload details' box, you will come across the list of errors and their line numbers to quickly identify them on the spreadsheet.
One of the common errors that you could encounter is 'company not found' - It means the customer ID entered is invalid. So please check and enter the correct customer ID. The steps to find the customer ID is mentioned above.