
You can upload your customer names and add custom fields too in Peakflo by following this article steps.
Before getting started, ensure you've invited your team members and assigned them admin or account manager roles. Check out this article to learn how to add users: How to invite users and assign roles in Peakflo?
Table of Content
Add Custom Fields for Customers
- Go to "Settings" and click on "Custom Fields" under general settings.

- Click the blue "Add New" button at the top right.
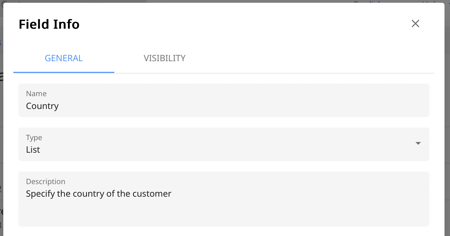
- Once a popup appears, fill out the following fields:
Name: The name of the custom field or the detail you'd like to add when managing customers. It could be "Beneficiary country", "reference number", and so on.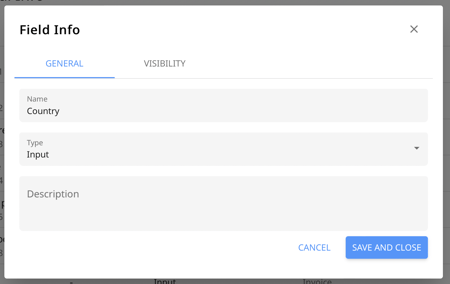
Type: Set how the data should be filled by your internal teams, such as in the form of input, number, list, multi-list, multi file, or date.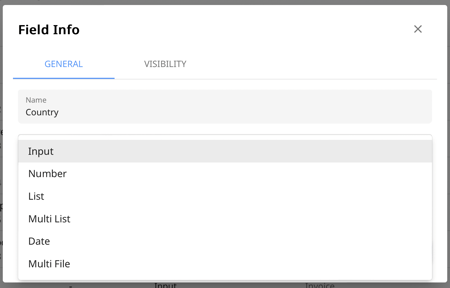
The difference between a list and a multi-list is that for lists, only one item from the list of items can be chosen whereas for a multi-list more than one item from the list can be chosen.
If you select the Multi File input field, it will give you the option to upload multiple attachments.
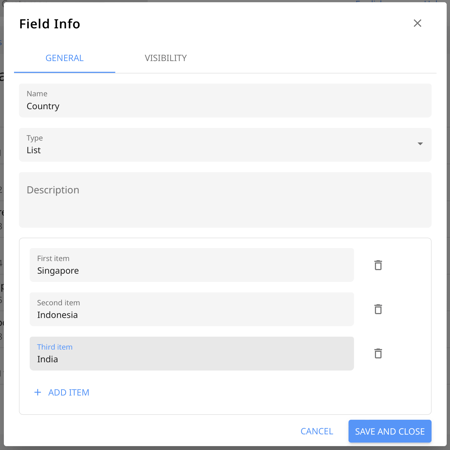
For example, if it's a list or a multi-list, you'll need to provide the first, second, third item, or more. - Click on the Add Item button to add more items.
- Description: Describe the purpose of the custom field to help your internal teams understand how to fill it out.
- Now click on the Visibility tab and tick where you'd like the custom fields to appear for invoices.
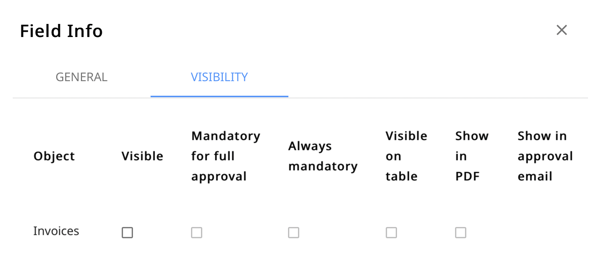
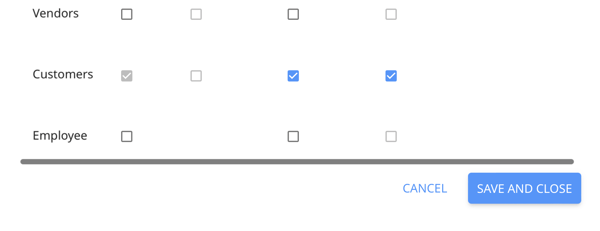
- Visible: Visible as a field in the edit form
- Always Mandatory: Mandatory to fill out in edit form
- Visible on table: only visible in the table view in the Customers tab.
Similarly you can create multiple custom fields at customer level.
Follow these steps if you have fewer customer names to upload
In case you don't currently use any accounting software and want to add your customers to Peakflo one by one, you can upload their data in a few simple steps. We suggest this option for users who wish to start using Peakflo with fewer customers.
1. Go to Customers under Accounts Receivable and click Add New.
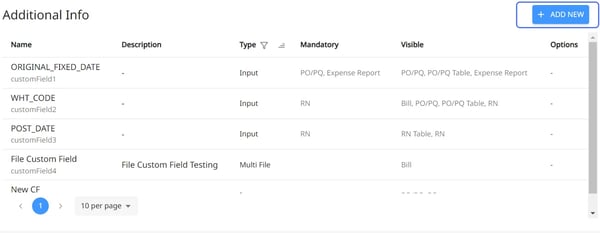
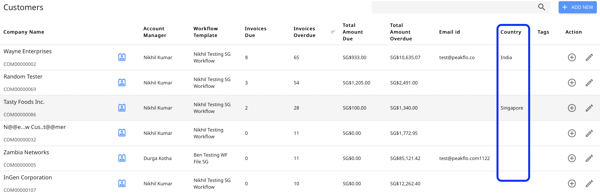
In the table view, you can see that the custom field is now visisble.
2. In the Add customer box info tab, enter your customer's info details.
You will also see the custom field you added in the Additional Info section.

Important Note:
Since you’re the first member of your team to sign up, you will be assigned as the account manager by default to this customer.
Workflows help streamline your entire accounts receivable process by eliminating mundane tasks, triggering personalized, multi-channel reminders, and keeping all stakeholders aligned.
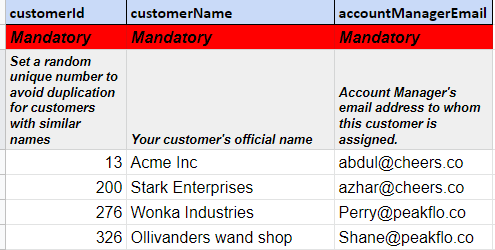
The customer ID can be a number you've already set in place for them in your system, or it can be a new number. The customer ID helps avoid creating duplicate customer entries with similar names.
To find the Customer ID, check out this link.
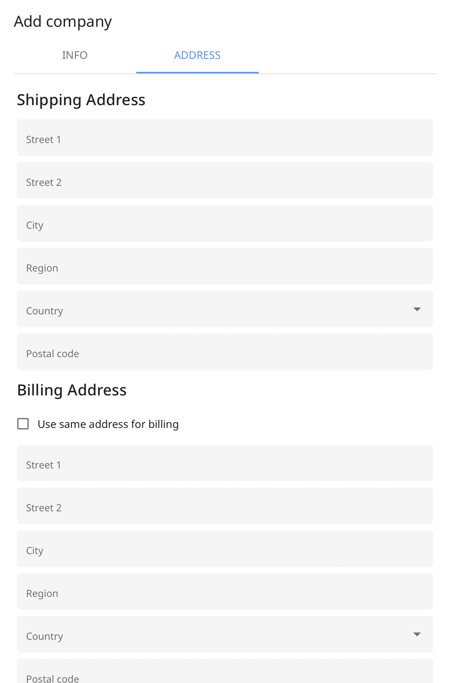
3. Once you’ve entered the customer info details, please move to the Address tab, enter their address details, and click Save.
Follow these steps if you have a high volume of customer names to upload
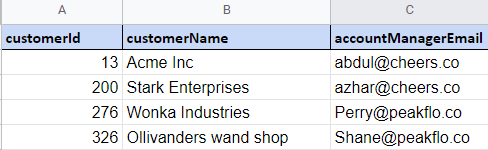
1. Download a copy of the customer upload template in .XLSX or .CSV format and fill in the details required.
IMPORTANT NOTE:
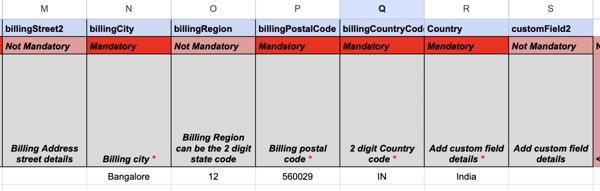
In case you've added details for the street1 field, all fields including those marked as Not Mandatory will become Mandatory.
2. Add the details of the custome fields too.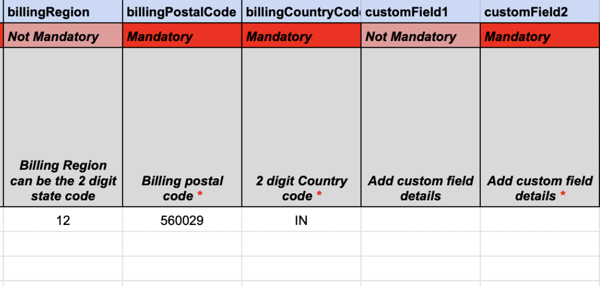
Important Note:
For the custom field header, keep the exact same name as you used to create the custom field.
For instance, as per the example above, the custom field name is "Country". So, in the spreadsheet the row header will be "Country".
2. Once you've entered all the details, delete the mandatory and the field description column. Your spreadsheet should be like this.
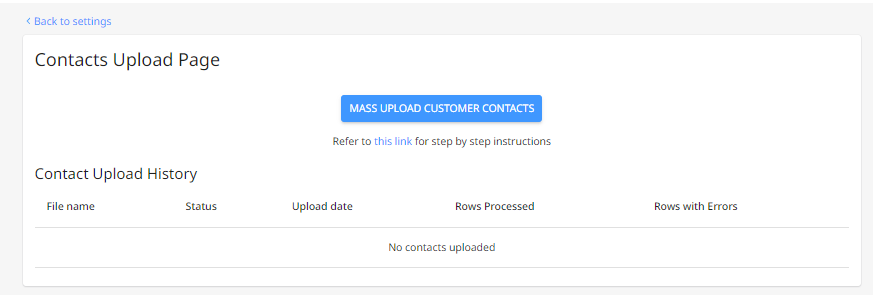
3. Next, go to Settings -> Upload Customer Contacts and click Mass Upload Customer Contacts to upload your spreadsheet.
4. After uploading the customer file, if the status is displayed as Completed with errors, click on the line item to view the list of errors.

5. In the Upload details box, you will come across the list of errors and their line numbers for easy identification of the spreadsheet.
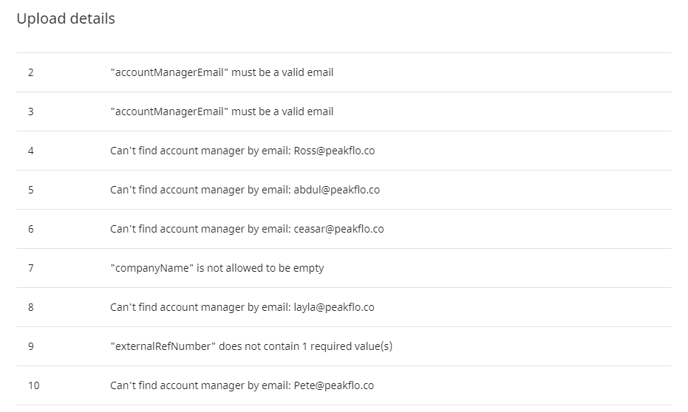
Some of the common errors that you could come across are
- If the error message is must be a valid email - Check if the entered email address has any typographical errors. This error can also show up if you didn't delete the mandatory and field description row.
- If the error message is Can't find account manager by email - Ensure the account manager's email ID is added to your Peakflo account as a user.
- If the error message is not allow to be empty or does not contain required value(s) - Check if you've left any fields empty under the mandatory columns
6. Once you’ve fixed the errors, re-name and re-upload the file to complete a successful customer file upload which will be marked with the status Completed.