Table of Content
1. View Vendors
2. View and Verify Vendor Details
3. Invite a Vendor
4. Revoke the Invitation Sent to the Vendor
5. Perform Bulk Action
View Vendors
Go to the "Vendors" tab under the "Payables" section.
Here you will see all the vendors and their details.
Listed below is the function of the different tabs:
Active Vendors: In the Active Vendors tab, you can view all the currently active vendors in the system.
Inactive Vendors: Here you will find the vendors you have achieved, the ones whose invitation has been revoked, or the vendors who have declined your invitation.
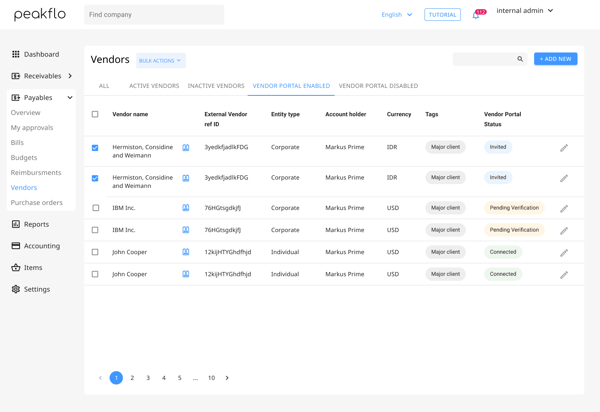
Vendor Portal Enabled: When you have the Vendor Portal with Peakflo, here you will find the active vendors for whom you have enabled the vendor portal.
Vendor Portal Disabled: When you have the Vendor Portal with Peakflo, here you will find the active vendors for whom you have disabled the vendor portal.
View and Verify Vendor Details
- Go to the "Vendors" tab under the "Payables" section.
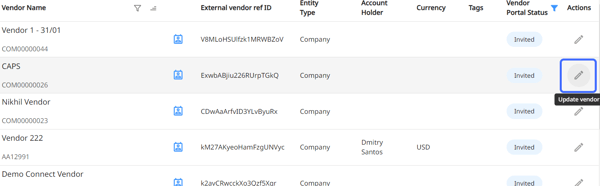
- Locate the vendor for whom you want to verify the details and click on the Edit button.
- A pop-up will appear with all the vendor details.
- In the Info tab, view all the details of the vendor's company. You can see the green tick that represents verification if the vendor information has been verified.
.png?width=450&height=1093&name=AP%20side%20vendor%20form%20(1).png)
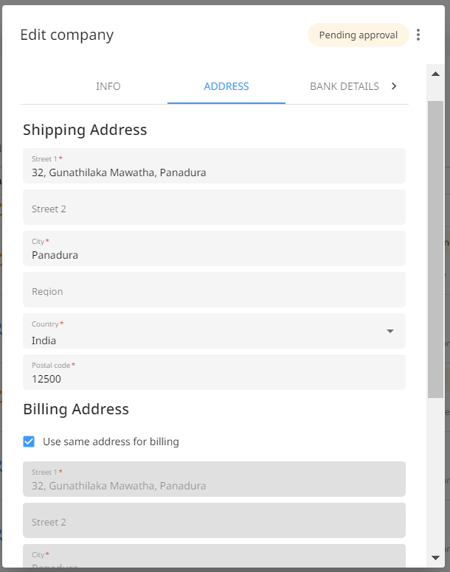
- In the Address tab, view the vendor's company address as well as the billing address.
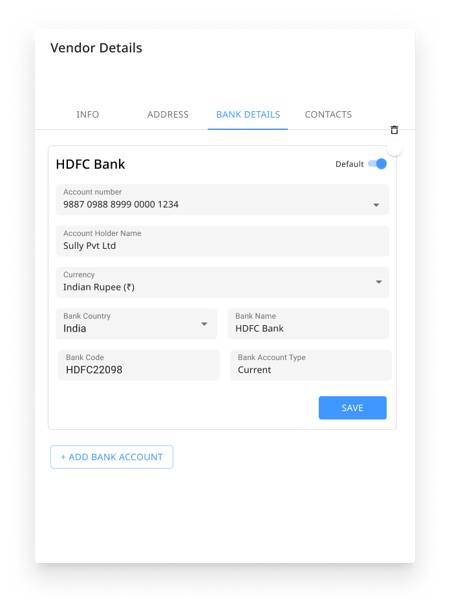
- In the Bank Details tab, view and verify the bank details the vendor provided.
- When the vendor information is accurate and verified, the pop-up window will look like the image below.
- If the vendor's bank details are invalid, the system will show a message: Bank account verification failed. In such cases, the pop-up window will look like the image below.

You will need to ask your vendor to fill in the correct information again in the Vendor Onboarding.
- When the vendor information is accurate and verified, the pop-up window will look like the image below.
- In the Contacts tab, you can view the contacts associated with the vendor's company. Also, you will be able to view the email, phone number, and designation of each contact.
.png?width=450&height=414&name=filled%20contacts%20(1).png)
- In the Info tab, view all the details of the vendor's company. You can see the green tick that represents verification if the vendor information has been verified.
- Click on Accept to approve the vendor details or Decline to reject after reviewing all the information.
NOTE:
The GSTIN, PAN, MSME, and bank account validations are only available for entities in India. The OTP verification is available in all countries.
Invite a Vendor
To invite a vendor, follow the steps below:
- Go to the Vendors tab under the Payables section.
- Select the vendors you want to send the invite.
- Click on the Bulk Action button and then hit the Send Invite button.
.png?width=600&height=413&name=Vendors%20(2).png)
- A pop-up will appear, asking you to confirm your action. Click on the Yes, Accept button to send the invite.
.png?width=600&height=413&name=Vendors%20(3).png)
Note: If a vendor has no contacts, you’ll see this error:
"The following vendors don't have contacts available. Please add at least one contact before sending the invitation."
Invitations will still be sent to vendors with at least one contact.
The vendor will receive an email automatically informing them that they have been invited to the Vendor Onboarding.
If you have WhatsApp Business enabled for Vendor Portal, then all the vendor contacts will receive an onboarding message via your WhatsApp Business Number.

Learn more about the functionalities of WhatsApp Vendor Portal here.
Revoke the Invitation Sent to the Vendor
To revoke the invitation sent to the vendors, follow the below-mentioned steps:
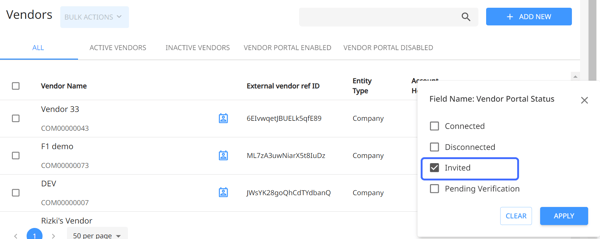
- Go to the Vendors tab under the Payables section.
- Click the filter button beside Vendor Portal Status.

- A pop-up will appear, tick the button adjacent to Invited and hit Apply.
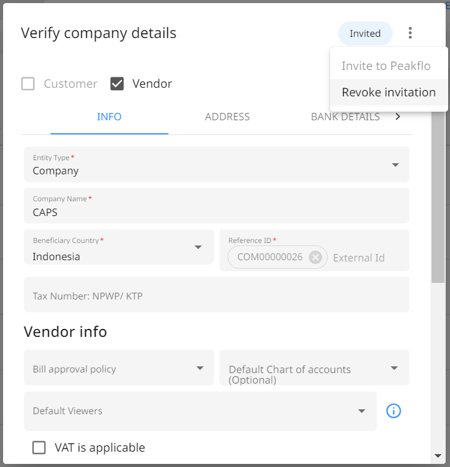
- Locate the vendor for whom you want to revoke the invite and click on the Edit button.
- Click on the three dots in the top right corner and hit Revoke Invitation.
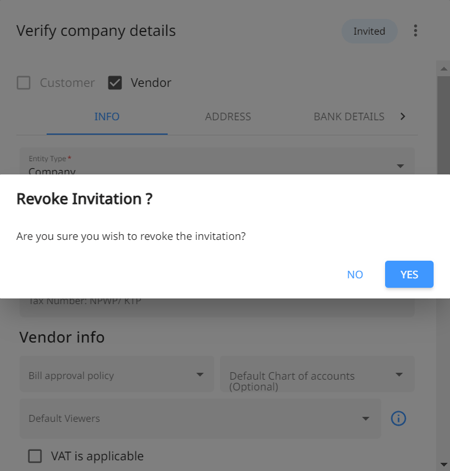
- A dialogue box will appear, confirming whether you want to revoke the invite for the vendor. Click Yes to complete the process of revoking a vendor.
The vendor will receive an email notification automatically informing them that the invitation has been revoked.
Alternatively, you can perform this action for multiple vendors at once. Follow the steps mentioned below:
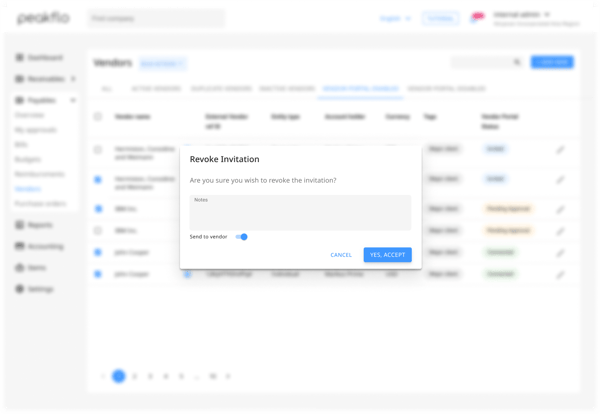
- Go to the Vendors tab under the Payables section.
- Select the vendors you want to revoke the invite.
- Click on the Bulk Action button and then hit the Revoke button.
.png?width=600&height=413&name=Vendors%20(1).png)
- A pop-up will appear, asking you to confirm your action. Click on the Yes, Accept button to revoke the invite.
The vendor will receive an email notification automatically informing them that the invitation has been revoked.
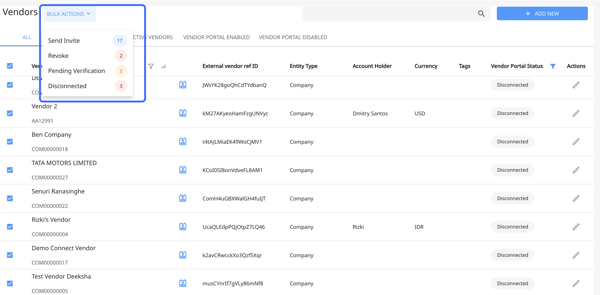
Perform Bulk Action
To perform bulk actions, select all the Vendors you want to perform the bulk actions and then click on the Bulk Action button. You can send invites to vendors, revoke invites, view pending verifications, and disconnect vendors in bulk.