How to make attachment mandatory for vendor invoices?
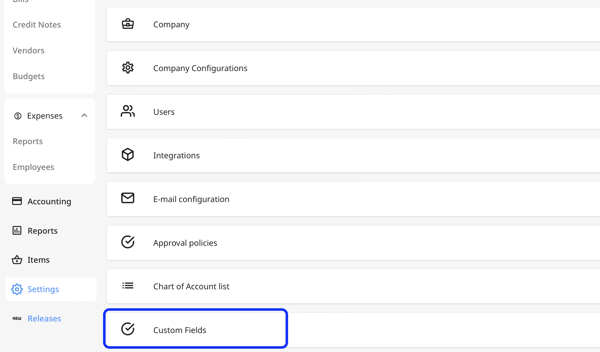
- Go to "Settings" ⚙️ and click on "Custom Fields" under general settings.

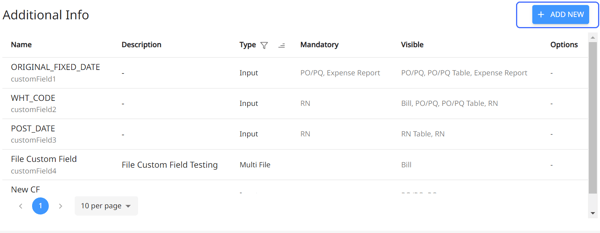
- Click the blue "Add New" button at the top right.

- Once a popup appears, fill out the following fields:
Name: The name of the custom field or the detail you'd like to add when managing vendor invoices.
Type: Set the type to multi-file. Multi-file are custom field for adding one or more than one file with specific categorizations as attachment.
- Now click on the Visibility tab and tick where you'd like the custom fields to appear in vendor invoices with the following configurations:

- Visible: visible as a field in the edit form
- Mandatory on approval: mandatory to fill for full approval
5. Hit "Save". Now vendor invoices will have the mandatory supporting documents without which the invoice approval will remain incomplete.

"Upload an invoice" is always a mandatory attachment for the invoice. Without it, the invoice cannot proceed for approval.
This ensures that invoices being synced as bills have the correct invoice PDF file attached throughout the invoice-to-bill sync process.
📘Read More
Want to explore more about custom fields? Check out how: What are custom fields and how to add them?
6. After the invoice is approved, the mandatory and non-mandatory attachments will be shown in the vendor invoice Timeline.

7. The same will also be reflected in your Bill Timeline.

FAQ
Q: Can vendors attach additional files after the vendor invoice is synced to the bill?
Yes, vendors can attach additional files after their invoice is synced to the bill in Peakflo. Any newly added attachments will automatically get added to the bill for seamless documentation management. You will be able to monitor these updates via Bill Timeline.
