- Help Center
- Accounts Payable
- Vendors
-
New to Peakflo?
-
Accounts Payable
- Getting Started
- Rules
- Approval Workflow
- Custom Fields
- Vendors
- Purchase Requests
- Purchase Quotes
- Purchase Orders
- OCR
- Bill Management
- My Approvals
- Goods Receipt Notes & Service Receipt Notess
- Budget
- Reconciliation
- Reports
- Wallet & Transactions
- Payments
- Vendor Onboarding Management
- Vendor Portal
- WhatsApp Vendor Portal
- Three-way Matching
-
Accounts Receivable
-
Integrations Page
-
Travel & Expense Management
-
Payment Automation
-
Legal Notes
-
Latest Releases
-
Invoice Management
-
Reports
-
General Questions
-
Offboarding
-
Vendor Portal
-
Peakflo Ticket Portal
How to add custom fields on the vendor form?
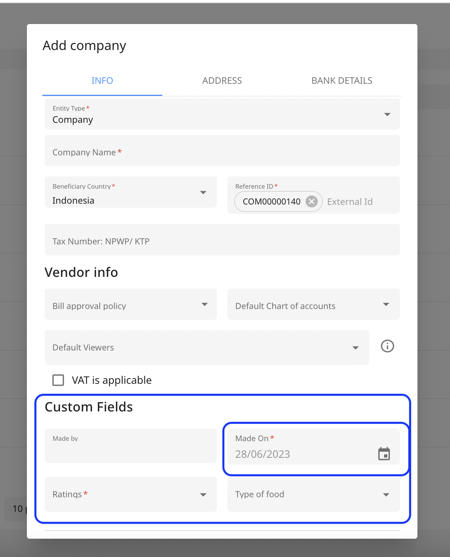
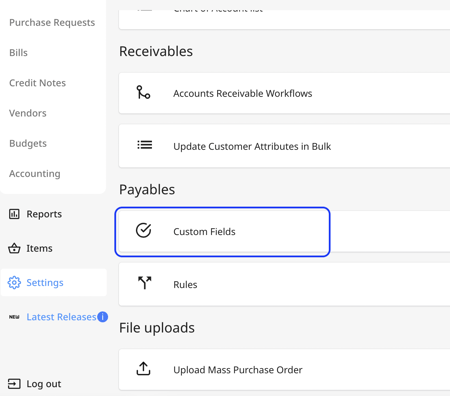
If you need to include specific information about your vendors and the built-in vendor details is not supporting your requirement, you can always add more details to the vendor detail form using custom fields. In this article, we will walk you through the steps of how you can do that:1. Go to "Settings" and click on "Custom Fields" under the "Payables" section.
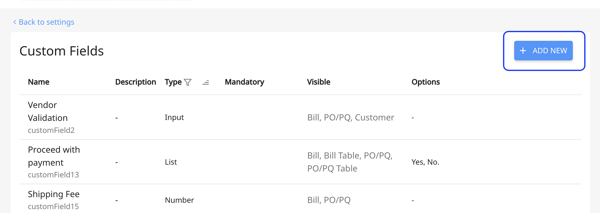
2. Then click on "Add New" to define a new custom field. You can also edit an existing custom field by clicking on it.
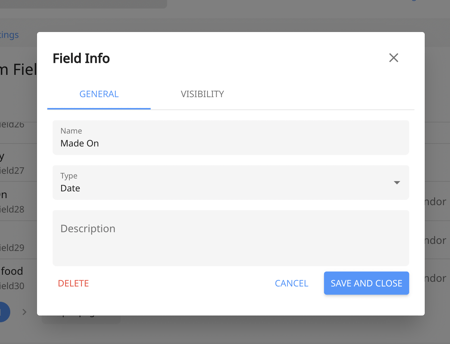
3. Add the details of the custom field in the "General" tab
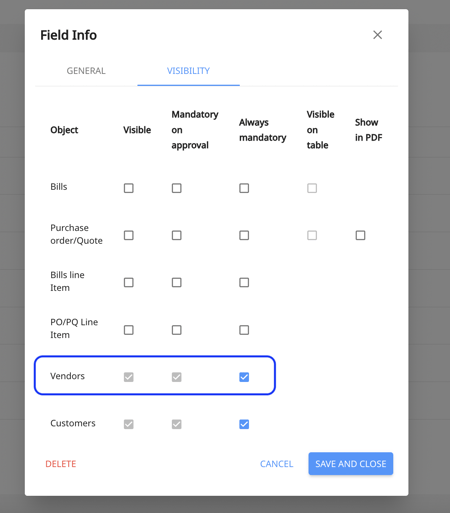
4. Then go to the "Visibility" tab of the custom field module and tick the items the custom field needs to have. Then click on "Save".
Visible: The custom field will be visible on the vendor edit form.
Mandatory on approval: the custom field will become a mandatory field for approvals
Always mandatory: the field is always mandatory to fill.
5. Go to the "Vendor" tab under the "Payables" section. You can either add a new vendor or edit an existing one from this tab.
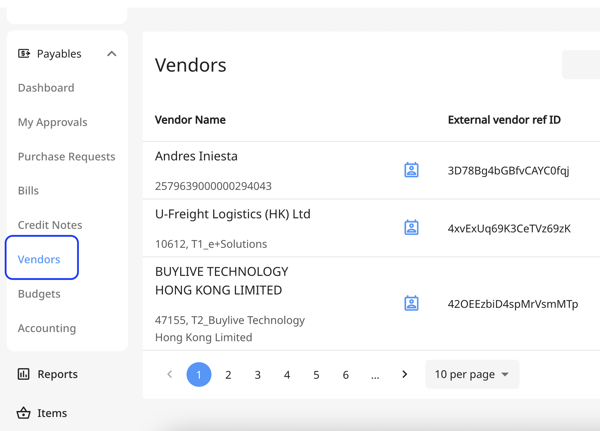
6. In the vendor form, you can find the newly added custom field under the "custom field" section.