Table of Contents:
How to Install 20X?
For Mac Users:
1. Go to github.com/peakflo/20x/releases and click on the latest release .dmg file to download.
2. Open the .dmg file on your desktop.
If you are a Mac user, then drag the 20X icon to your "Application" folder to install. Check the video below for reference:
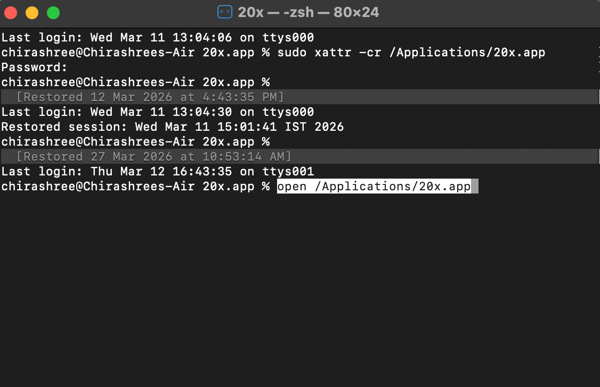
3. Next, open "Terminal" on your desktop.

And run the commands:
-
Run:
sudo xattr -cr /Applications/20x.app -
Enter your system Password.
-
Run:
open /Applications/20x.app
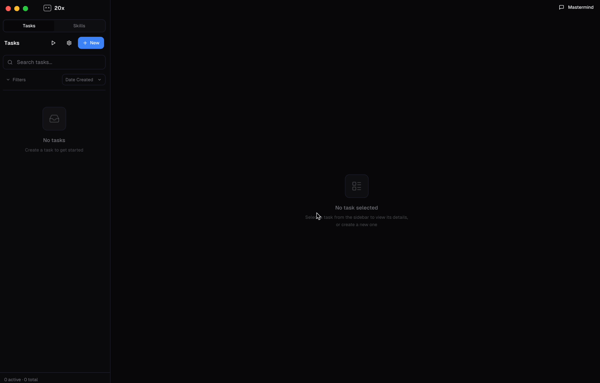
4. Now, you will be able to see the Peakflo 20X application.
For Windows Users:
1. Go to github.com/peakflo/20x/releases and click on the latest release .exe file to download.
2. Open the downloaded setup and follow on screen guide.
-Apr-08-2026-04-01-57-6409-AM.png?width=600&height=466&name=image%20(1)-Apr-08-2026-04-01-57-6409-AM.png)
3. Select installation folder.
-Apr-08-2026-04-01-57-6409-AM.png?width=600&height=467&name=image%20(2)-Apr-08-2026-04-01-57-6409-AM.png)
4. Select the checkbox "Run 20x", and then click on "Finish."
-4.png?width=600&height=466&name=image%20(3)-4.png)
5. Install dependencies and tools using the in-app setup.
-2.png?width=600&height=619&name=image%20(4)-2.png)
How to Set Up 20X?
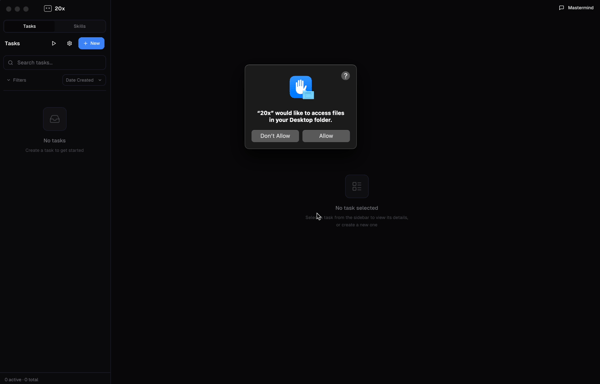
1. After opening 20X, the application will ask for certain permissions, such as access to your files and folders. Click "Allow" to continue.
2. Next, you will be able to see set up steps:
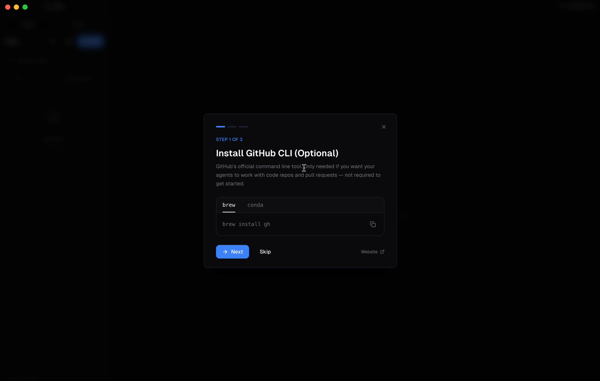
a. Install Git: If you are a developer and want to connect to git repository, copy the code and run it in your Terminal to install git. This is an optional step, so you can skip it.
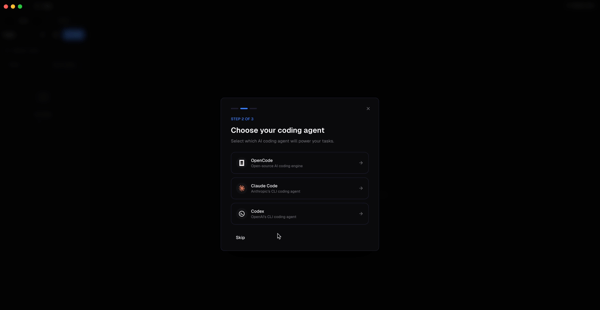
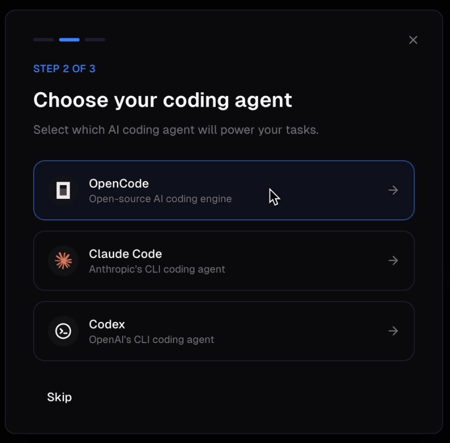
b. Add coding agent: Choose from a list of coding agent. This is a critical step as coding agents are the brain behind all your task execution. You can add multiple agents and edit them in Settings as well.
How to install a coding agent?
1. Choose a coding agent, for example, Open Code.
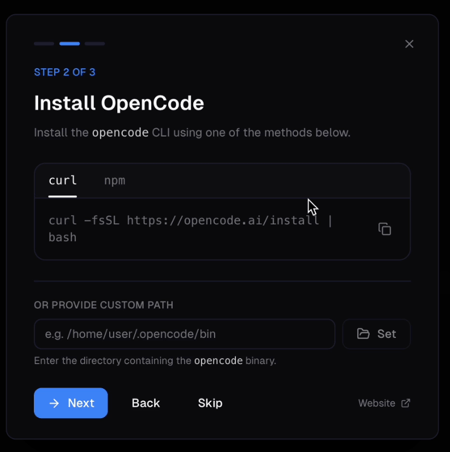
2. Follow the steps mentioned in the pop-up box to intsall the agent. Once installed, click on "Next."
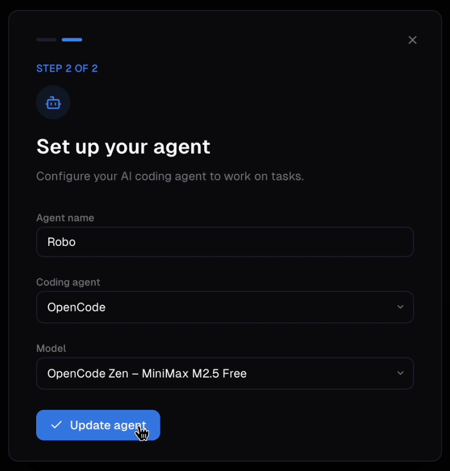
3. Name your agent and select the agent model. Then click on "Update agent."
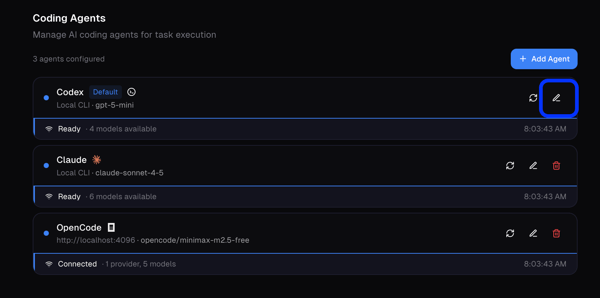
How to add coding agents in 20X Settings?
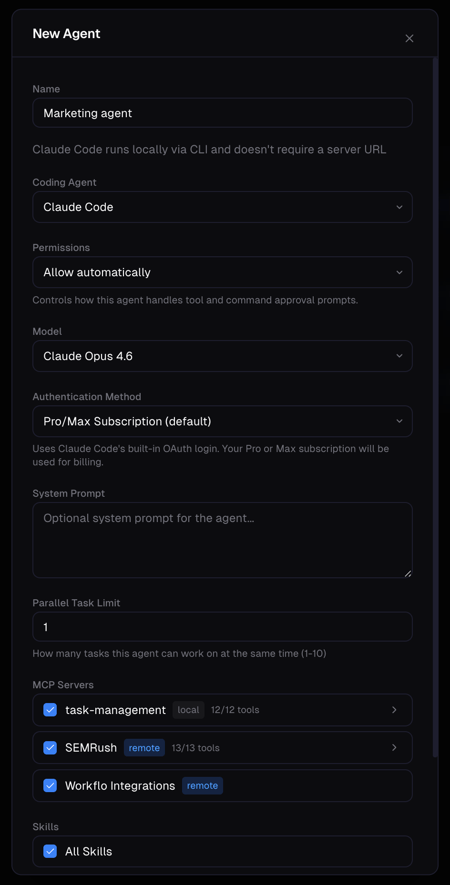
1. Go to Settings by clicking the "⚙️" icon. Next click on "Agents" and then "+ Add Agent"
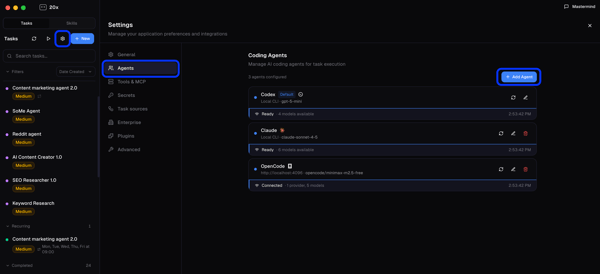
2. Select the agent, model, permissions status, MCP servers, skills and click on "Create."
To edit an existing agent, click on the pencil icon.
How to add MCP Servers?
1. Go to Settings by clicking the "⚙️" icon. Next click on "Tools & MCP" and then "+ Add Server."
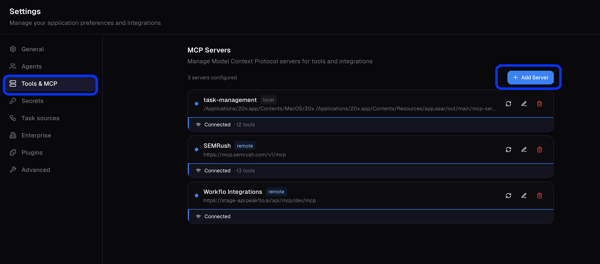
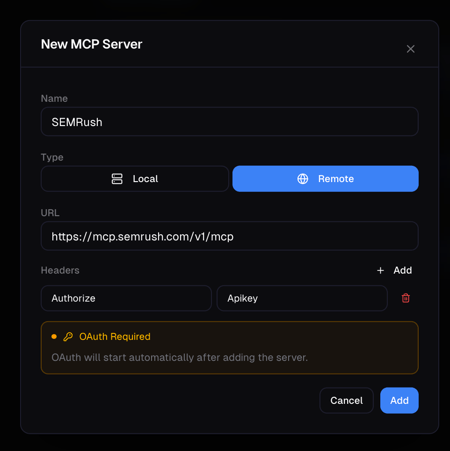
2. Enter the server details as follows:
-
Name – A clear, recognizable name for this MCP server
-
Type – Choose the appropriate server type depending on how the server is hosted and accessed such as Local or Remote.
-
URL – The full base URL or endpoint of the MCP server.
-
Headers – Any required authentication or custom headers (for example, API keys, bearer tokens). Enter them in key–value format, exactly as required by your MCP server configuration.
Then click on "Add." Once connected the status will indicate as "Connected."
Important Note:
Ensure that the server is correctly assigned to the relevant agent. This assignment is essential because the agent relies on the server connection to access tools, data, and MCP capabilities required to execute tasks consistently and without interruptions.
To learn how to complete this configuration step-by-step, refer to the video below.
How to create Tasks in Peakflo 20X?
1. Click on "New" from the side menu bar.
2. A pop-up window will appear. This screen is designed to help you define the task clearly so it can be executed accurately:
- Start by entering a task "Name". Choose a concise, descriptive name so that you and you can quickly understand the purpose of the task at a glance.
- In the "Description" field, explain what the task is about and what exactly needs to be executed by AI agent. A detailed description provides context, reduces ambiguity, and improves the quality of the outcome.
- Next, select the appropriate task Type and Priority. Task type helps categorize the work, while priority indicates how urgent or important the task is compared to others.
- If you have supporting documents, such as briefs, spreadsheets, or reference files, add them under "Attachments". Attachments give additional information that can guide the task execution.
- You can also define the type of "Output" you expect (for example, a report, summary, or list of actions). If this output is critical for your process, mark the output as "Required" so the task is not considered complete without it.
- Finally, if this task needs to run on a regular schedule, configure it as a "Recurring". You can set it to repeat on a daily, weekly, or monthly basis, which is useful for ongoing activities such as periodic reporting or routine checks.
- Lastly, click on "Save" to create the task.
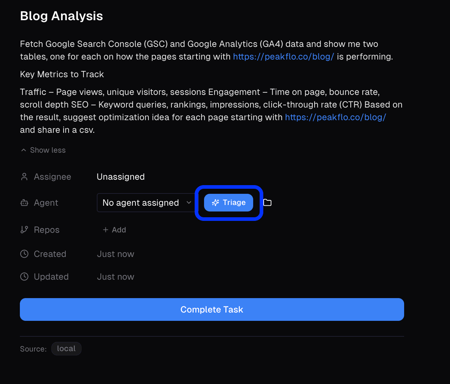
3. Next click on "Triage." This help in autonomously select the right agent, repositories, and skills to the task.
4. After agent, repositories, and skills are selected, click "Start" and the agents will start working on task execution.
5. Once the task is complete you will be able to review the details.
-
Files: Check the files create by clicking on the folder icon.
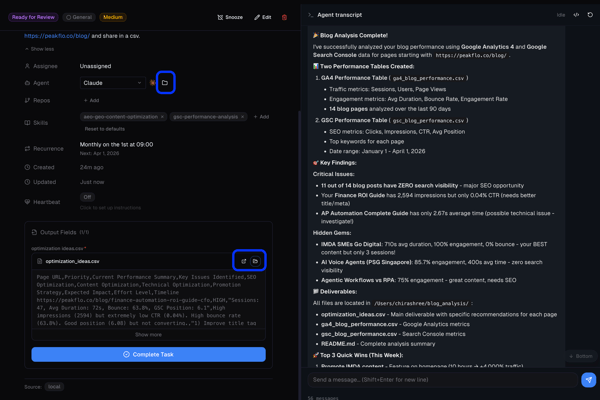
-
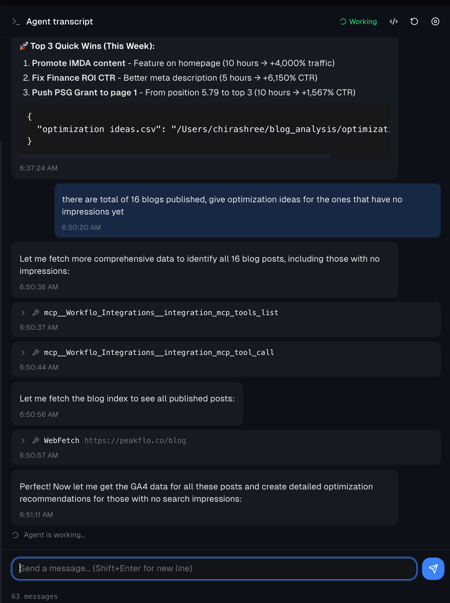
Summary: At the end of the agent trancript you can see the summary of the execution.
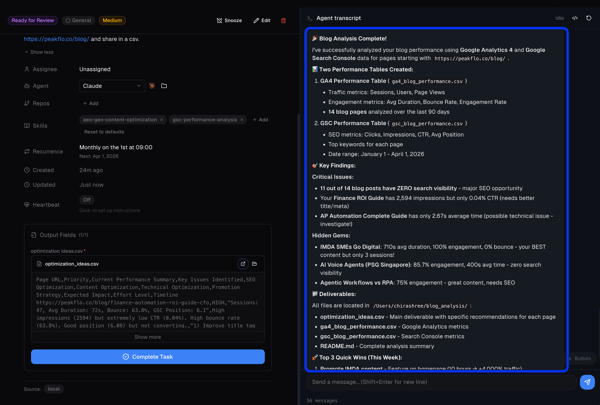
You can chat with the agent to give it further instructions or ask it to modify current results as per your review.
How to leave feedback after task completion?
1. After you have reviewed the task, click on "Complete Task."
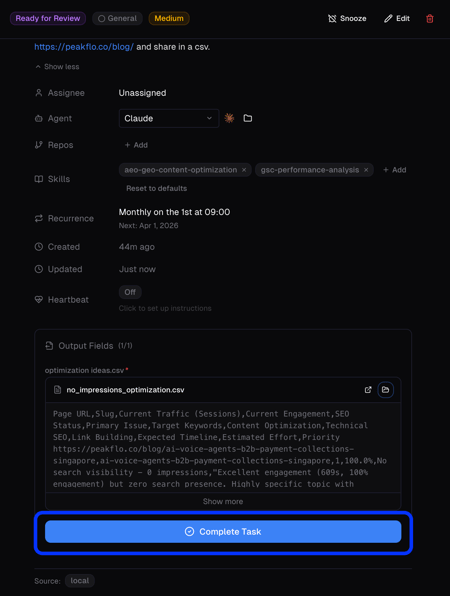
2. A pop-up will appear asking for your feedback. This step is important because it helps the agent improve over time based on real usage:
- You can rate the session to indicate your overall satisfaction with the result.
- In the feedback text box, describe in detail what worked well (for example, accurate data extraction, correct logic, or clear summaries) and what should be improved (such as missing steps, incorrect assumptions, or formatting issues).
The agent uses this feedback as a learning signal and creates and updates skills. Over time, it adjusts how it approaches similar tasks, refines its skills, and applies these improvements to future executions. By giving specific, actionable feedback, you directly contribute to more accurate, reliable outcomes in subsequent tasks.