Admins have all-encompassing access to using all accounts receivables functionality. Admins can edit invoices, manage reminder workflows, create customers, add credit notes, link payments to invoices, and view receivable reports among others.
Before you start, please make sure you've set up your account properly.
We will walk you through the various sections in the following sequence:
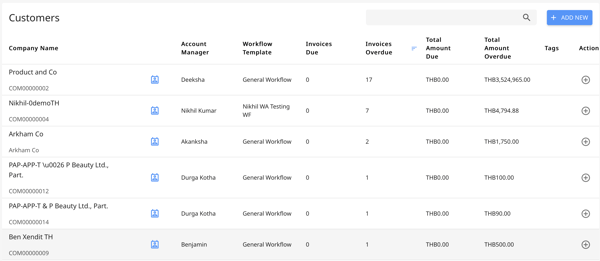
Customers
We have the Customers section in the Receivables module.
Customer details have a 2-way sync between Peakflo and your accounting system. All customers created in your accounting system will be present in your Peakflo account and vice versa. The synchronization happens every 5 minutes.
Customers can also be mass uploaded into Peakflo. Read how to mass upload customer data to understand the process.
Customers can also be added from the Peakflo UI. The following tutorials will guide you:
Invoices
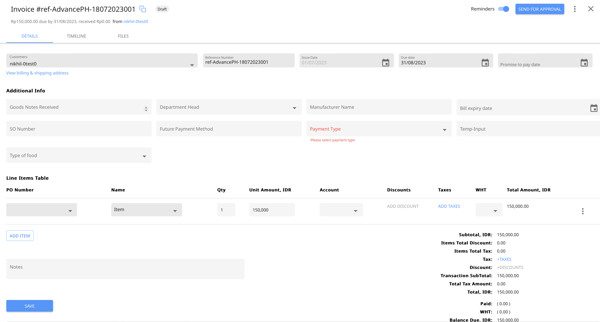
By creating invoices in Peakflo, you can send payment reminders to customers and get paid faster. Peakflo allows you to input invoices in 3 ways-
- Can manually create an invoice with professional branding (if the accounting system is not integrated)
- Can mass upload invoices by using excel docs in 1 go!
- Can directly sync from your accounting system. If integrated with Peakflo, no need to concern yourself with uploading invoices. Automatic 2-way sync to Peakflo from your accounting software will happen within minutes! Read more about this on our Integrations page.
Workflows
This is the meat and potatoes of the platform (unless you're a vegetarian, then this is the eggplant). Workflows are how Peakflo helps you manage your outstanding invoices and communicate with relevant stakeholders.
Would like to create a workflow? Read How do I create, edit or remove a workflow?
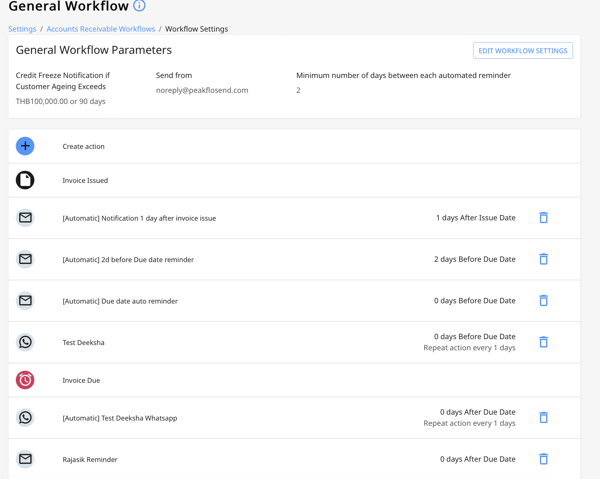
Before we get into the mechanics, let's understand some components of a workflow to make this process easier:
- Actions and action types: Actions can be added to workflows to improve the collection cycles of customers.
You can either send a reminder that a payment is due or notify someone in your company about an urgent need. Actions govern what happens to whom and how quickly. Actions can be manual or automated.
Learn more about:
- Triggers: The criteria for initiating the desired action. Currently, you can set triggers based on the issue date, due date, or monthly.
- Owners: The person from the finance team & Peakflo user who takes ownership of the action tagged to them.
- Recipients: The people who receive the message - email or WhatsApp message you're creating the action for. Aside from reminders, it can also be actions such as legal escalation.
More on the GIF below on how to create a workflow and add actions:
-
How do I pause or resume workflows for multiple customers at the same time?
-
How to subscribe to LINE Messenger App payment reminders? (available in THAI only, contact us at ops@peakflo.co to enable this in your region)
-
How to setup Whatsapp for business on Peakflo? (available in MALAY, INDONESIA, PHILIPPINES, and SINGAPORE, contact us at ops@peakflo.co to enable this in your region)
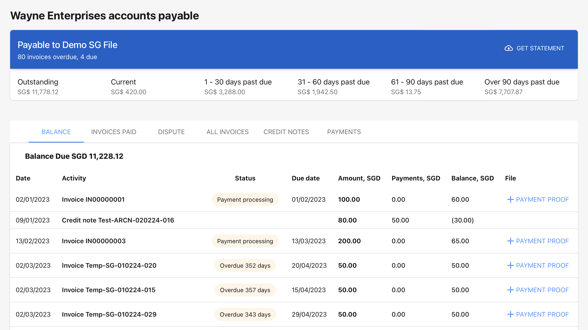
Customer Portal
The customer portal is the one-stop-shop for customers to:
-
View your credit notes
-
View outstanding balances and their aging
Payments
Payments are either added automatically or manually in Peakflo:
- Automatically, if the payment is made by the customer through the customer portal. Payment entry will automatically be added to the Payments tab.
- Manually, if the payment is made by the customer outside of Peakflo. Learn more how to add payments in Peakflo.
You can also export payments and import the file. You don't even have to reformat the sheet as we've formatted it so you can import the file straight to your accounting software!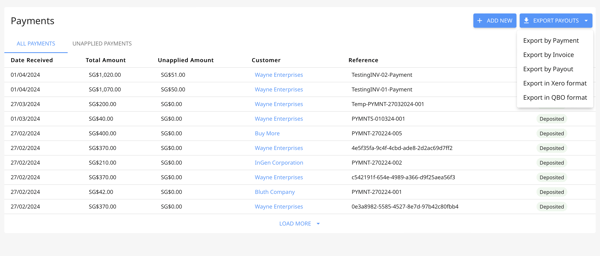
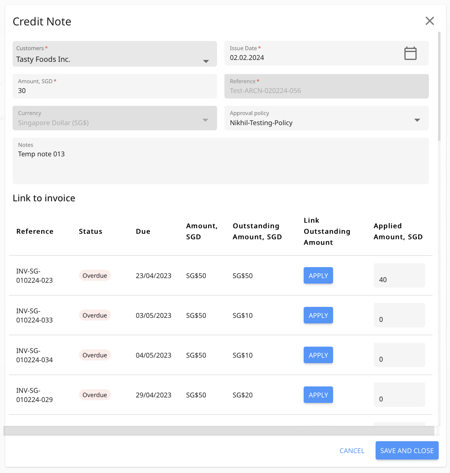
Credit Notes
With Peakflo, you can add a credit note and link it to an invoice. This way, document any changes to the invoice and have more control over who creates and approves the credit note!
Learn more how to create credit notes.
Reports & Dashboard
Keeping track of the reports will give you more insights into your collection performance and make strategic decisions for improvements. Currently, you get the following reports & dashboard:
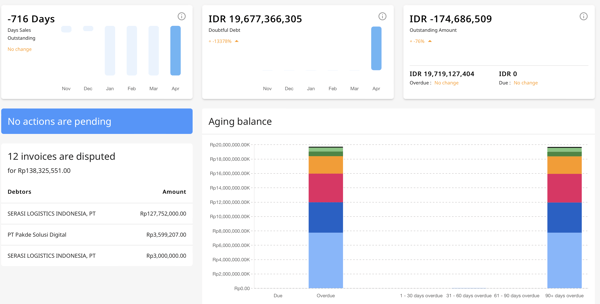
- DSO report: The average number of days your firm takes to collect money against invoices from customers after an invoice is raised. You can check your DSO health in your Dashboard, where you will see the numbers for the last 6 months and our goal is to reduce the metrics.
- Aging Balance report: The total that is aging in real-time. This is also visible in the Dashboard, for a more detailed report you can go to the Reports section.
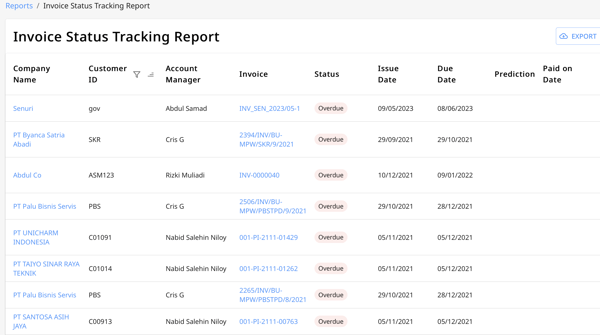
- Invoice Status Tracking Report: The report where you can check the important details of your invoices in a listed view. Read more about how to track invoice status.
- Customer Status Tracking report: The report where you can track the following for every customer:
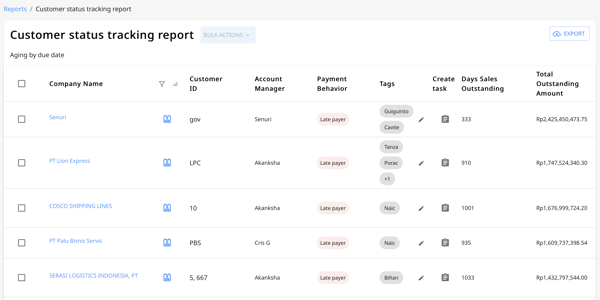
- Payment behavior: Track how timely or late a customer makes payments. There are 3 classifications:
- Early payer (pays before due date)
- Timely payer (pays on due date)
- Late payer (pays after due date)
- Customer-level DSO: Overall DSO is never good enough. Every customer has their own DSO and we provide this information to optimize your workflows for every customer’s DSO.
- Promise-to-pay amount: Say your customer has defaulted on their due date & they cannot pay the entire amount. You can check with them how much of the due amount they can pay and set this in the promise-to-pay amount.

- Payment behavior: Track how timely or late a customer makes payments. There are 3 classifications:
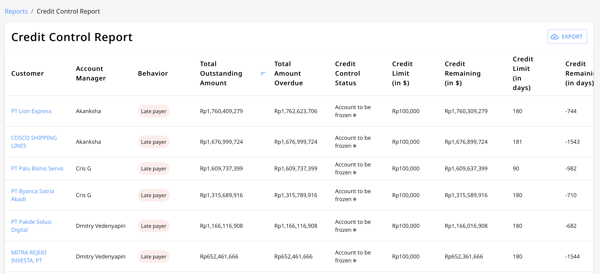
- Credit Control report:
Understand what a credit limit is & how to set it in Peakflo. Now use this report to track the credit given, remaining, and status in this report!
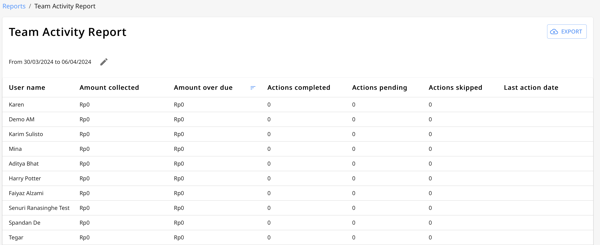
- Team Activity Report:
The purpose of this report is to track:
- The collections made by your team’s Peakflo users can be tracked here for the period you configure (as shown in the screenshot)
- You can monitor action numbers for collections. You can track:
- Action completed
- Action pending
- Action skipped
- The last action date for the selected period.
-
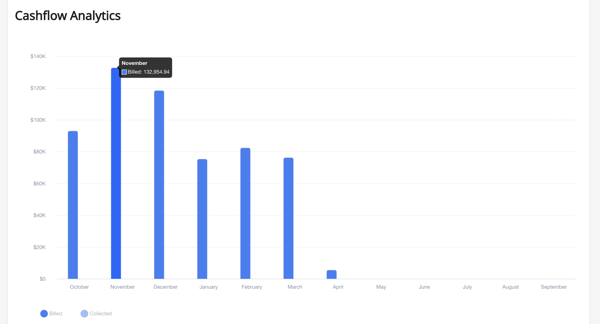
Cash flow analytics:
There are two reports here:- Cash flow analytics: The predicted collection for the coming months for all outstanding invoices.
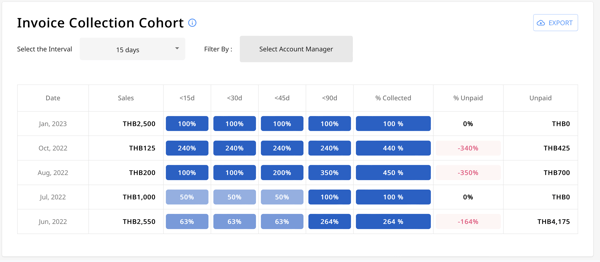
- Invoice collection cohort: This report is to help you gauge collection efficiency company-wide.
- Cash flow analytics: The predicted collection for the coming months for all outstanding invoices.
-
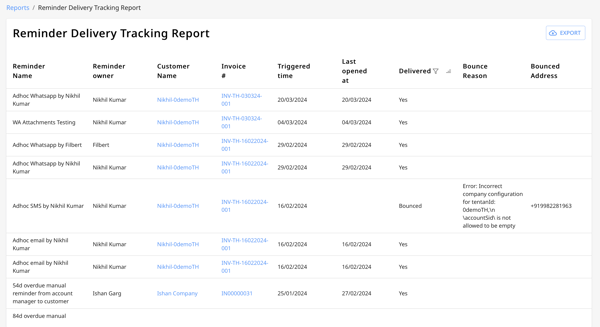
Reminder delivery tracking report: As the name suggests, this report helps you track the delivery of your payment reminders.